TBA: 3D Printer Tent Build
The 3D printer tent will be used to keep debris from getting on the print bed and other components. This is essential if you place the Creality Ender 3 V3 SE on the shelf of the Workbench.
1. Let’s Look at the Material Requirements
| Item | Price | Quantity | Total | Location |
|---|---|---|---|---|
| Elegoo PLA Filament 1kg | $13.99 | 1 | $13.99 | https://www.amazon.com/dp/B0BM739JRF/ |
| 24″x24″x1mm Acrylic Sheet (Qty 5) | $32.99 | 1 | $32.99 | https://www.amazon.com/dp/B0BQMGSVY1 |
| #8-32 1/2″ Long Machine Screws (Qty 100) | $6.04 | 1 | $6.04 | https://www.amazon.com/dp/B000BQWVR8 |
| #8-32 Hex Nuts (Qty 100) | $4.02 | 1 | $4.02 | https://www.amazon.com/dp/B000BQMMFY |
| Down Angle 6ft Power Cable | $9.99 | 1 | $9.99 | https://www.amazon.com/dp/B0C8FL33M8 |
| Grand Total | $67.03 | |||
2. Drilling the Holes in the Acrylic Sheet
I have created a 3D printed drill hole template to precisely place the drill holes in the acrylic. You slip the acrylic into the gap in the drill template at each corner of the acrylic.
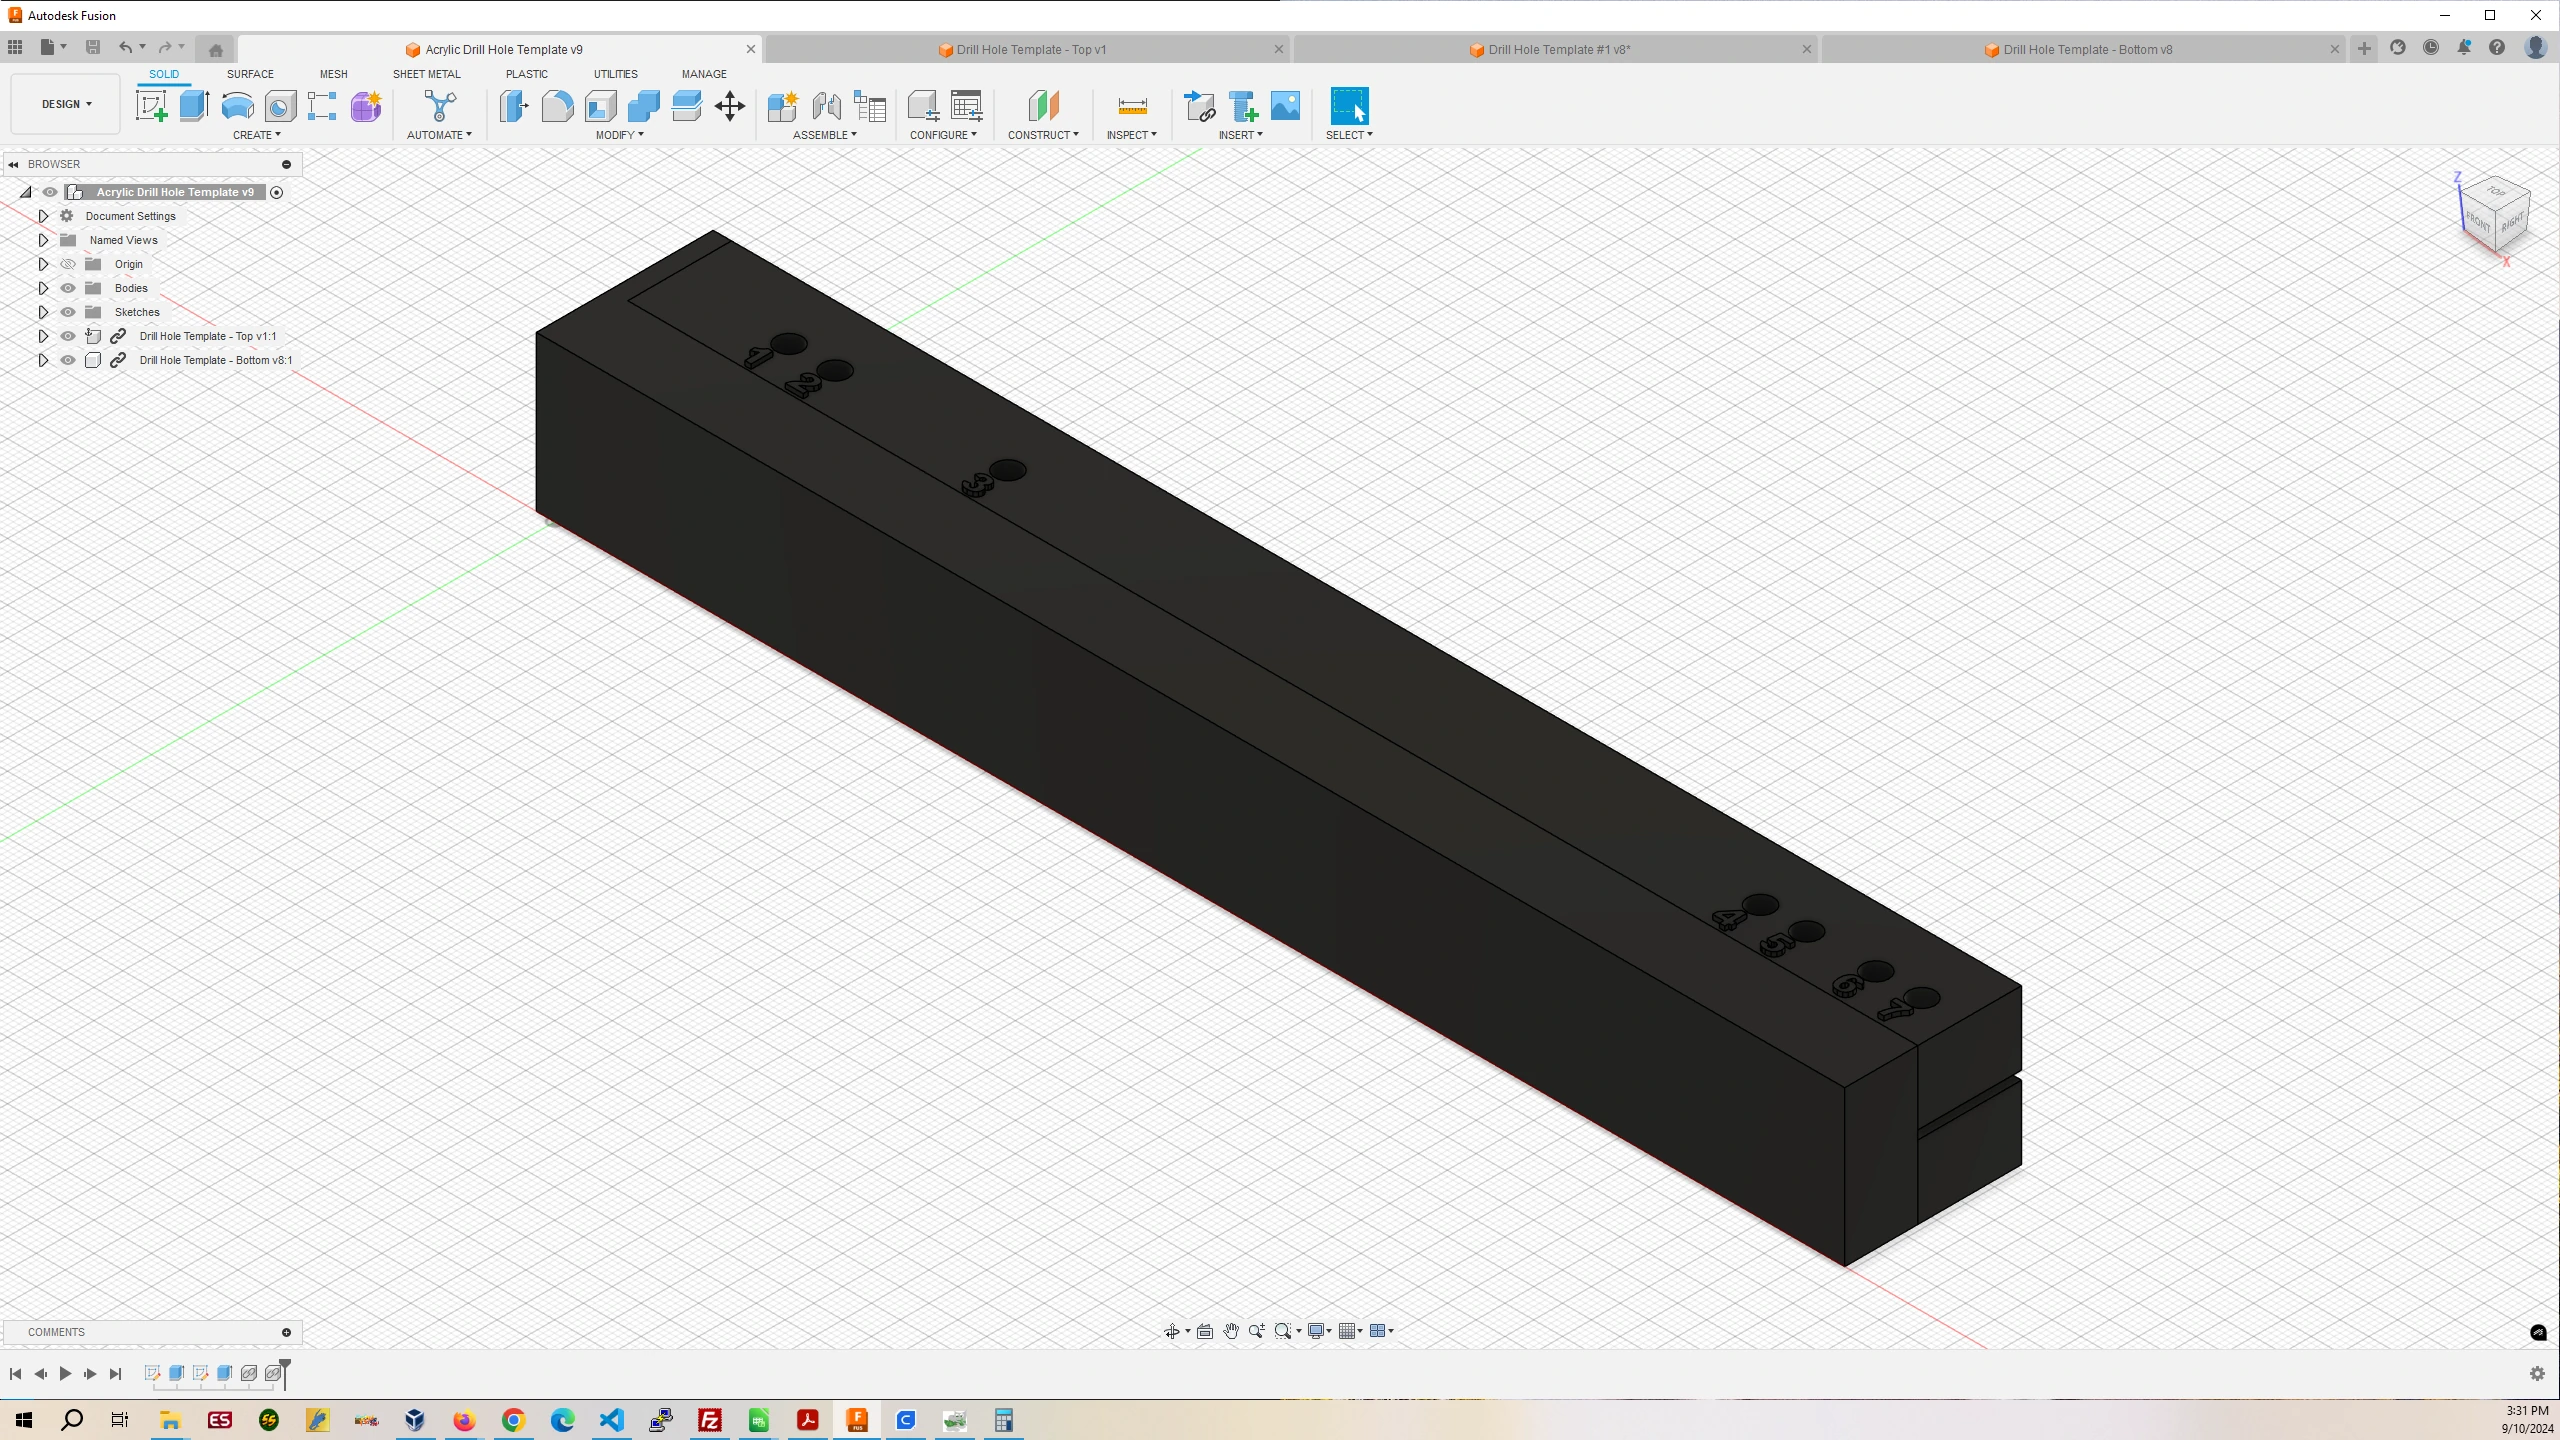
- Left – Use Holes – 1, 5, and 6 for all corners of the left side acrylic sheet.
- Right – Use Holes – 1, 5, and 6 for all corners of the right side acrylic sheet.
- Back – Use Holes – 2, 4, and 7 for all corners of the back acrylic except the Back Bottom Piece.
- Back Bottom – Use Hole – 3.
- Top Left/Right – Use Holes – 2, 4, and 7.
- Top Back – Use Holes 1, 5, and 6.
- Front – Use Holes – 1, 2, 4, 5, 6, and 7.
3. Let’s Look at the Printed Frame Parts
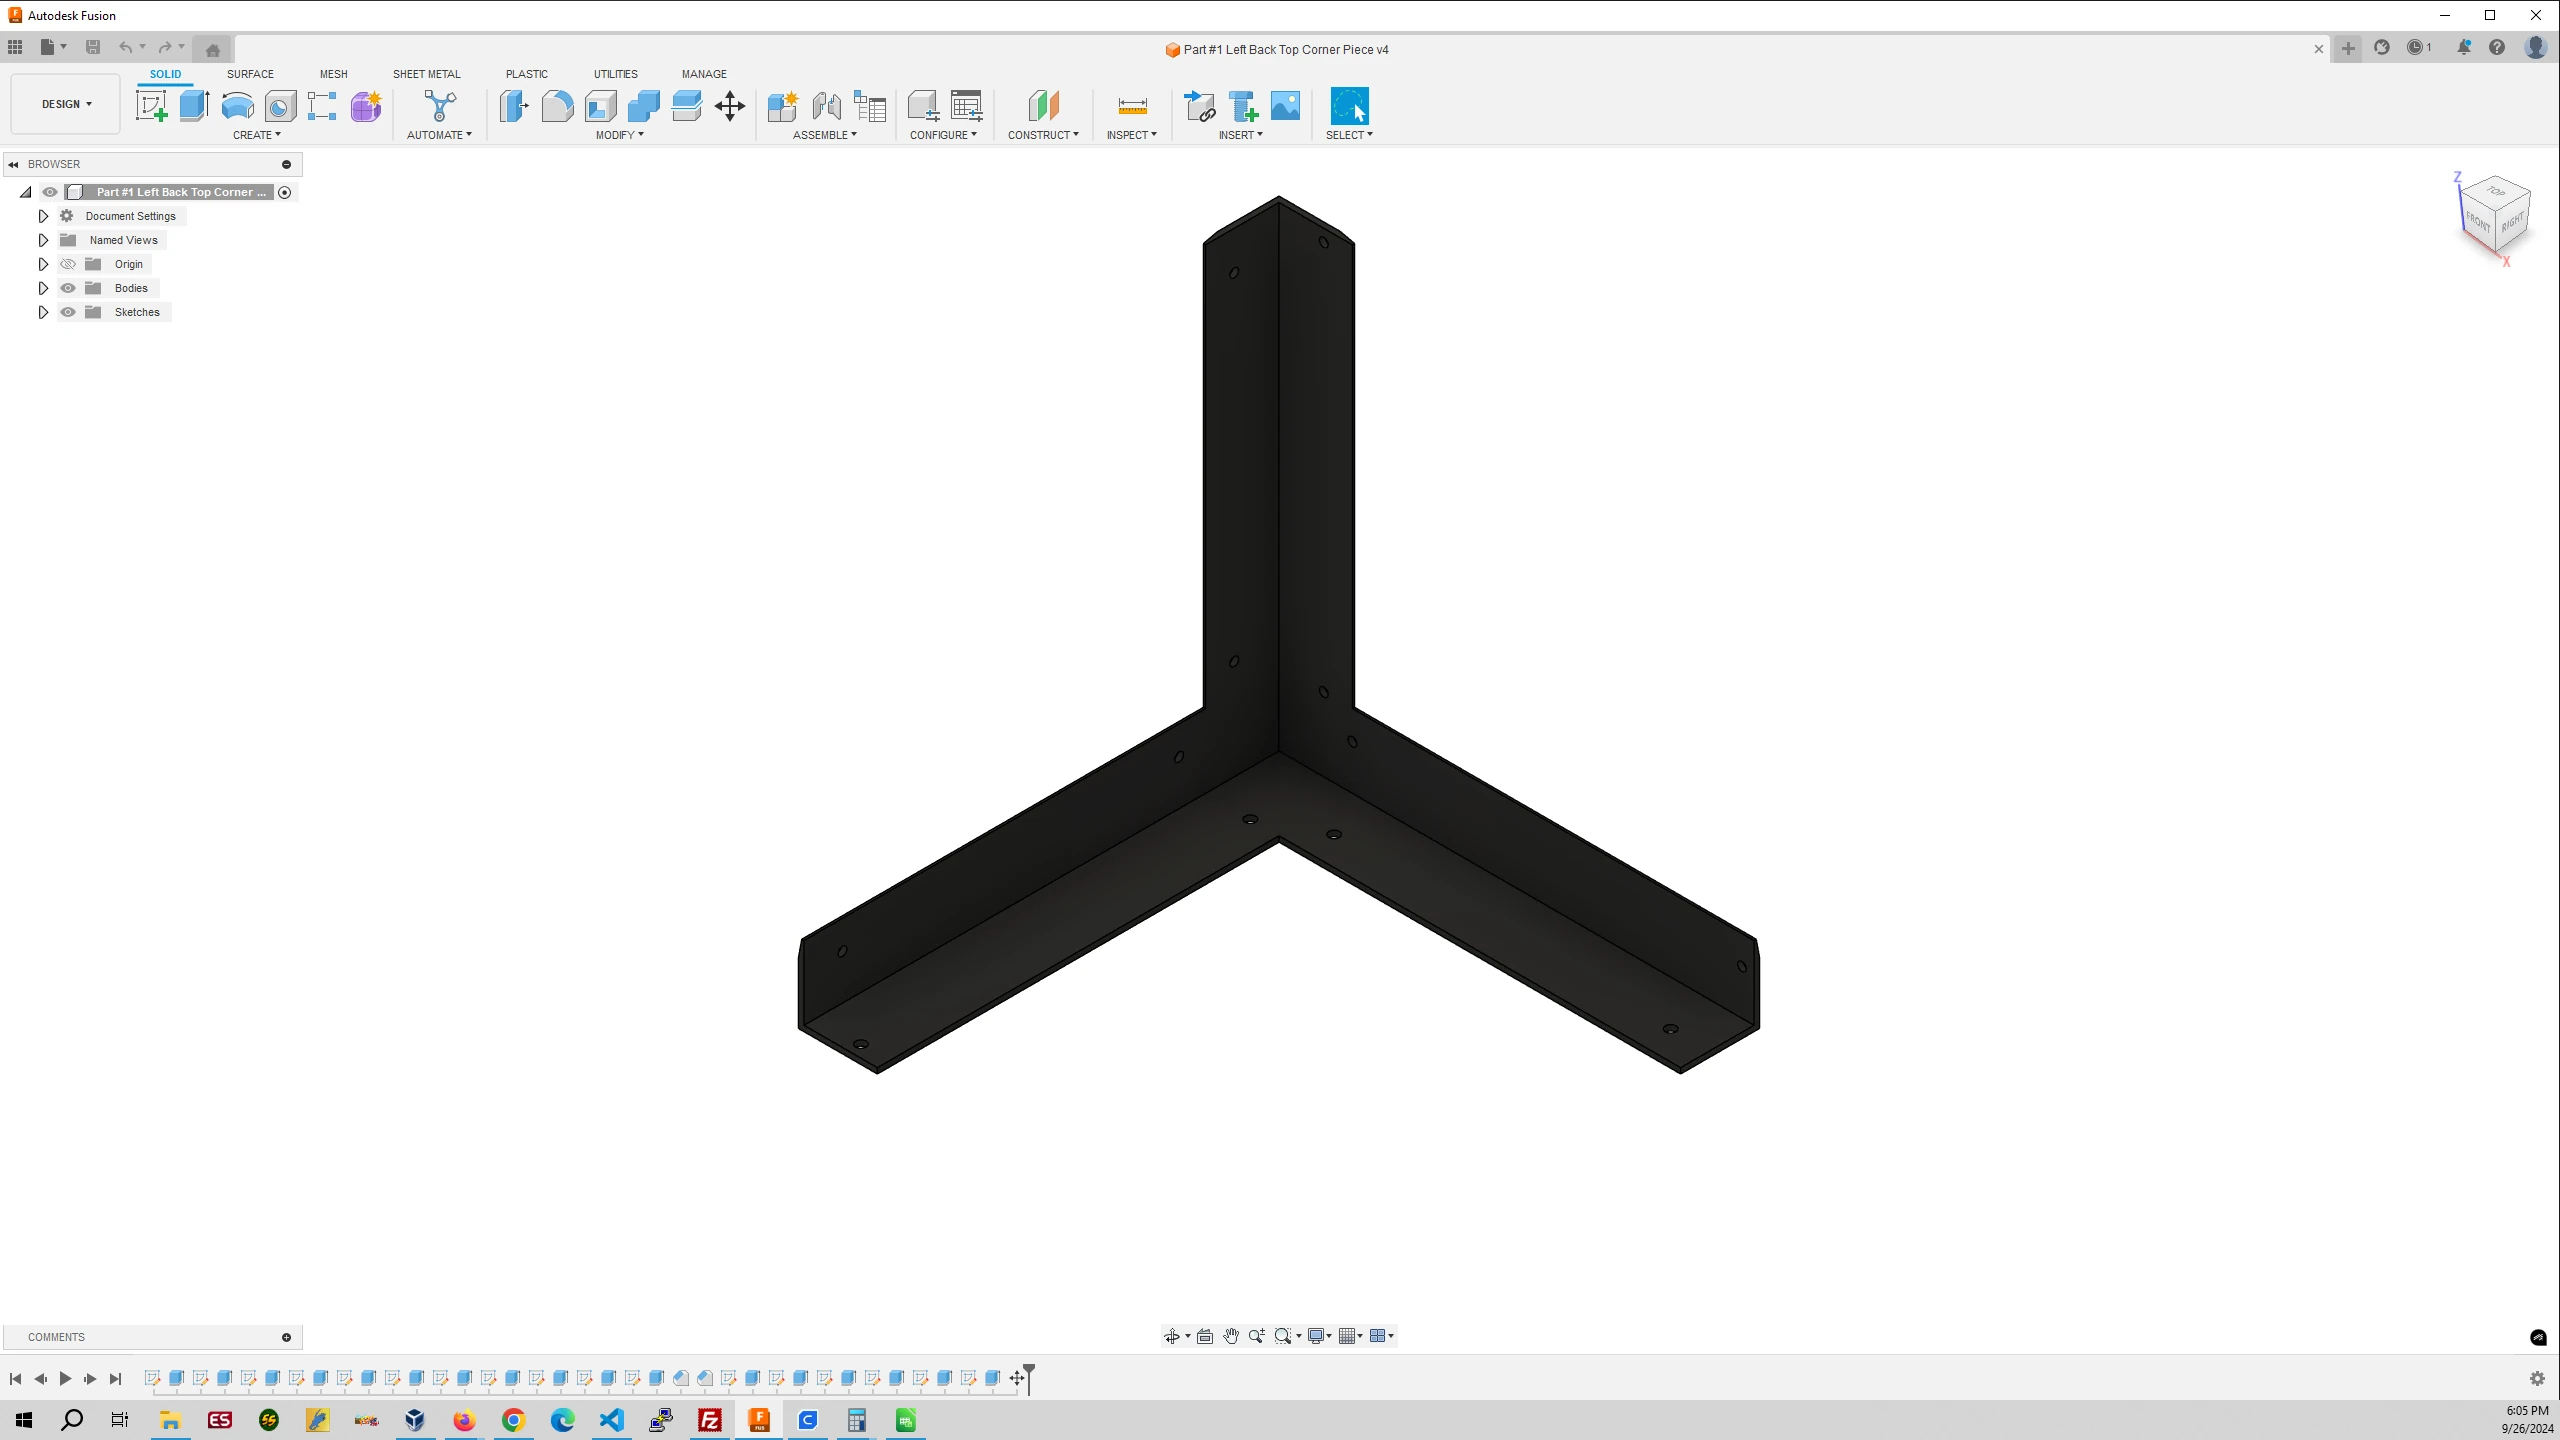
Part #1 Left Back Top Corner Piece
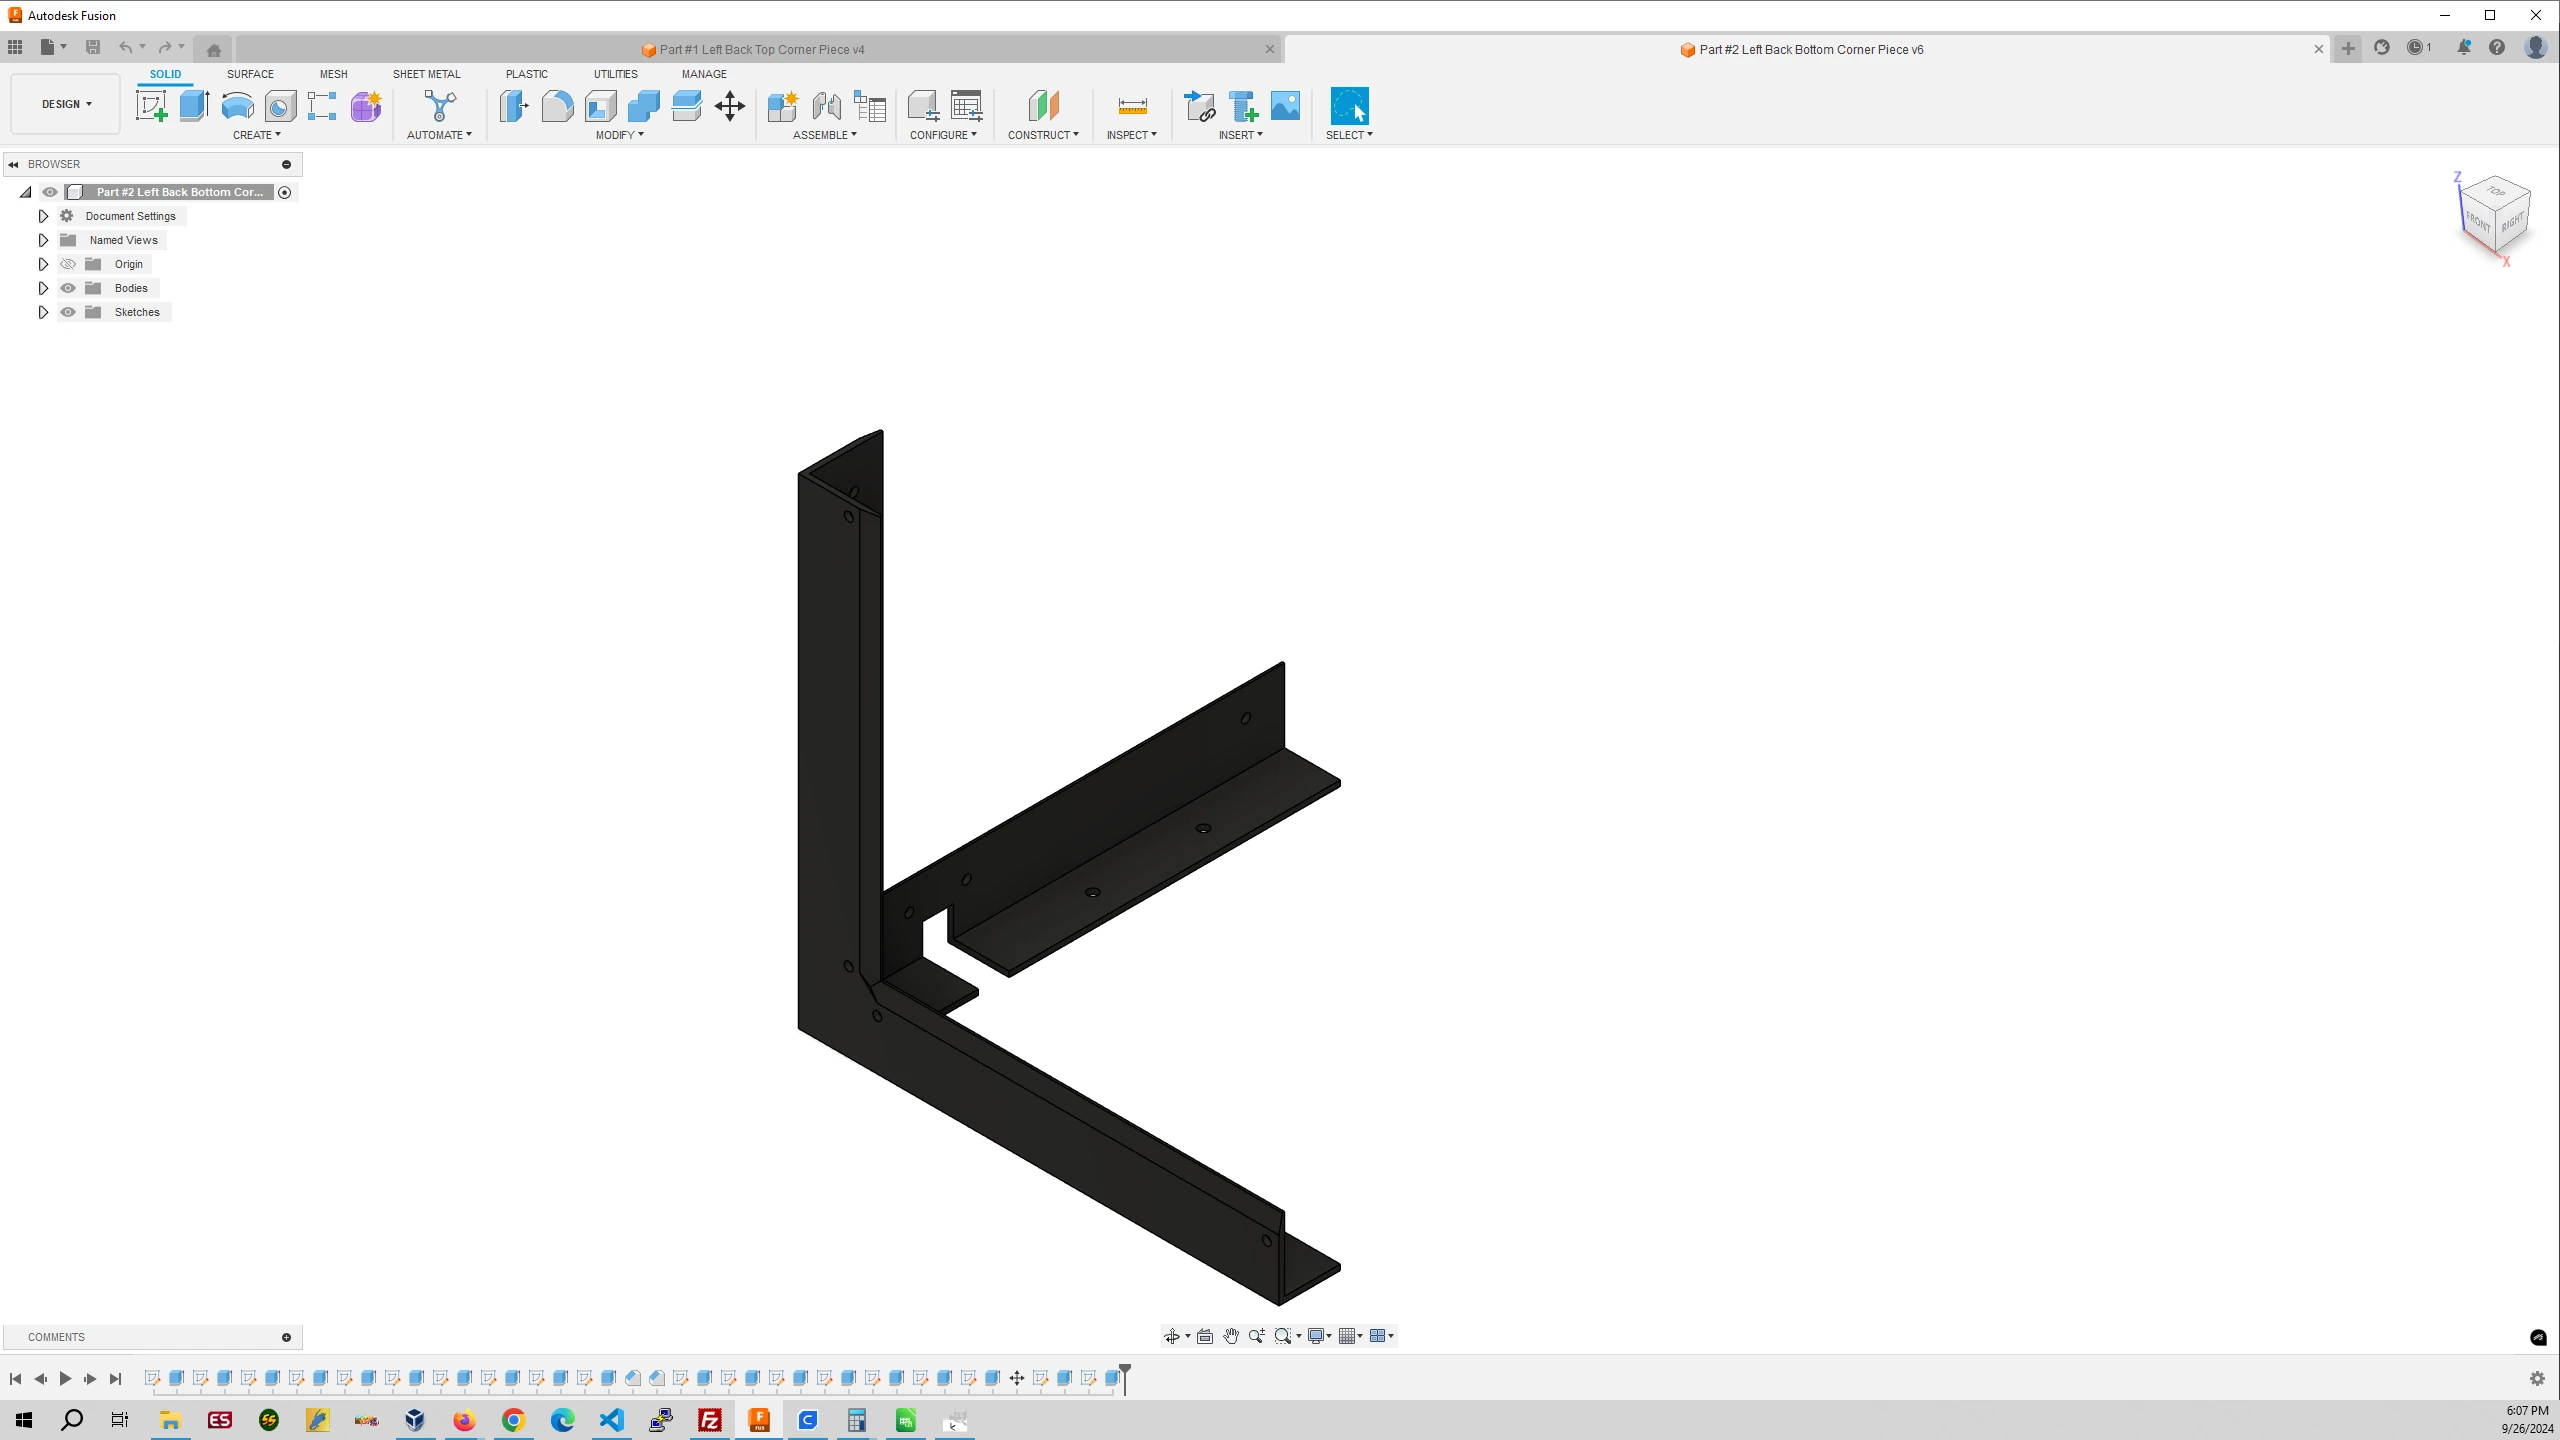
Part #2 Left Back Bottom Corner Piece
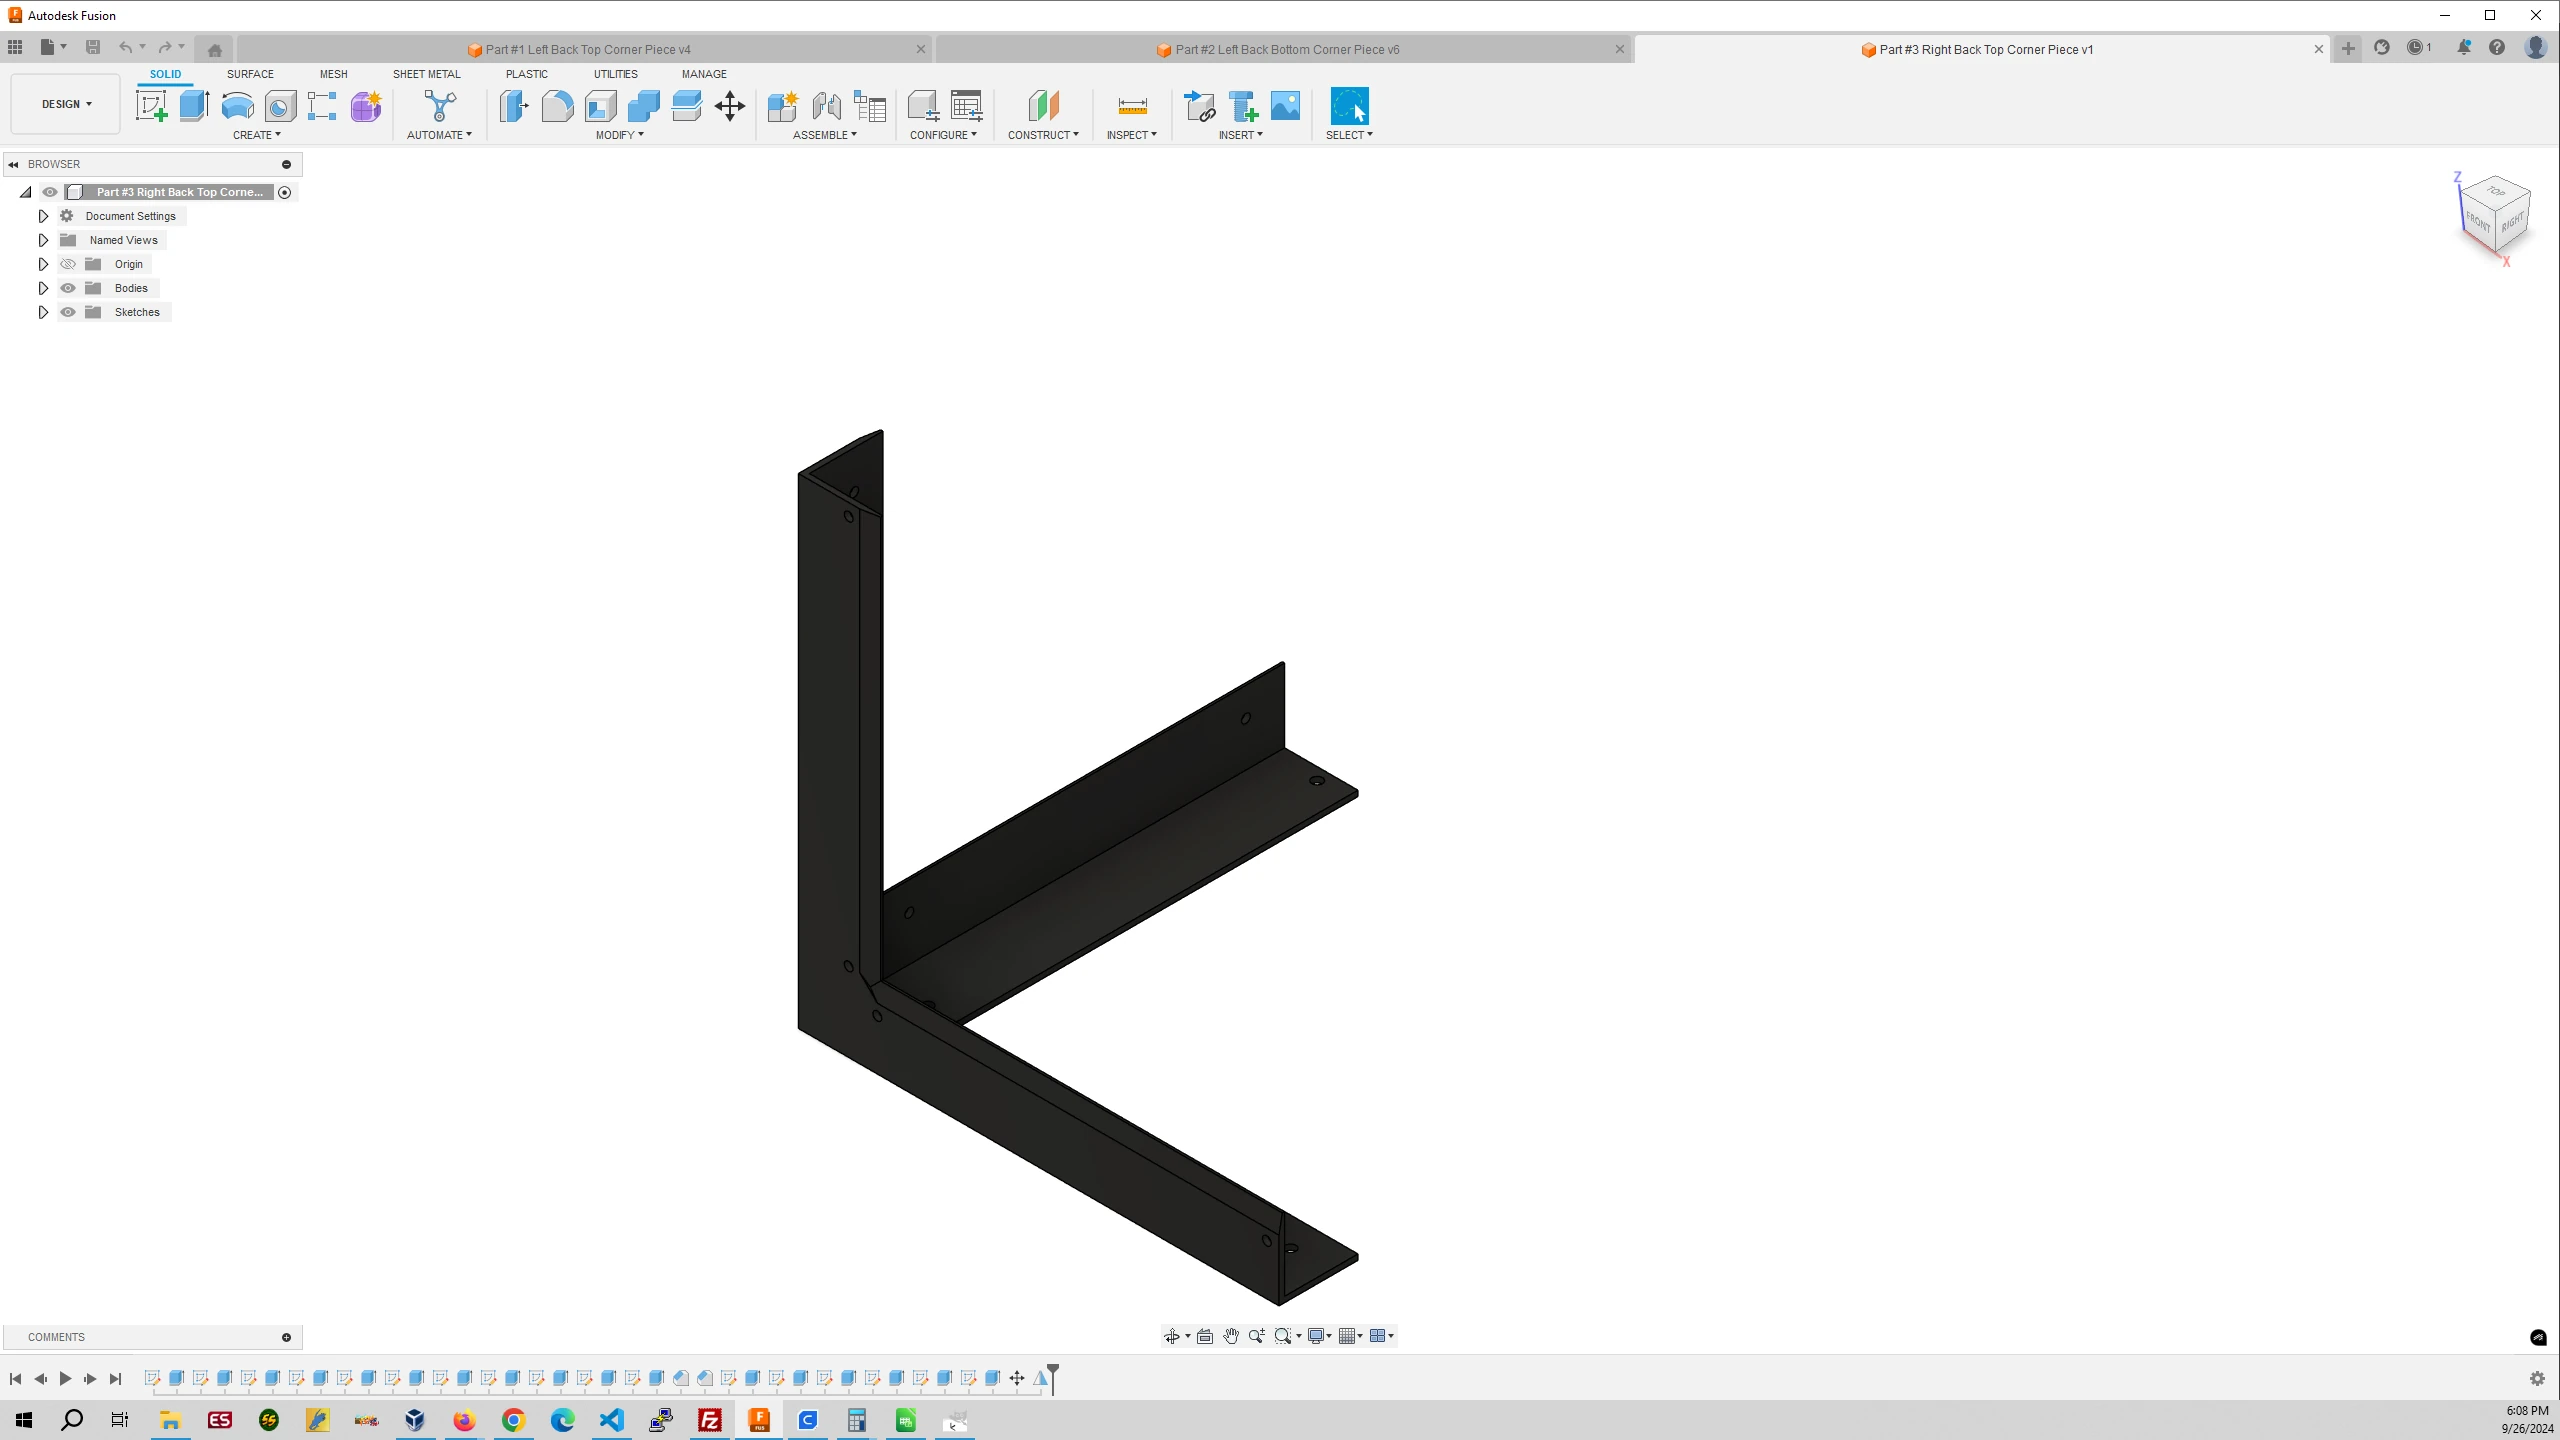
Part #3 Right Back Top Corner Piece
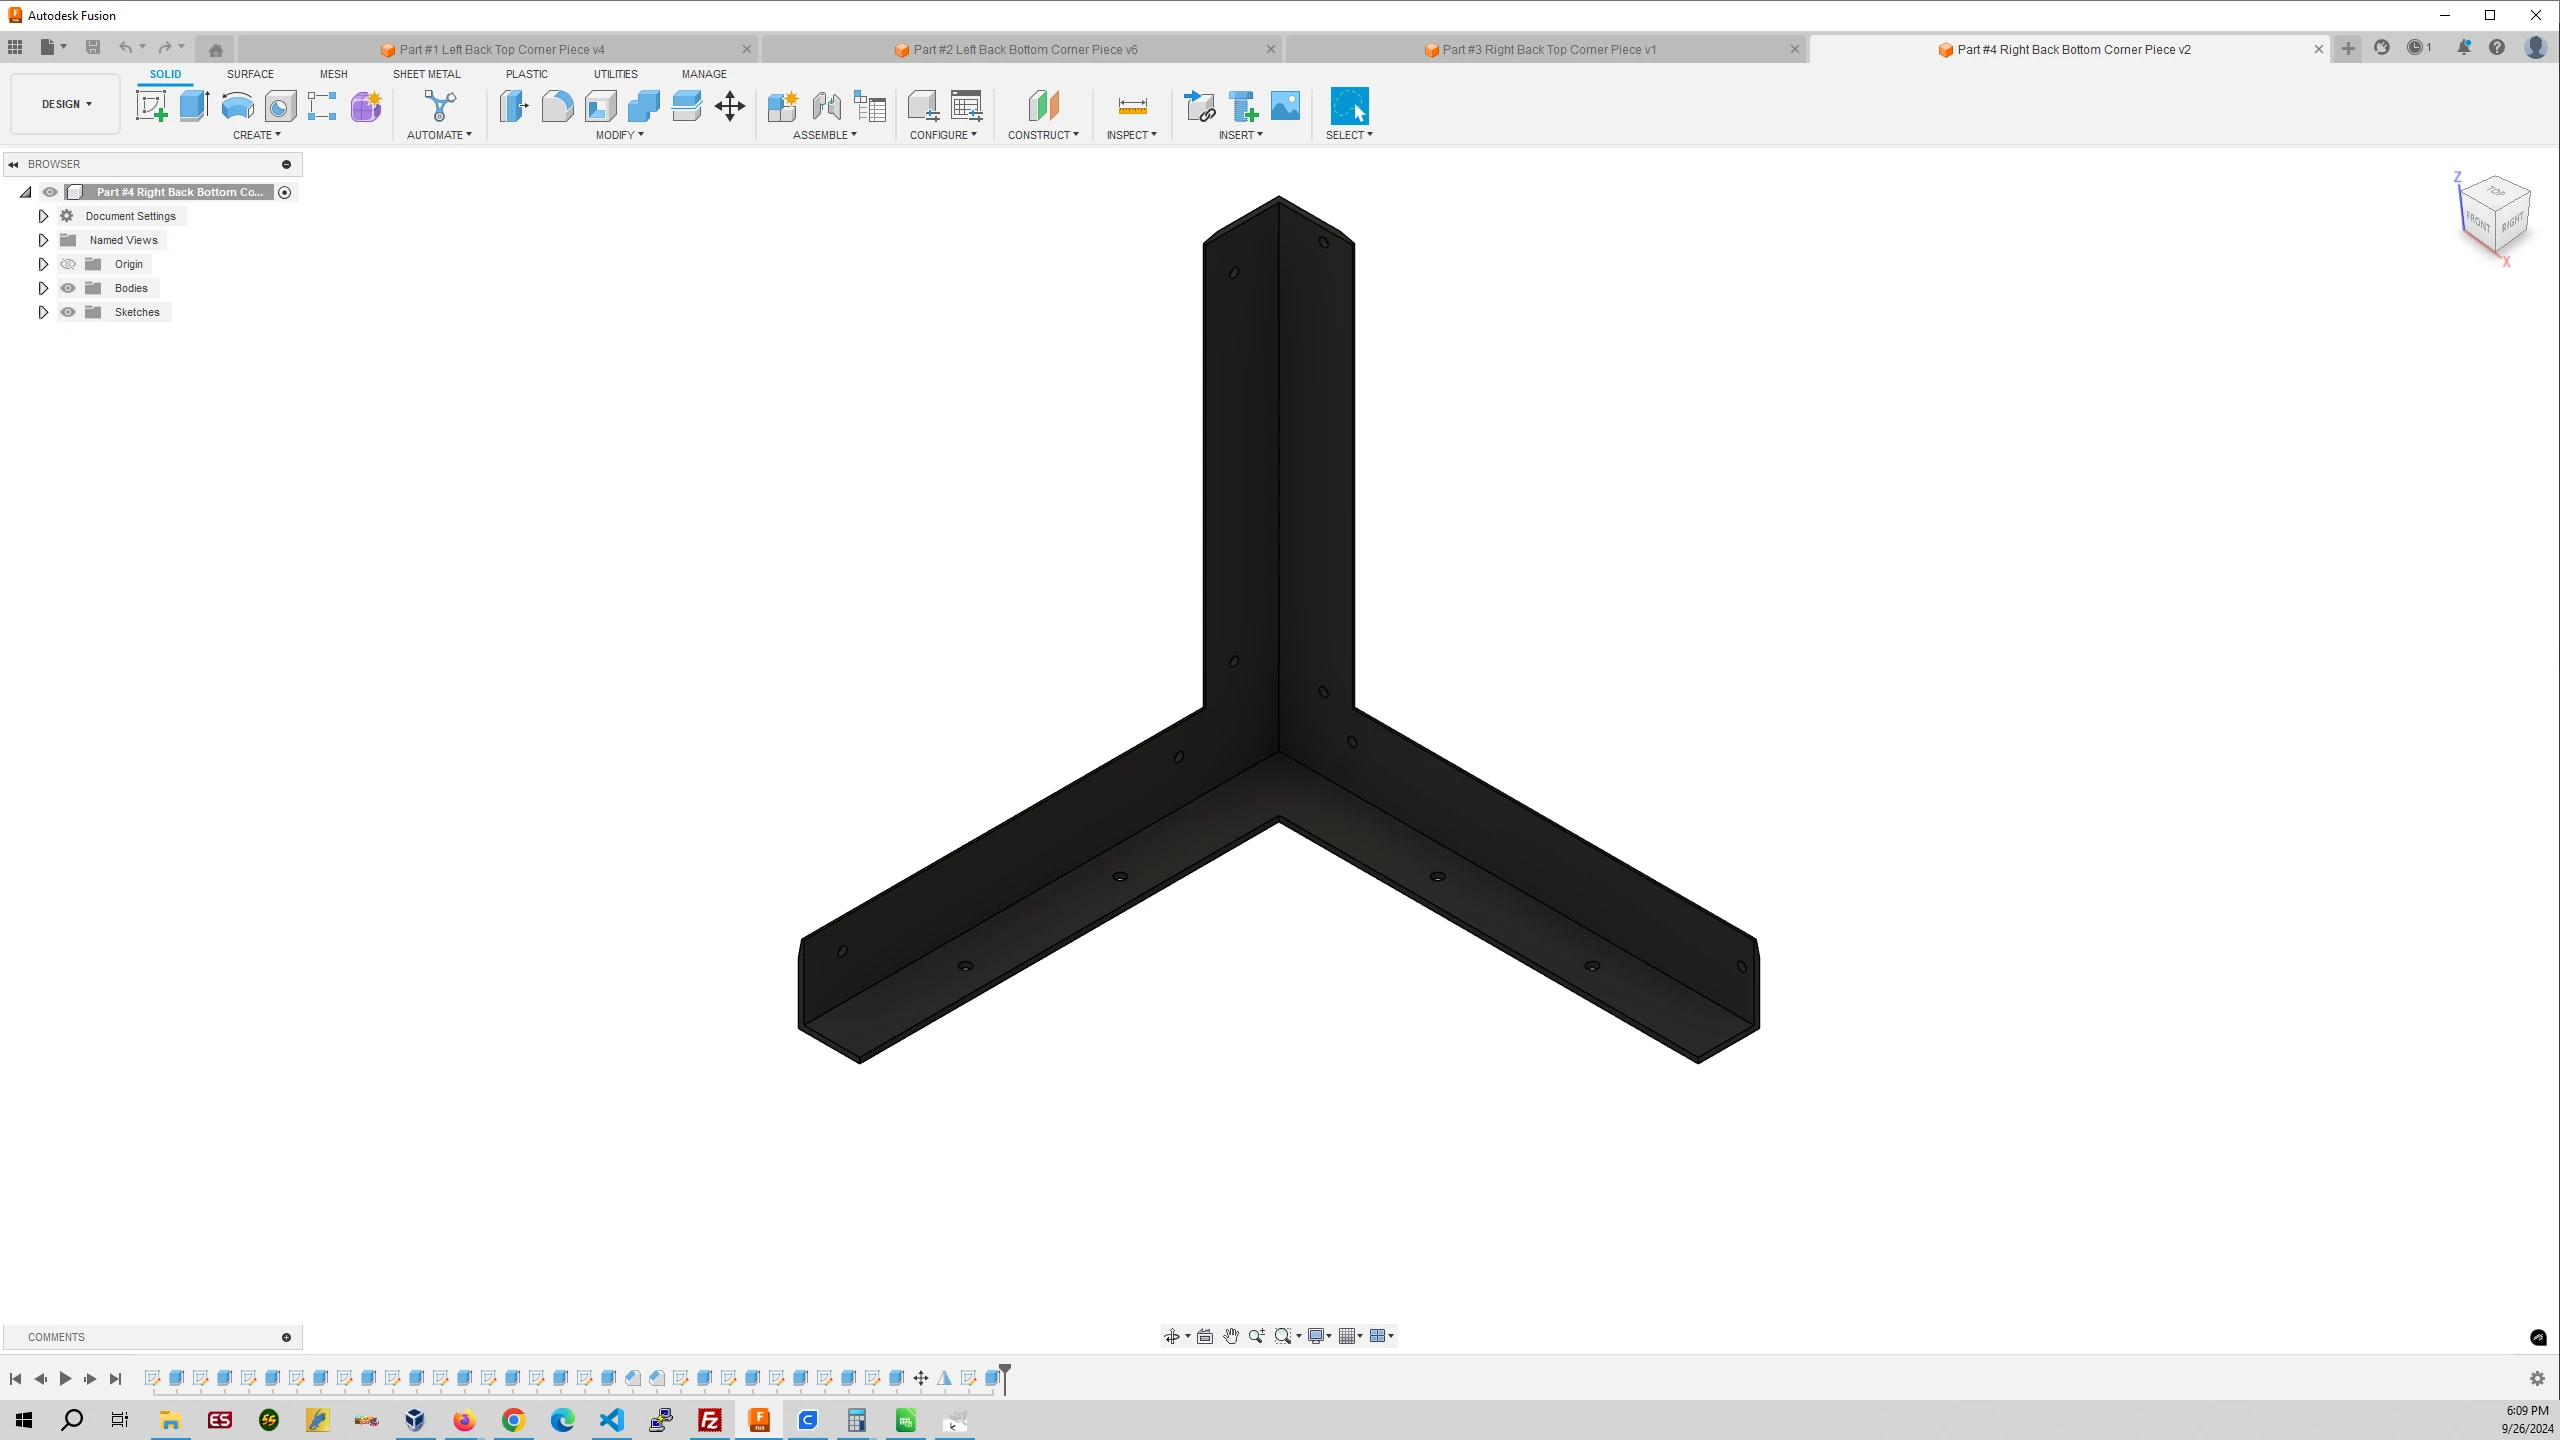
Part #4 Right Back Bottom Corner Piece
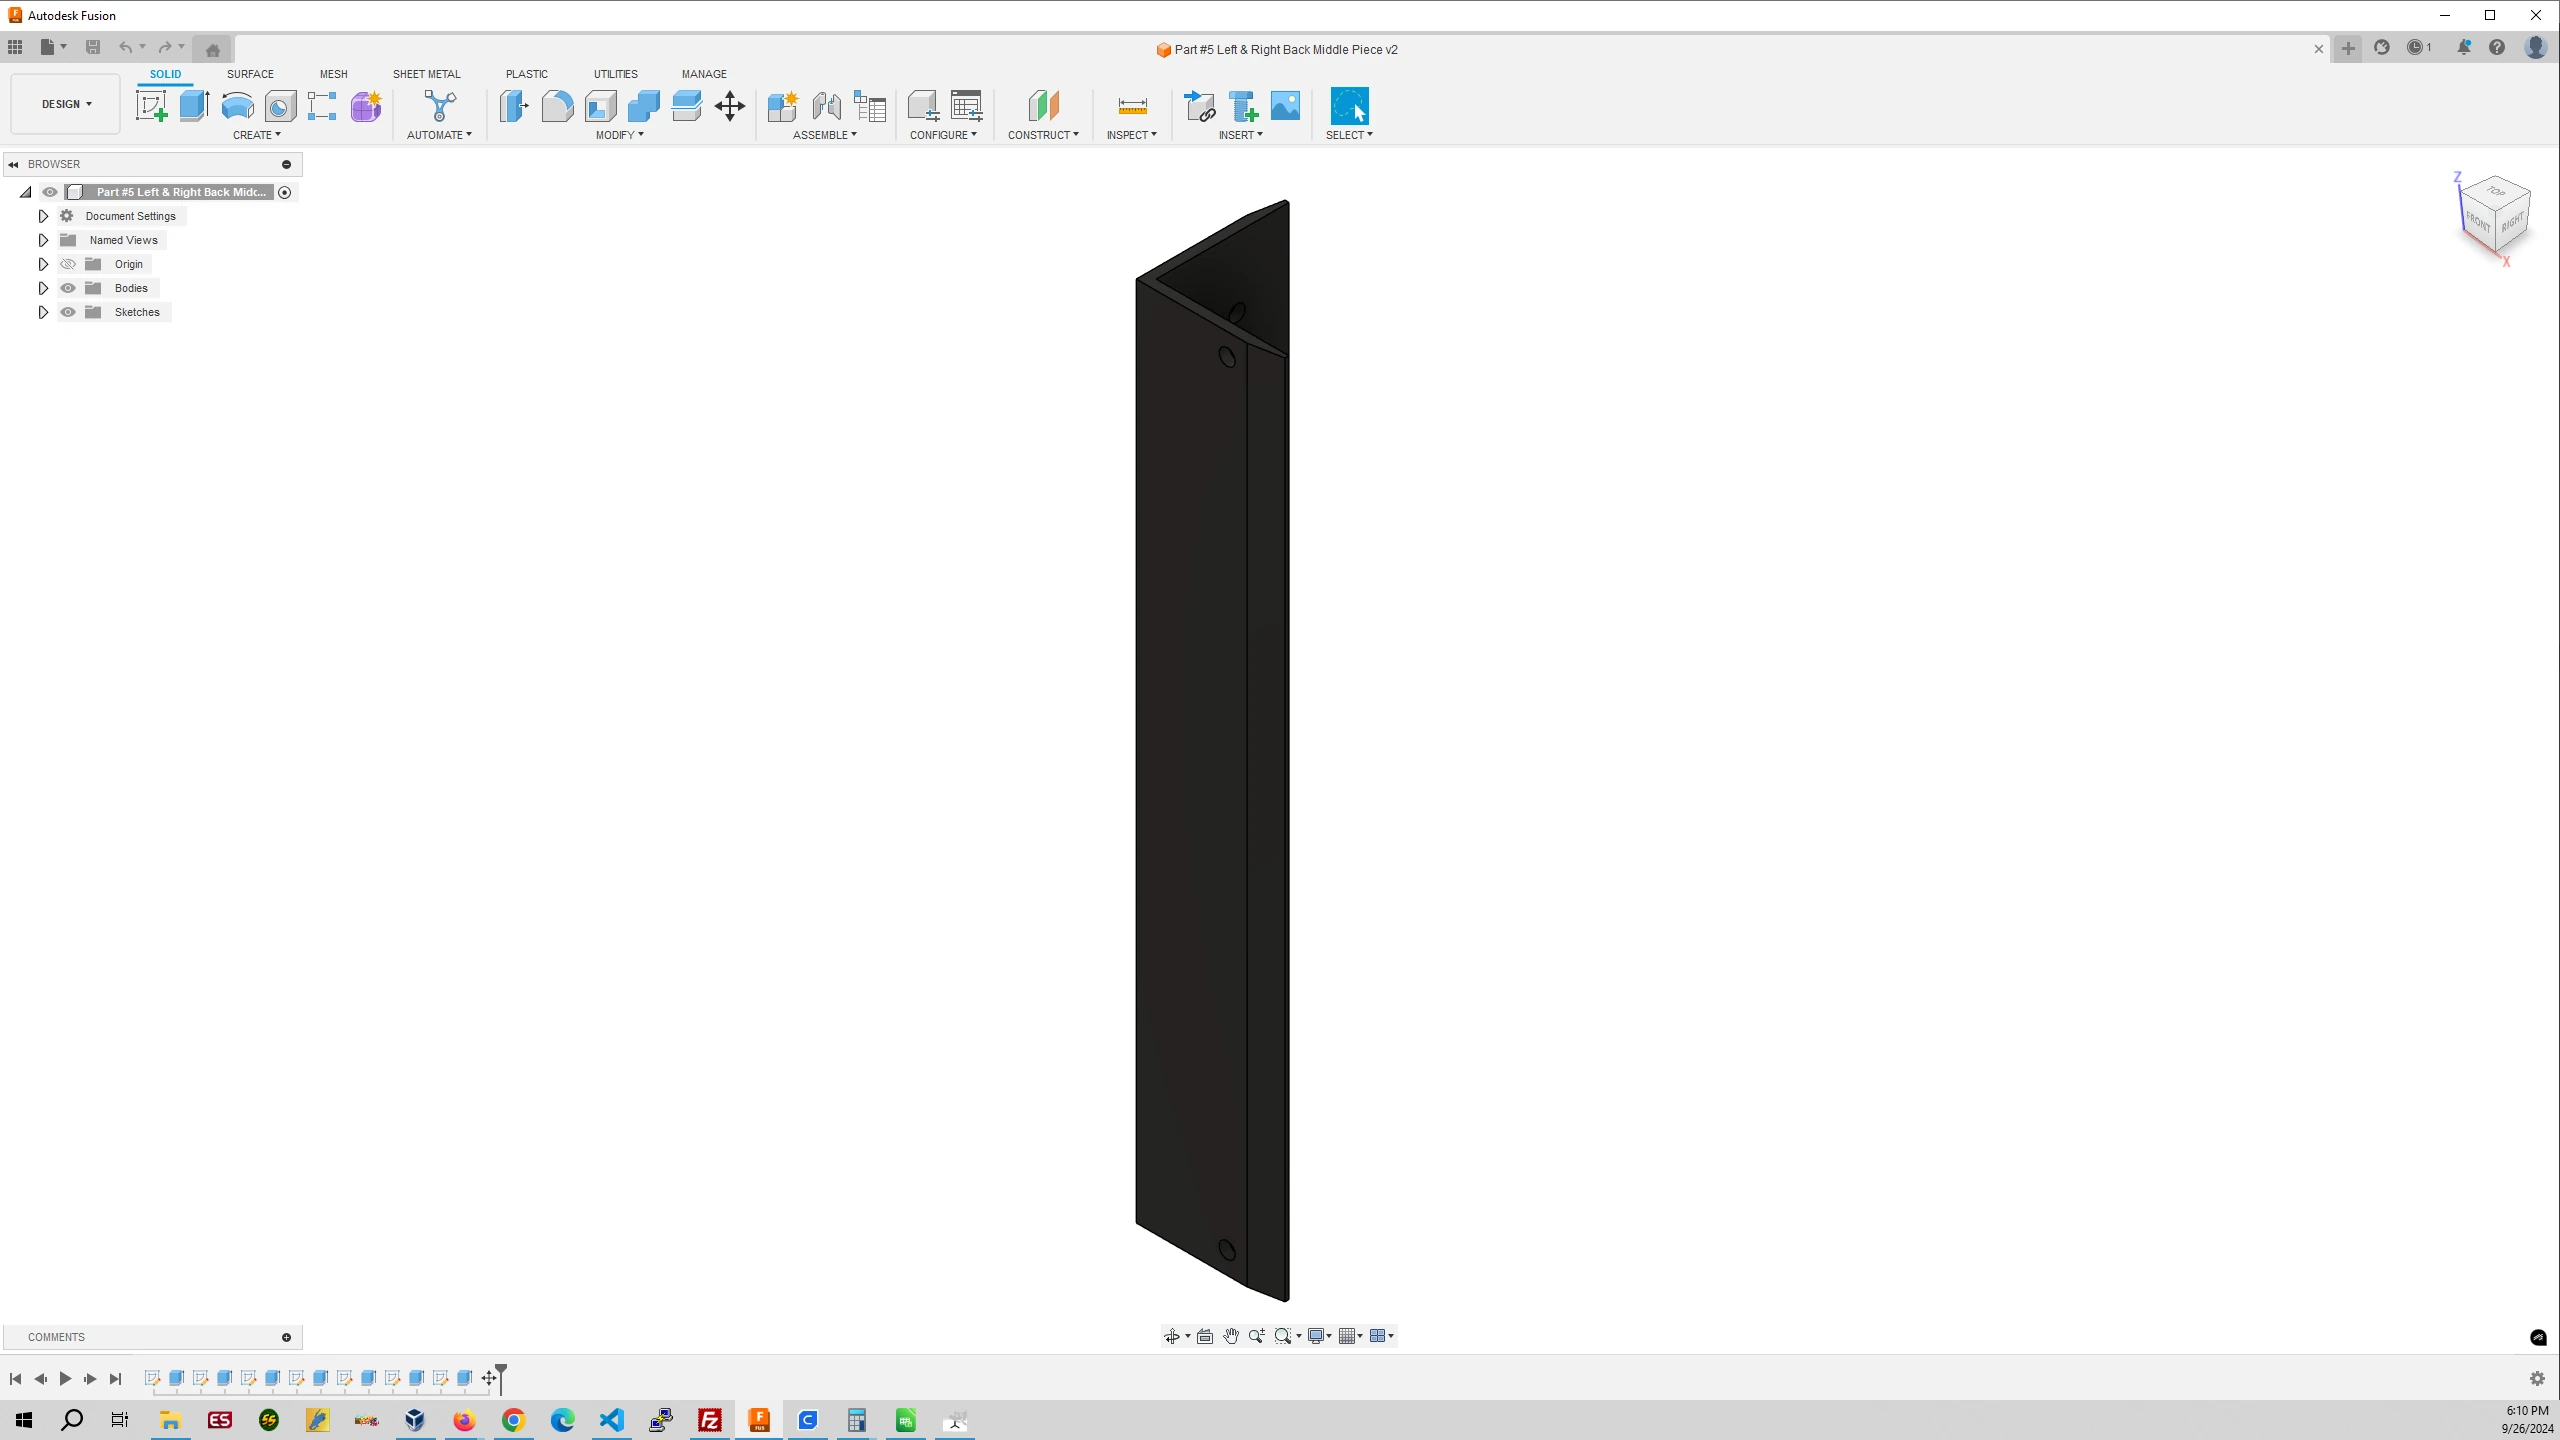
Part #5 Left & Right Back Middle Piece
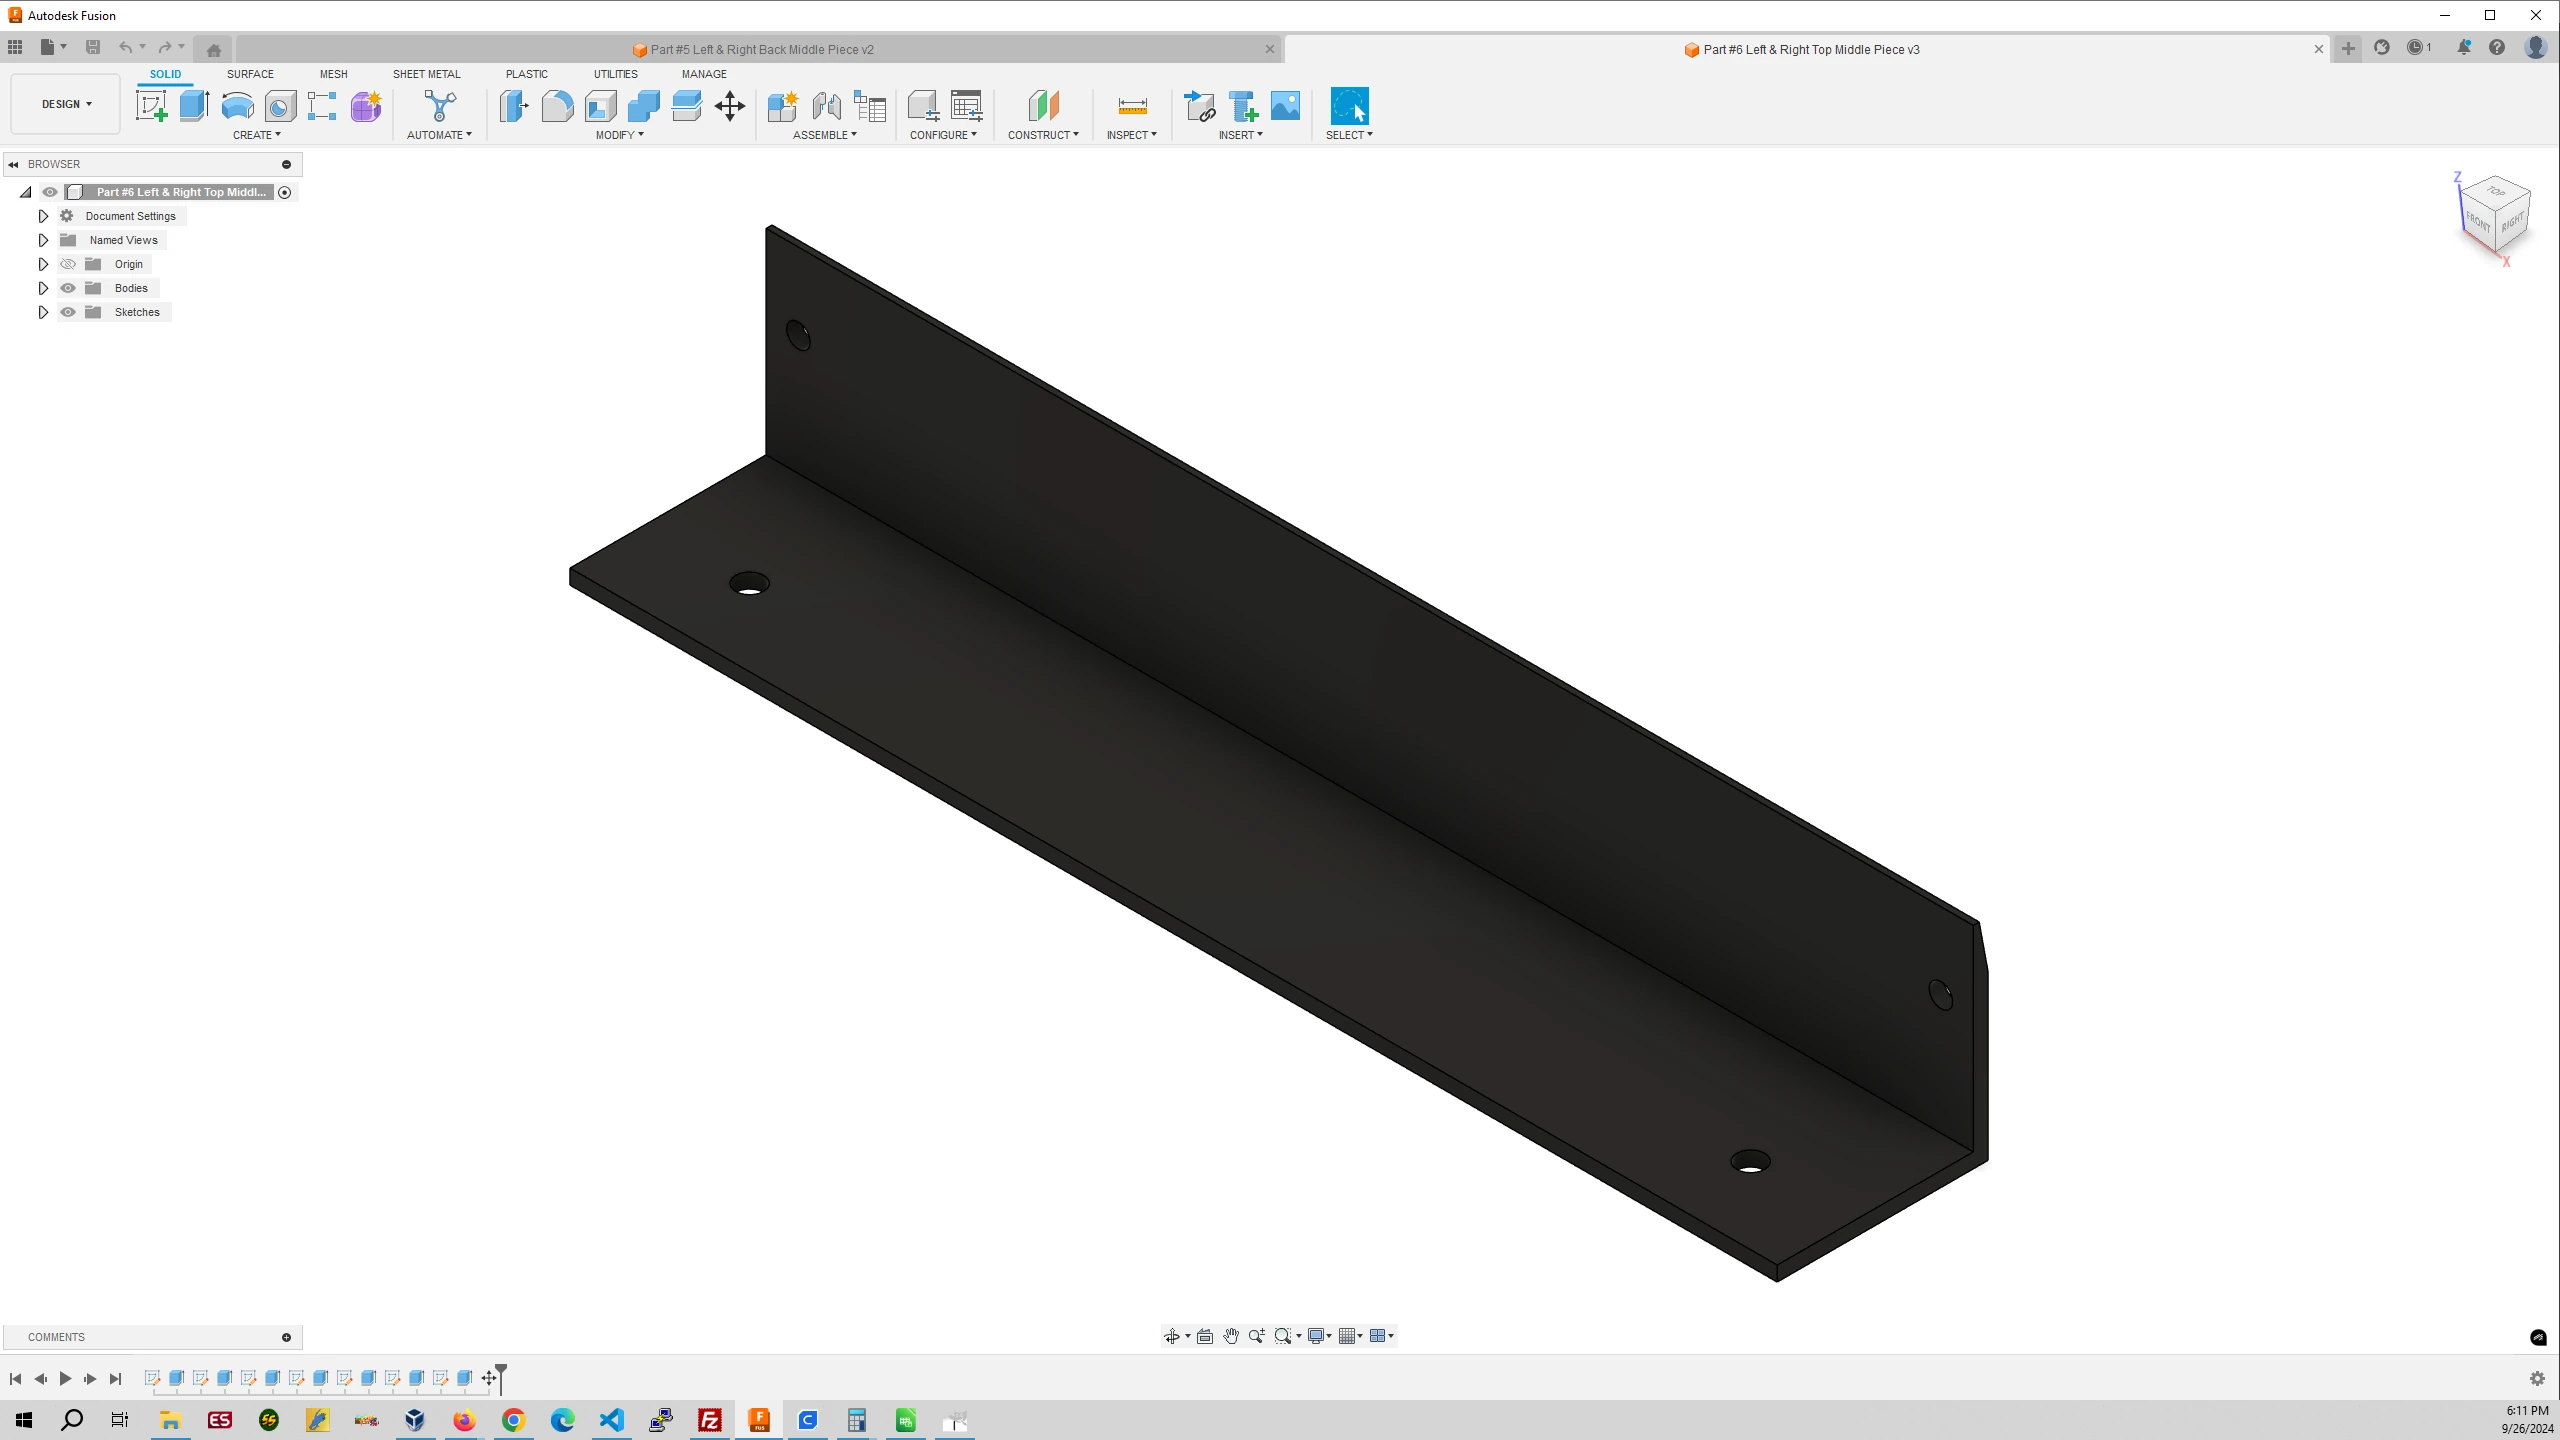
Part #6 Left & Right Top Middle Piece
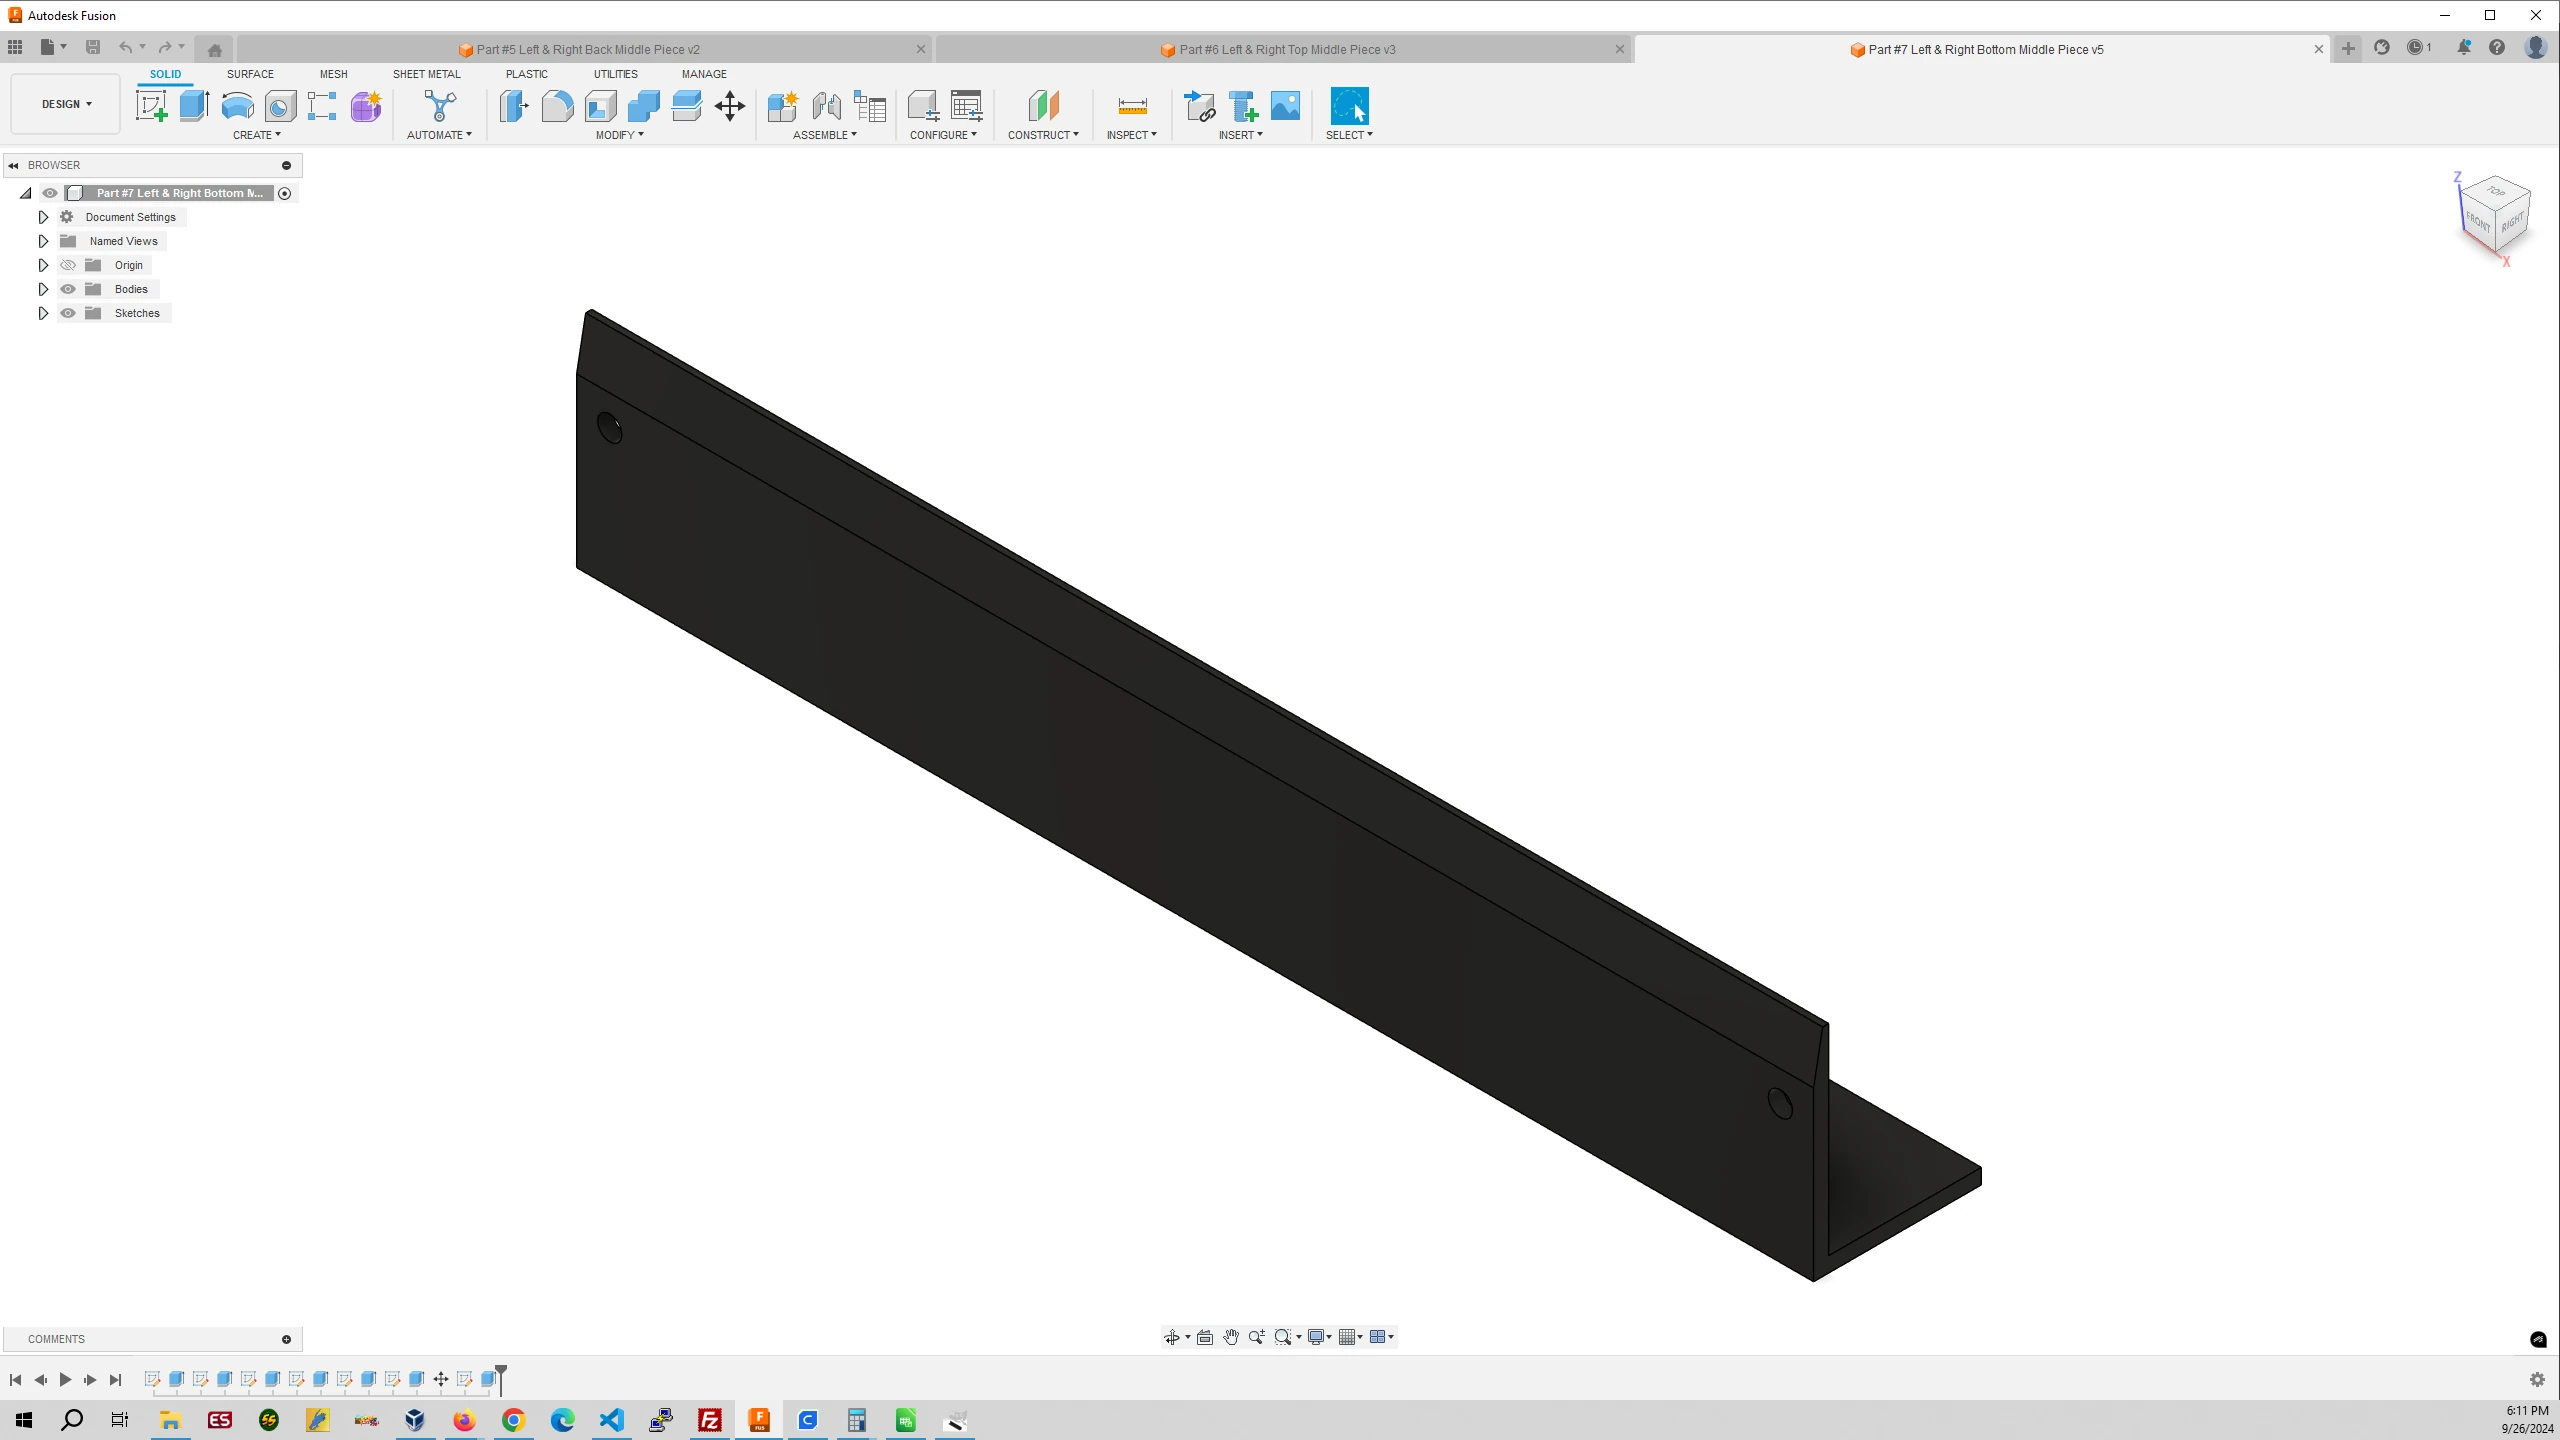
Part #7 Left & Right Bottom Middle Piece
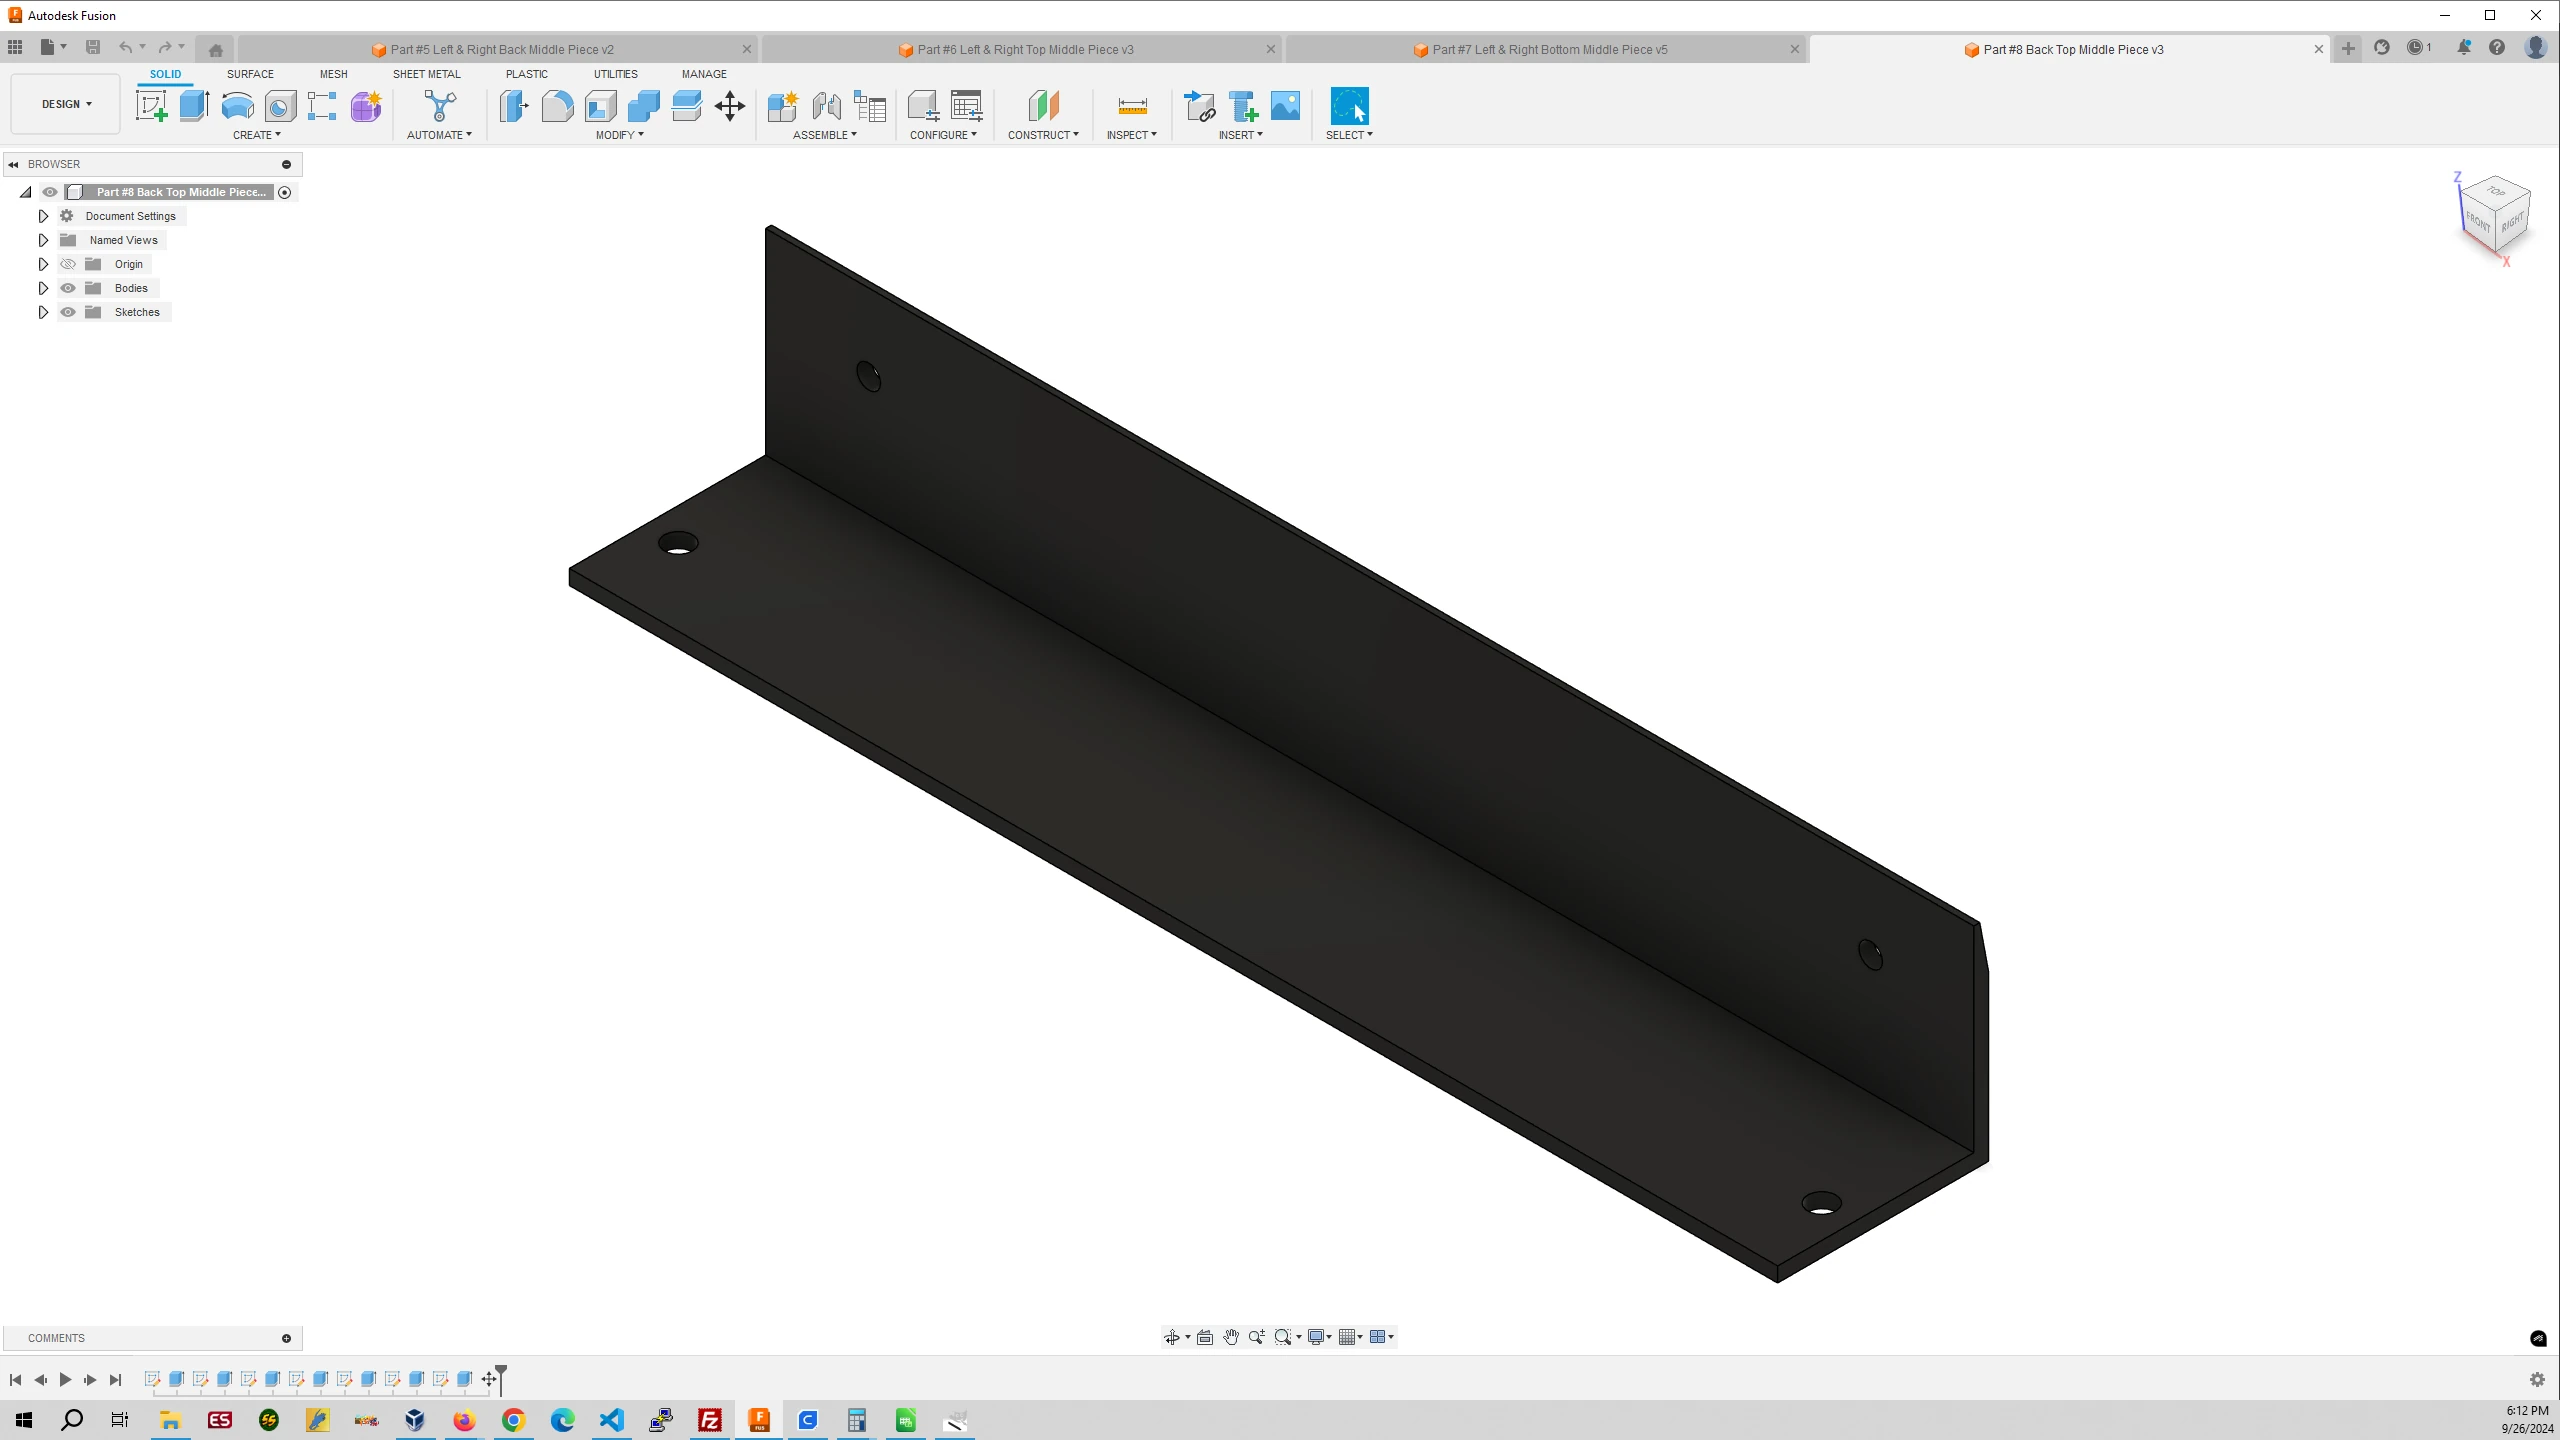
Part #8 Back Top Middle Piece
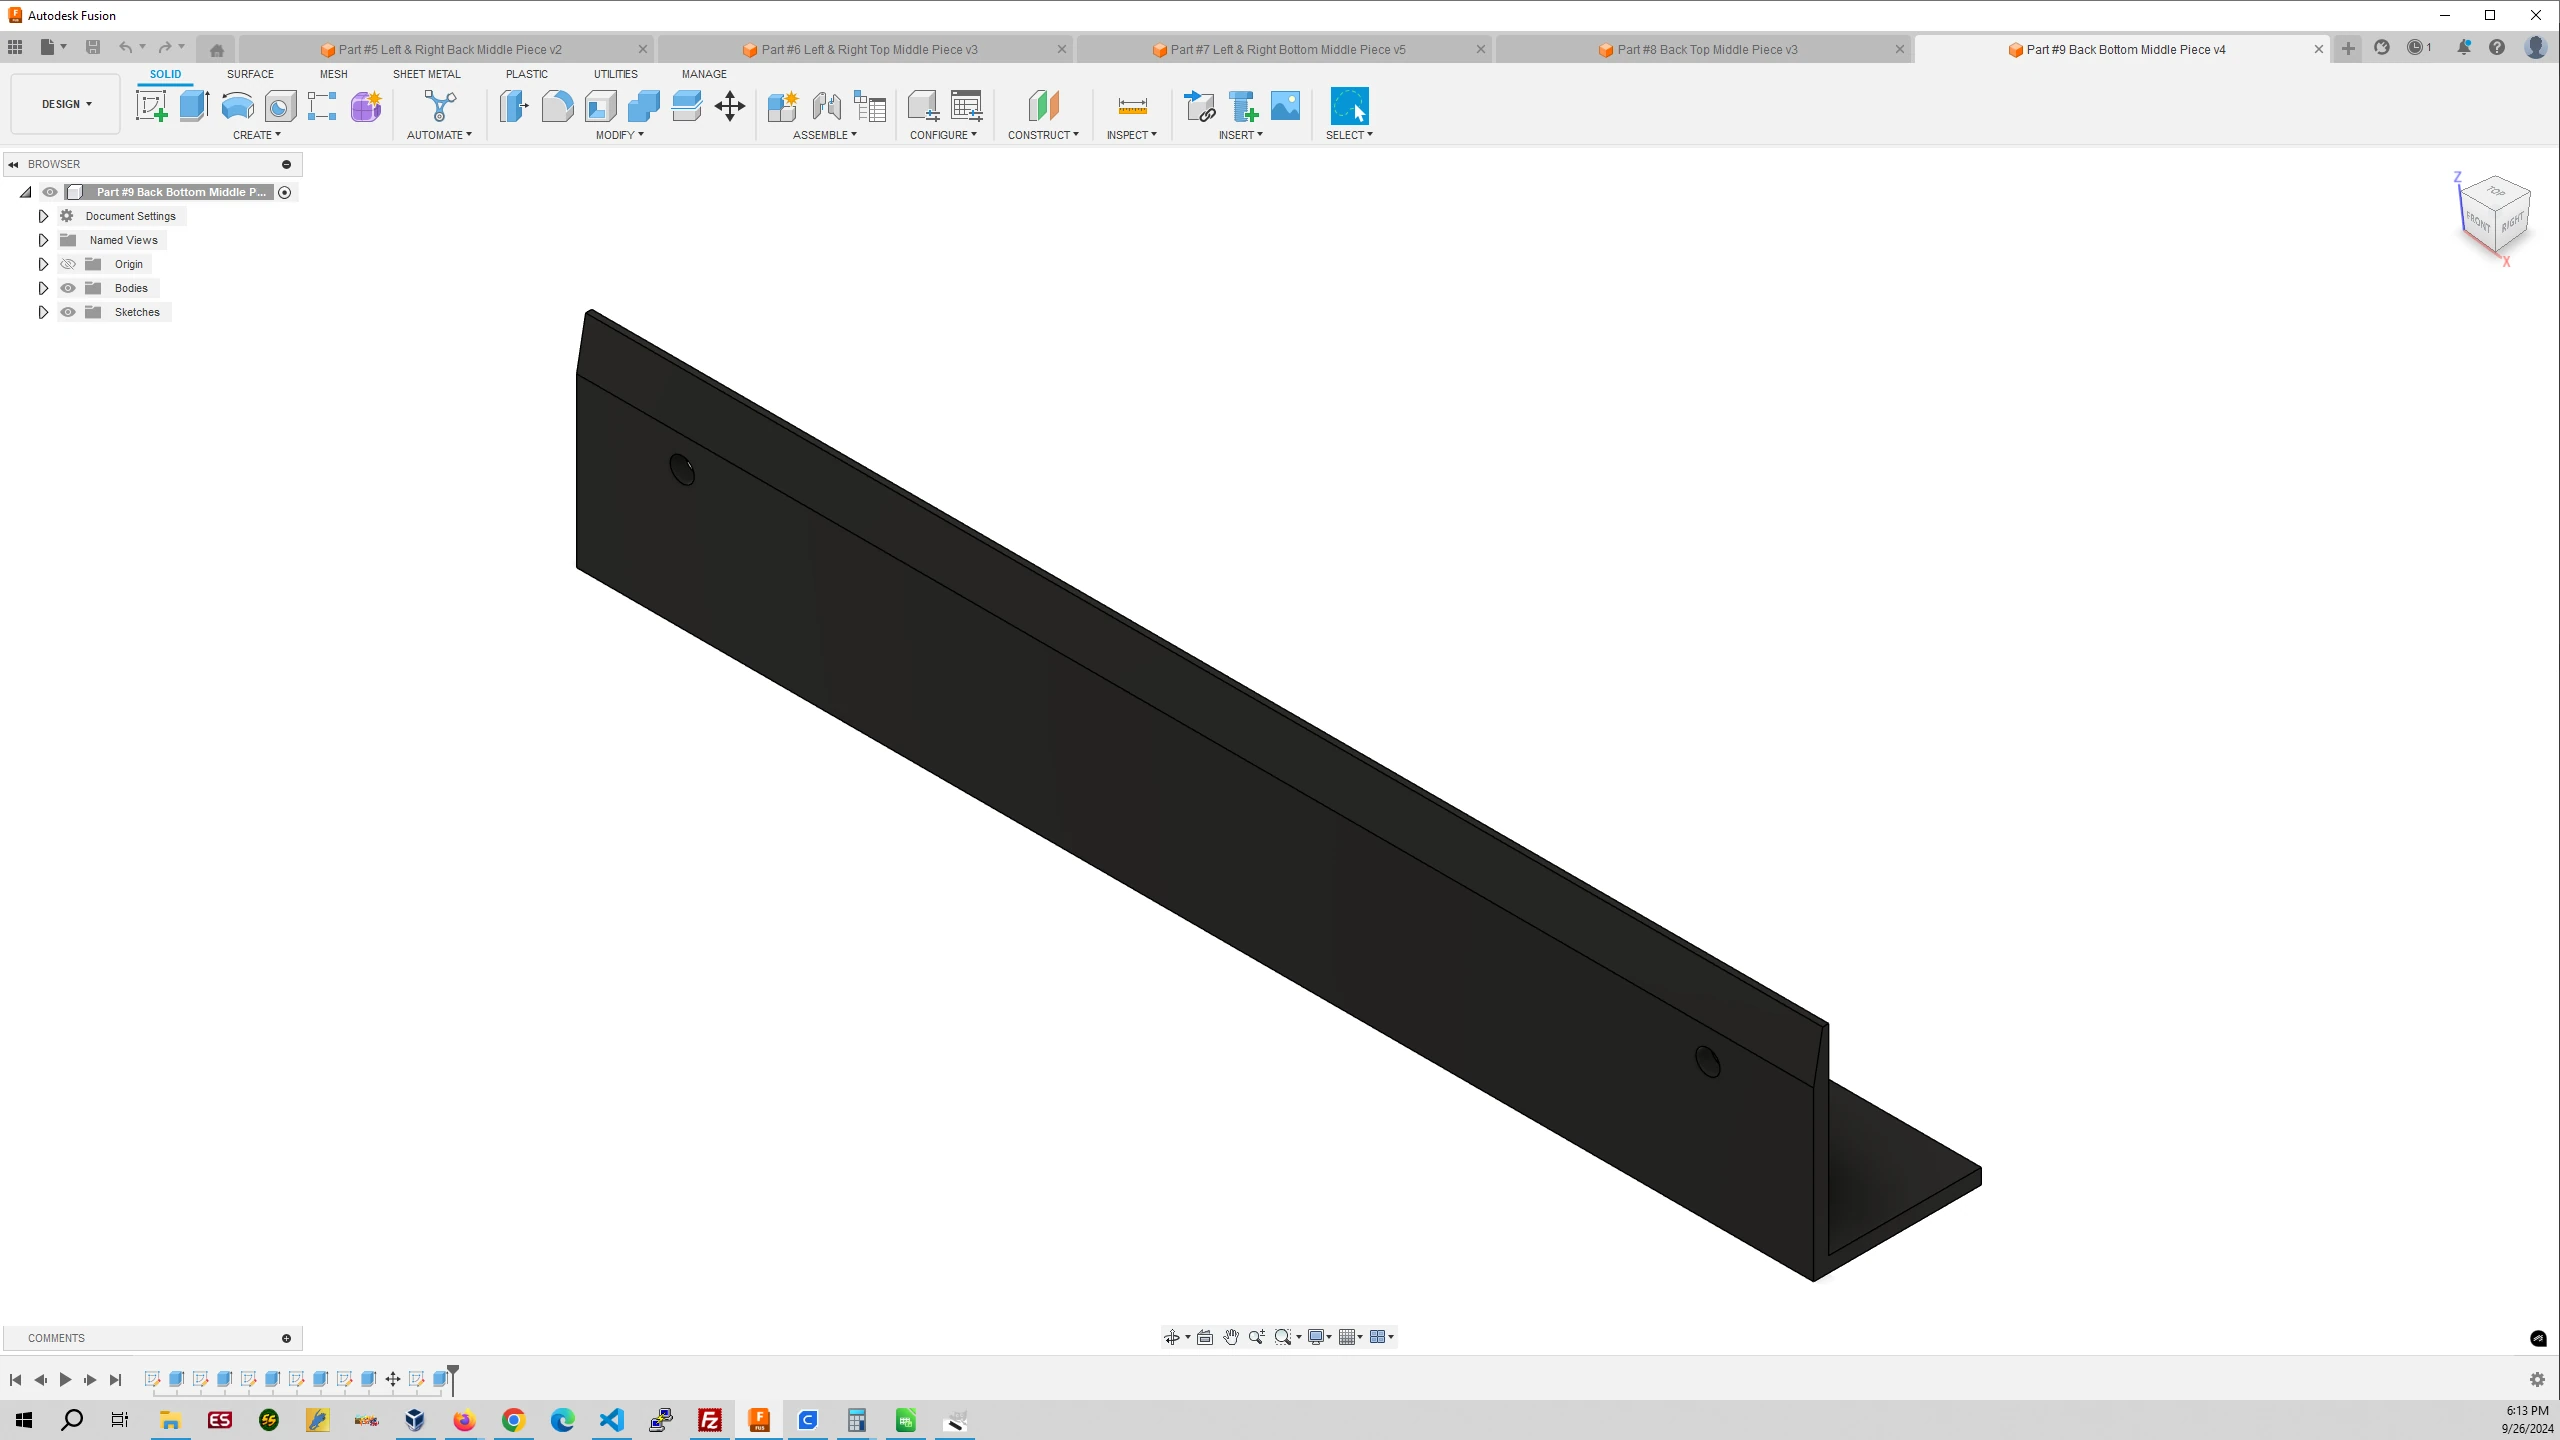
Part #9 Back Bottom Middle Piece
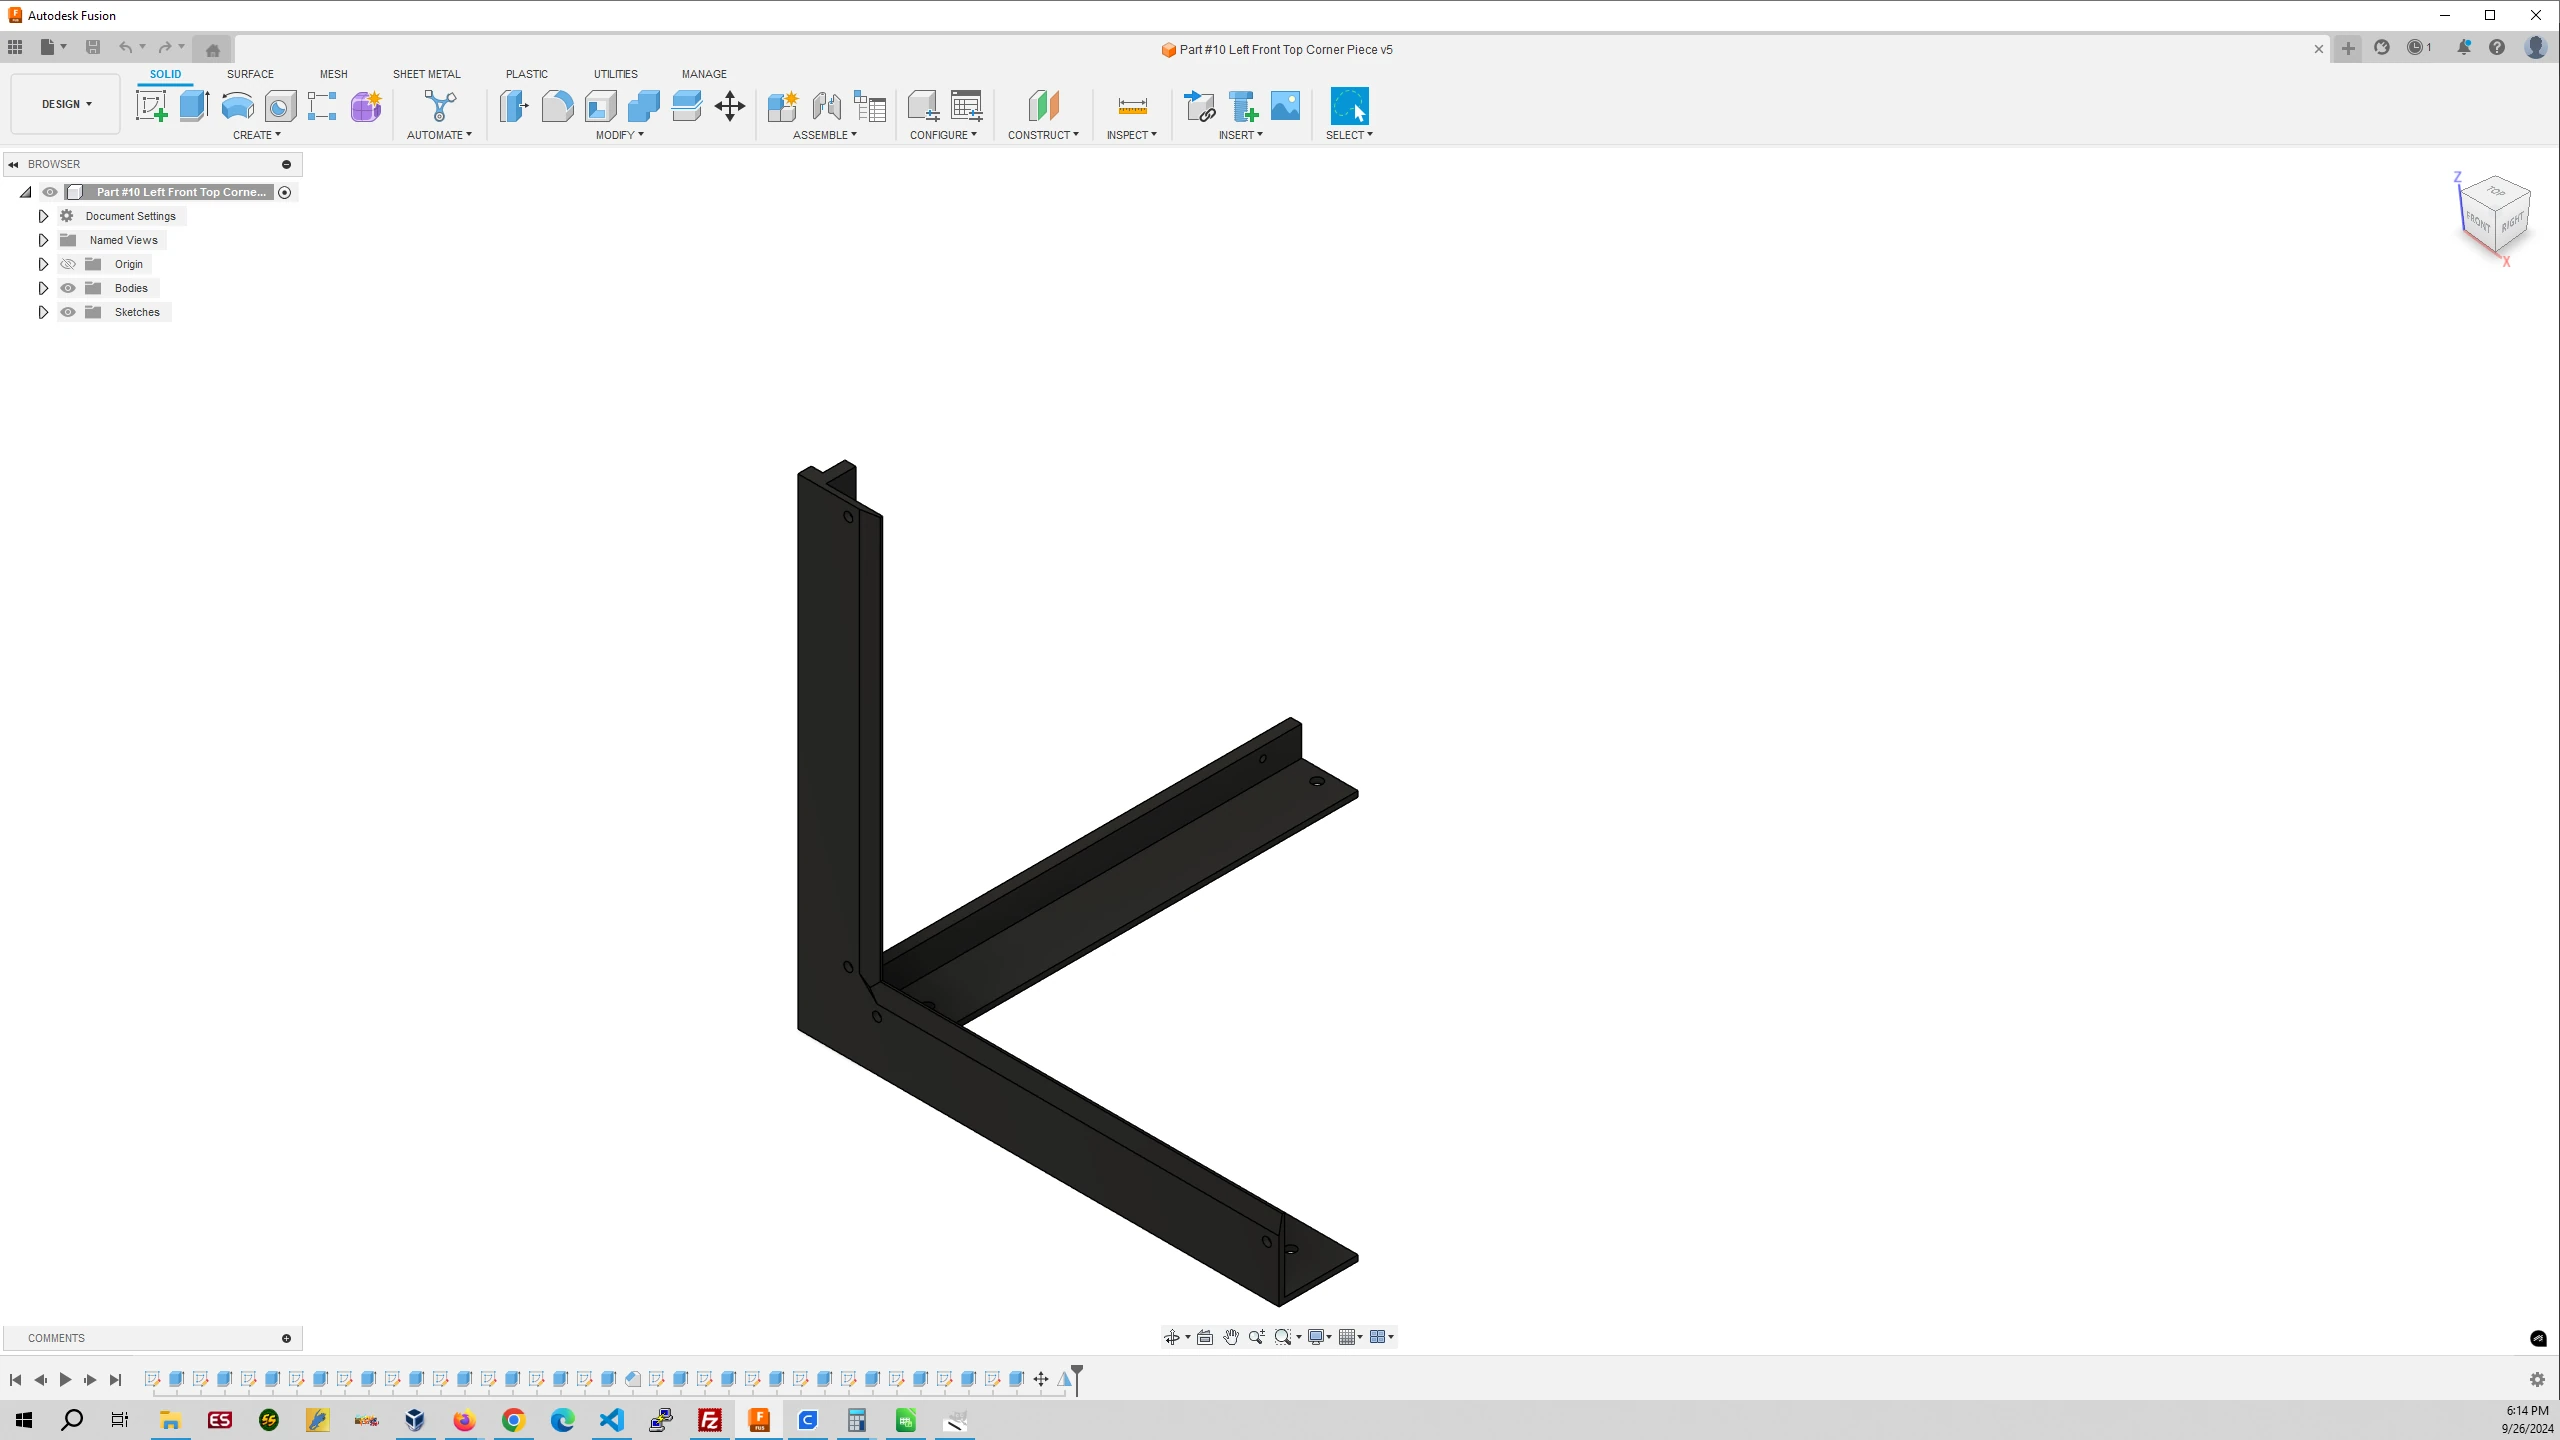
Part #10 Left Front Top Corner Piece
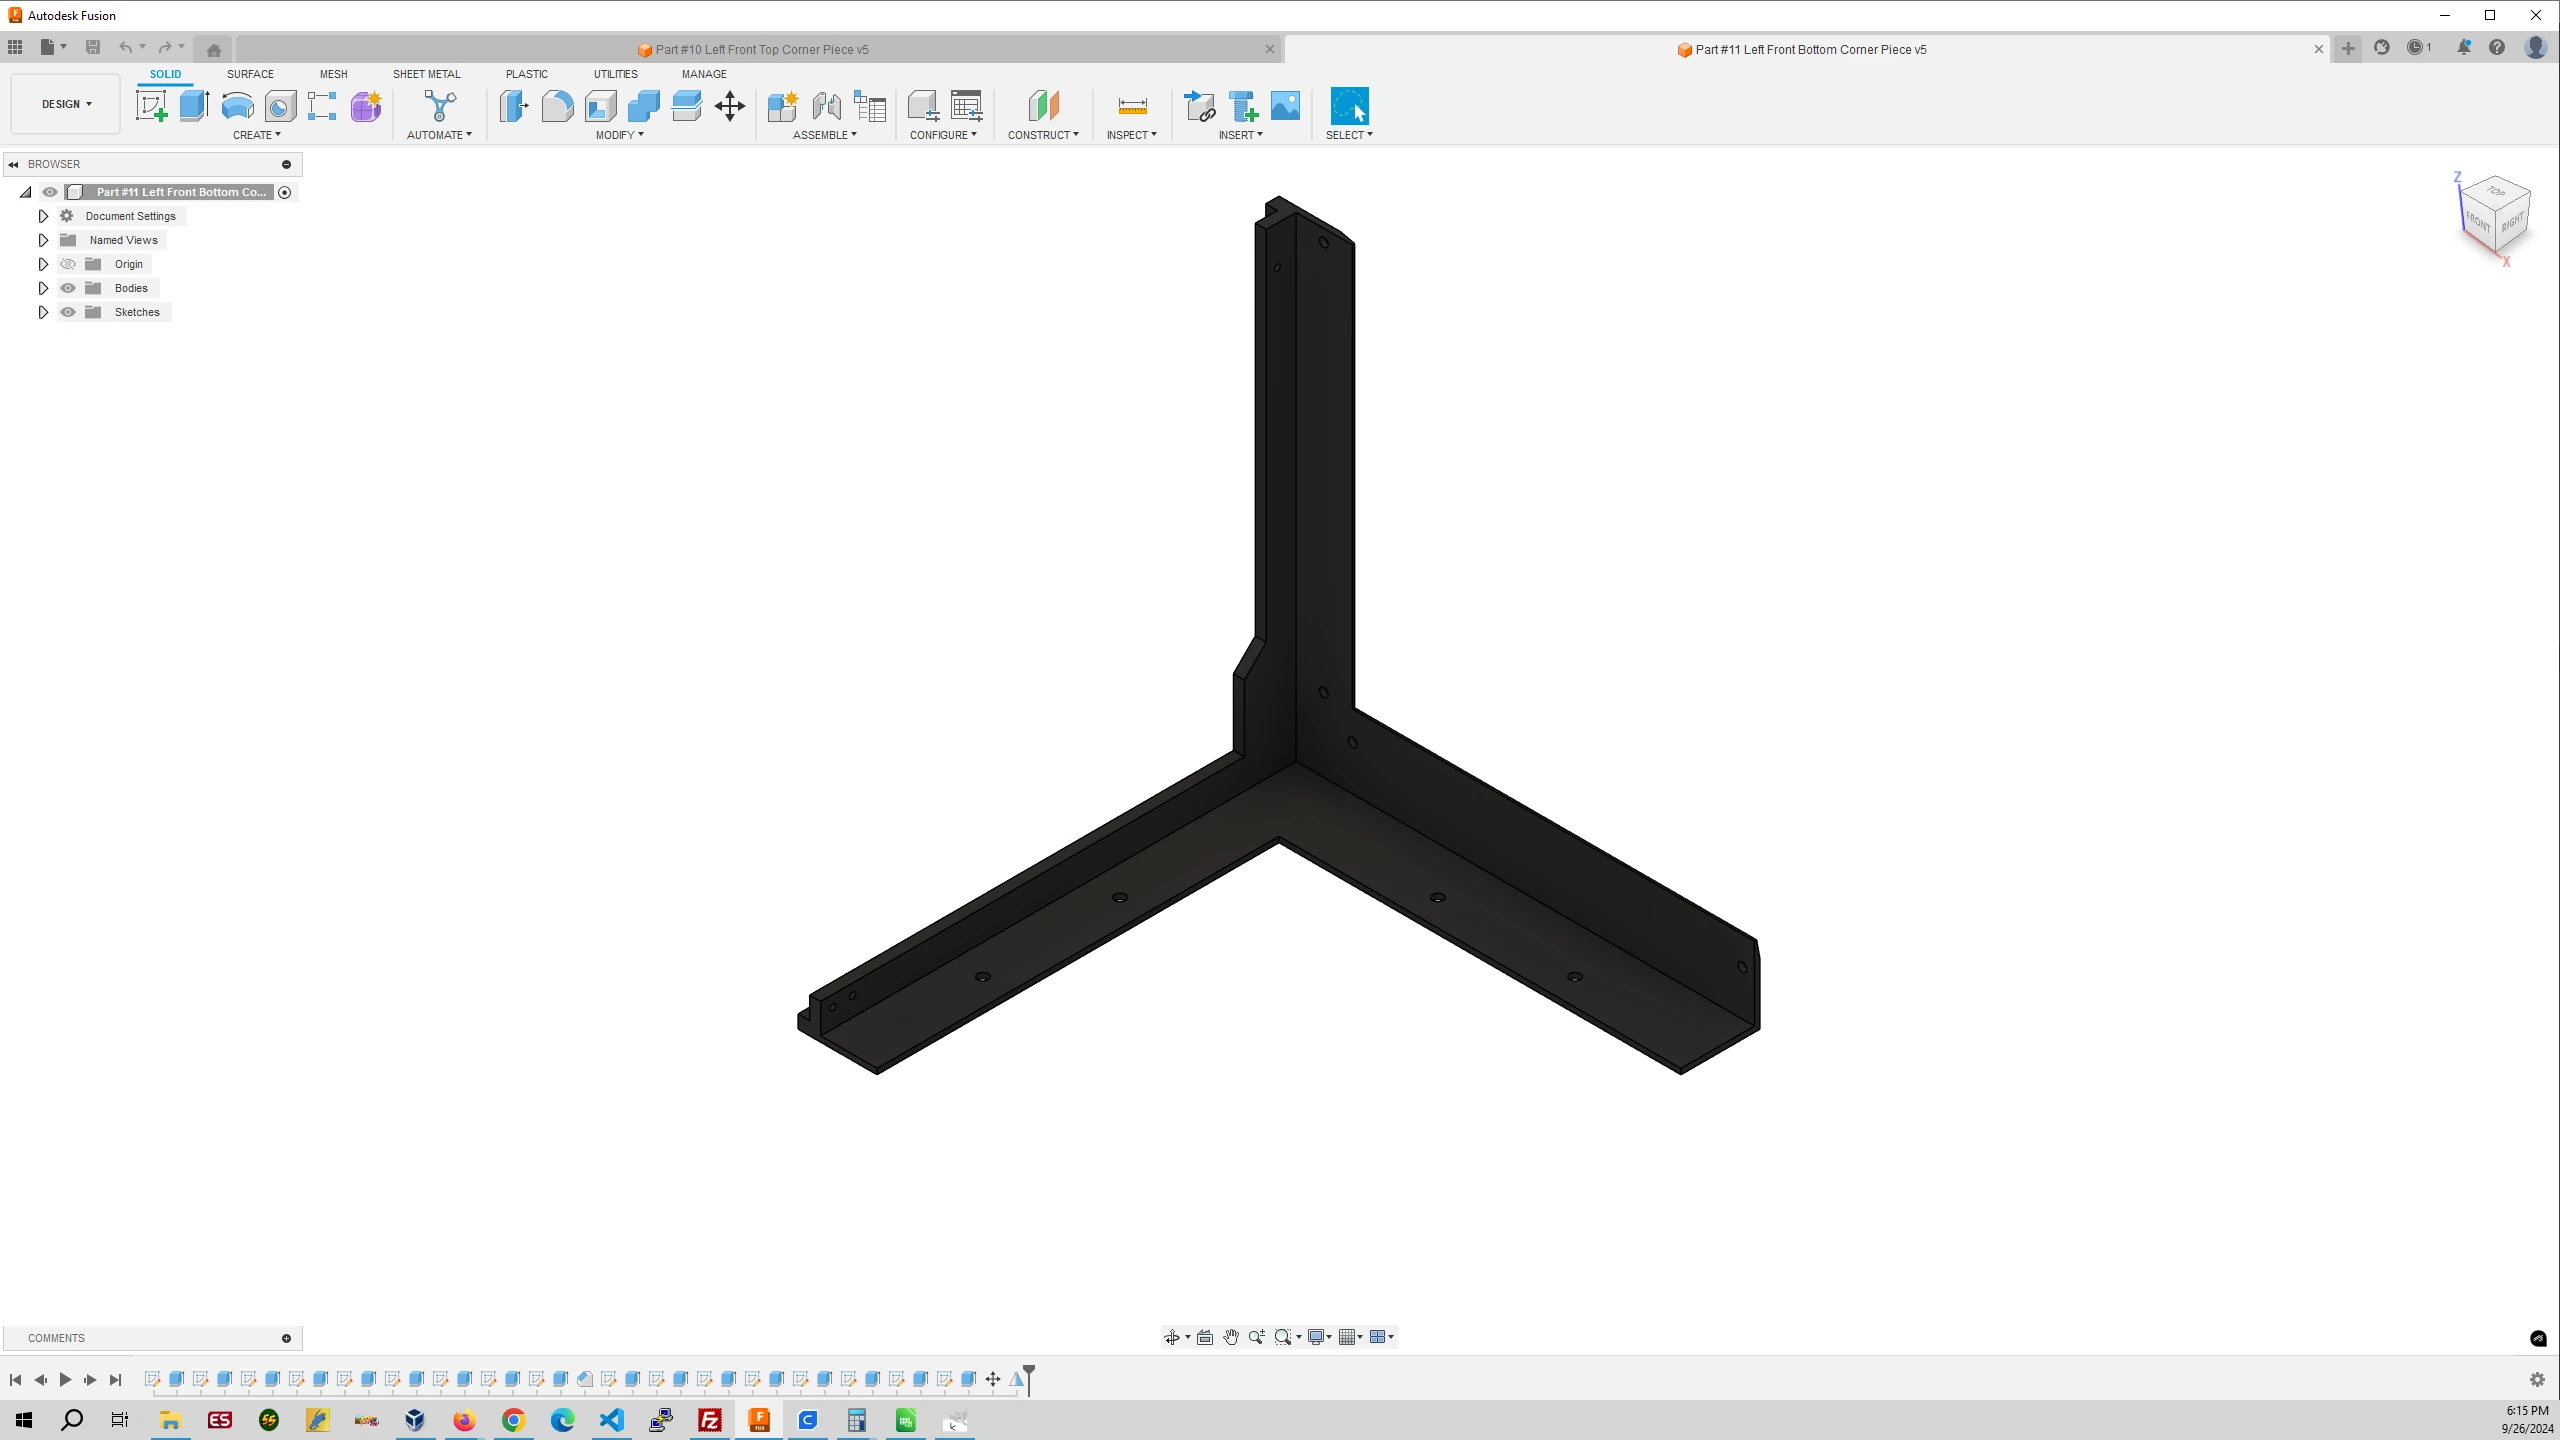
Part #11 Left Front Bottom Corner Piece
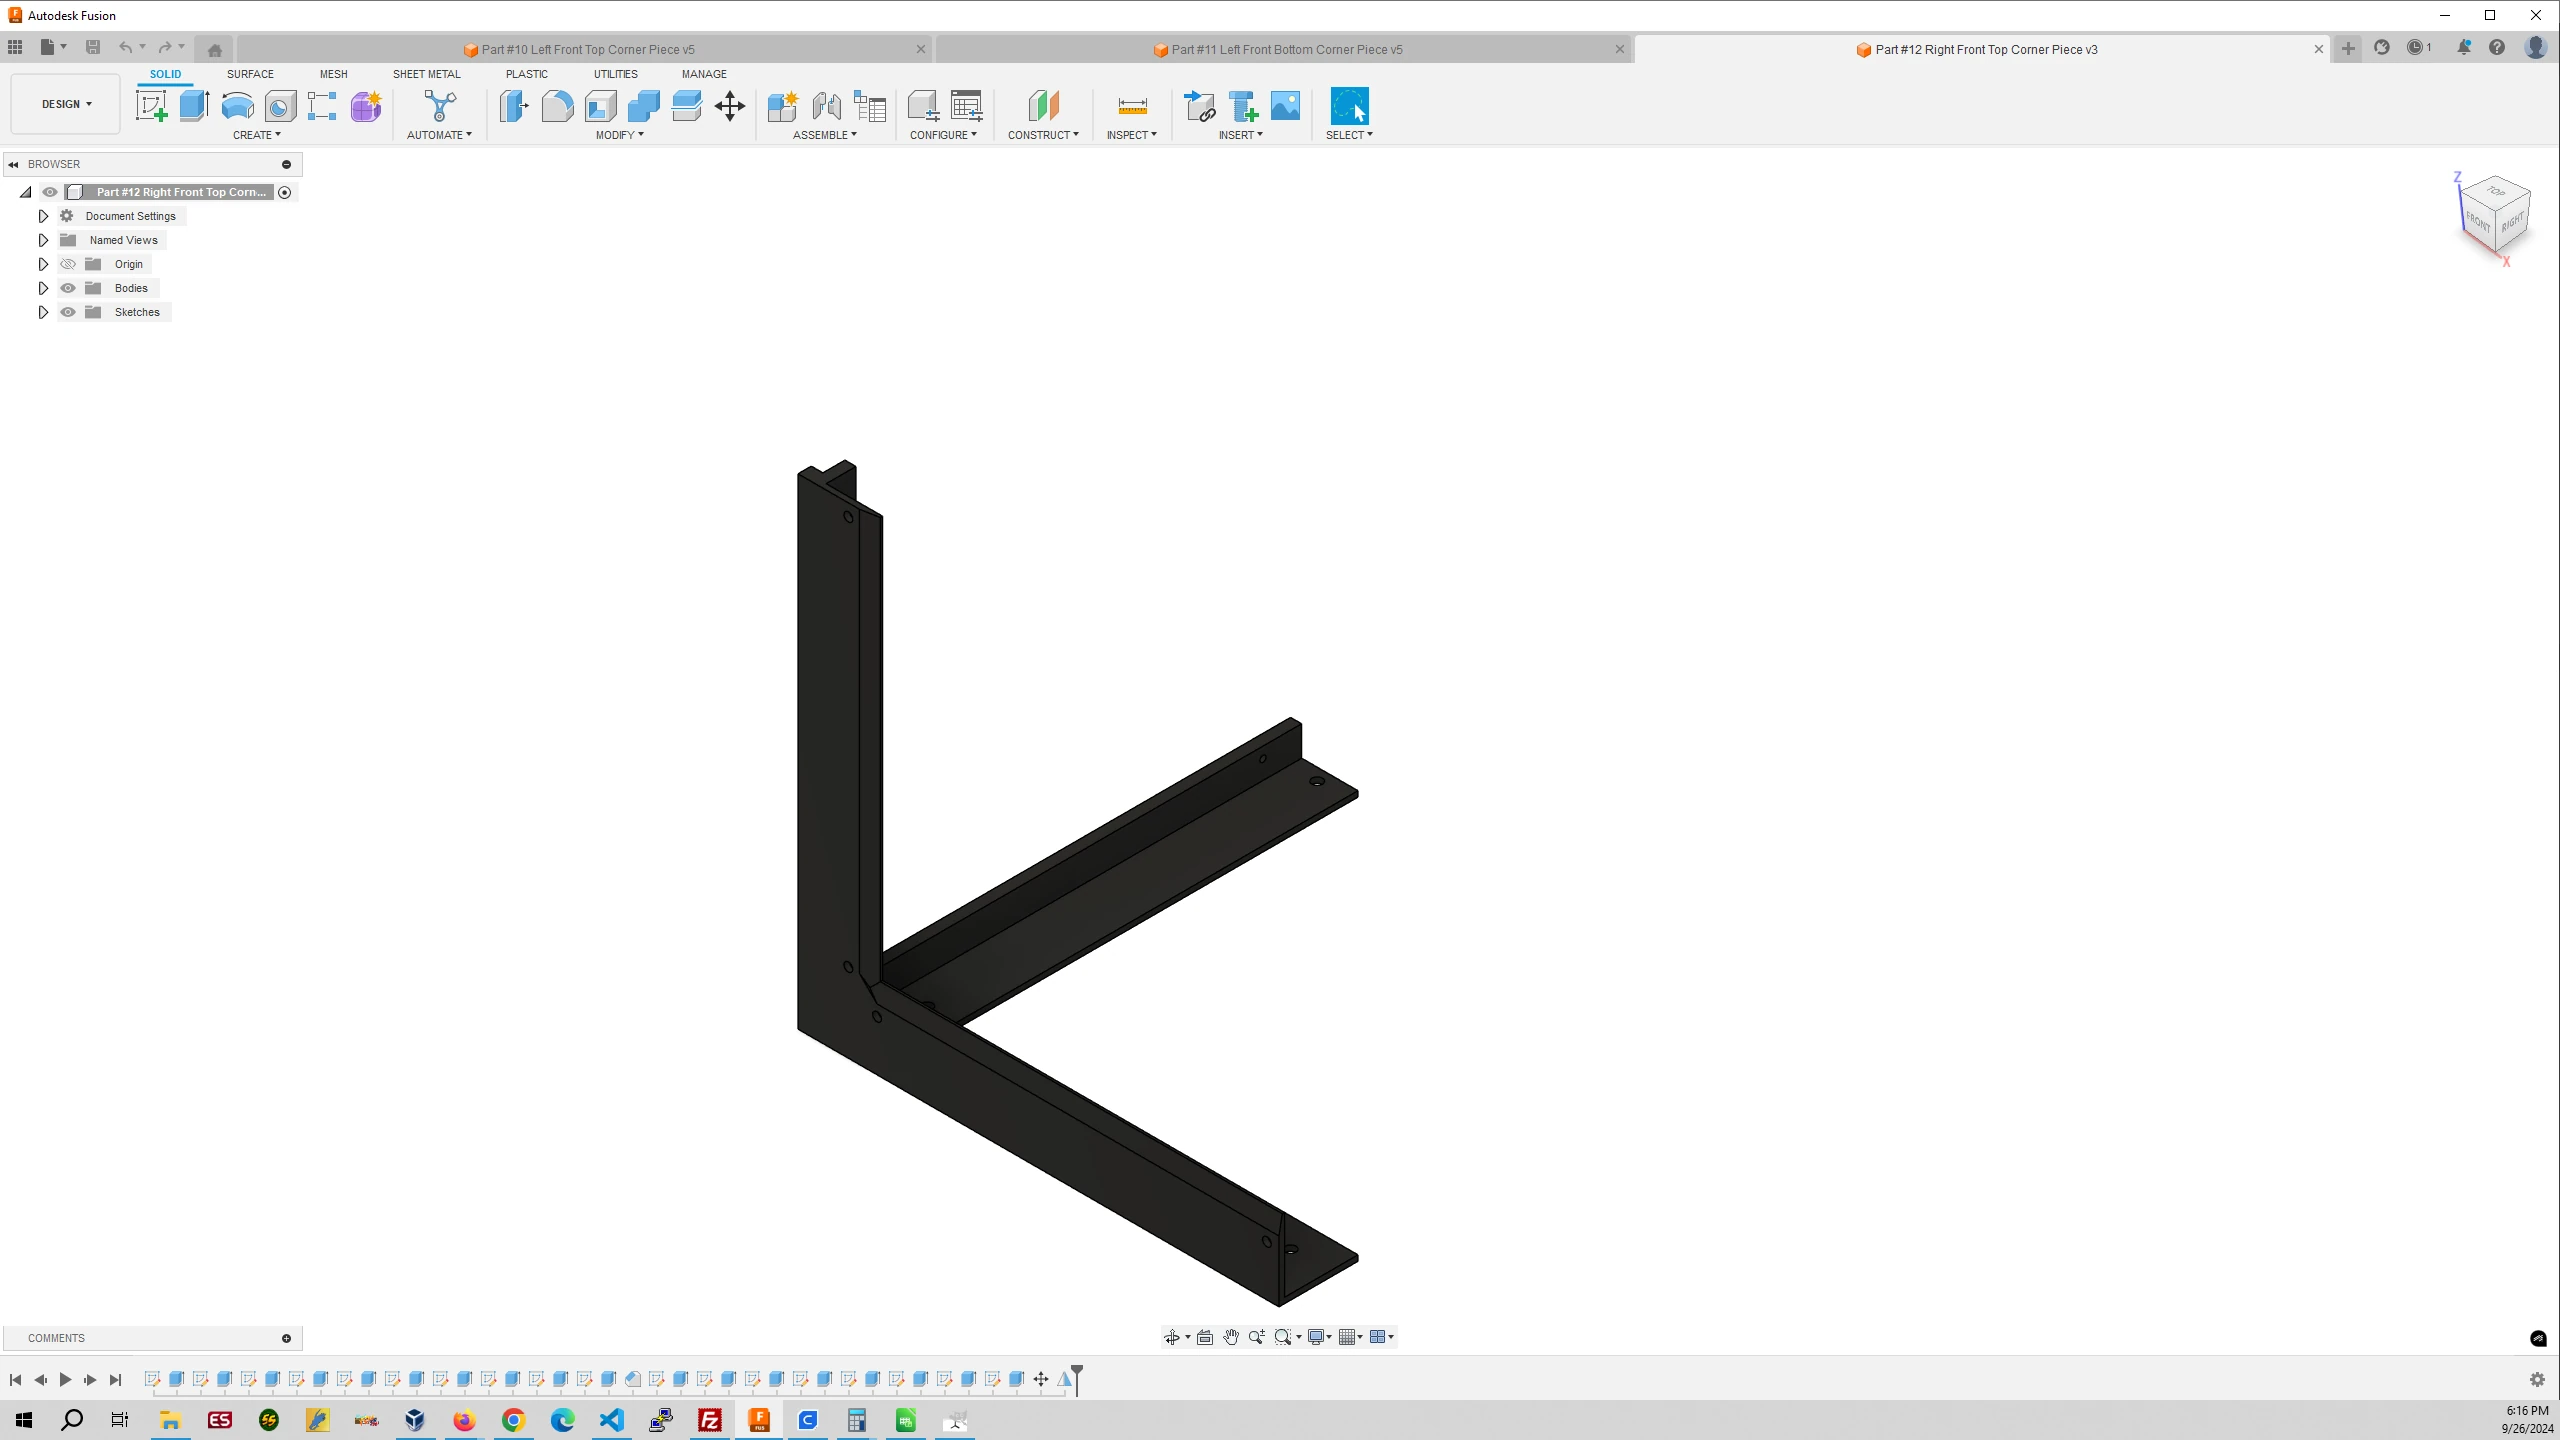
Part #12 Right Front Top Corner Piece

Part #13 Right Front Bottom Corner Piece
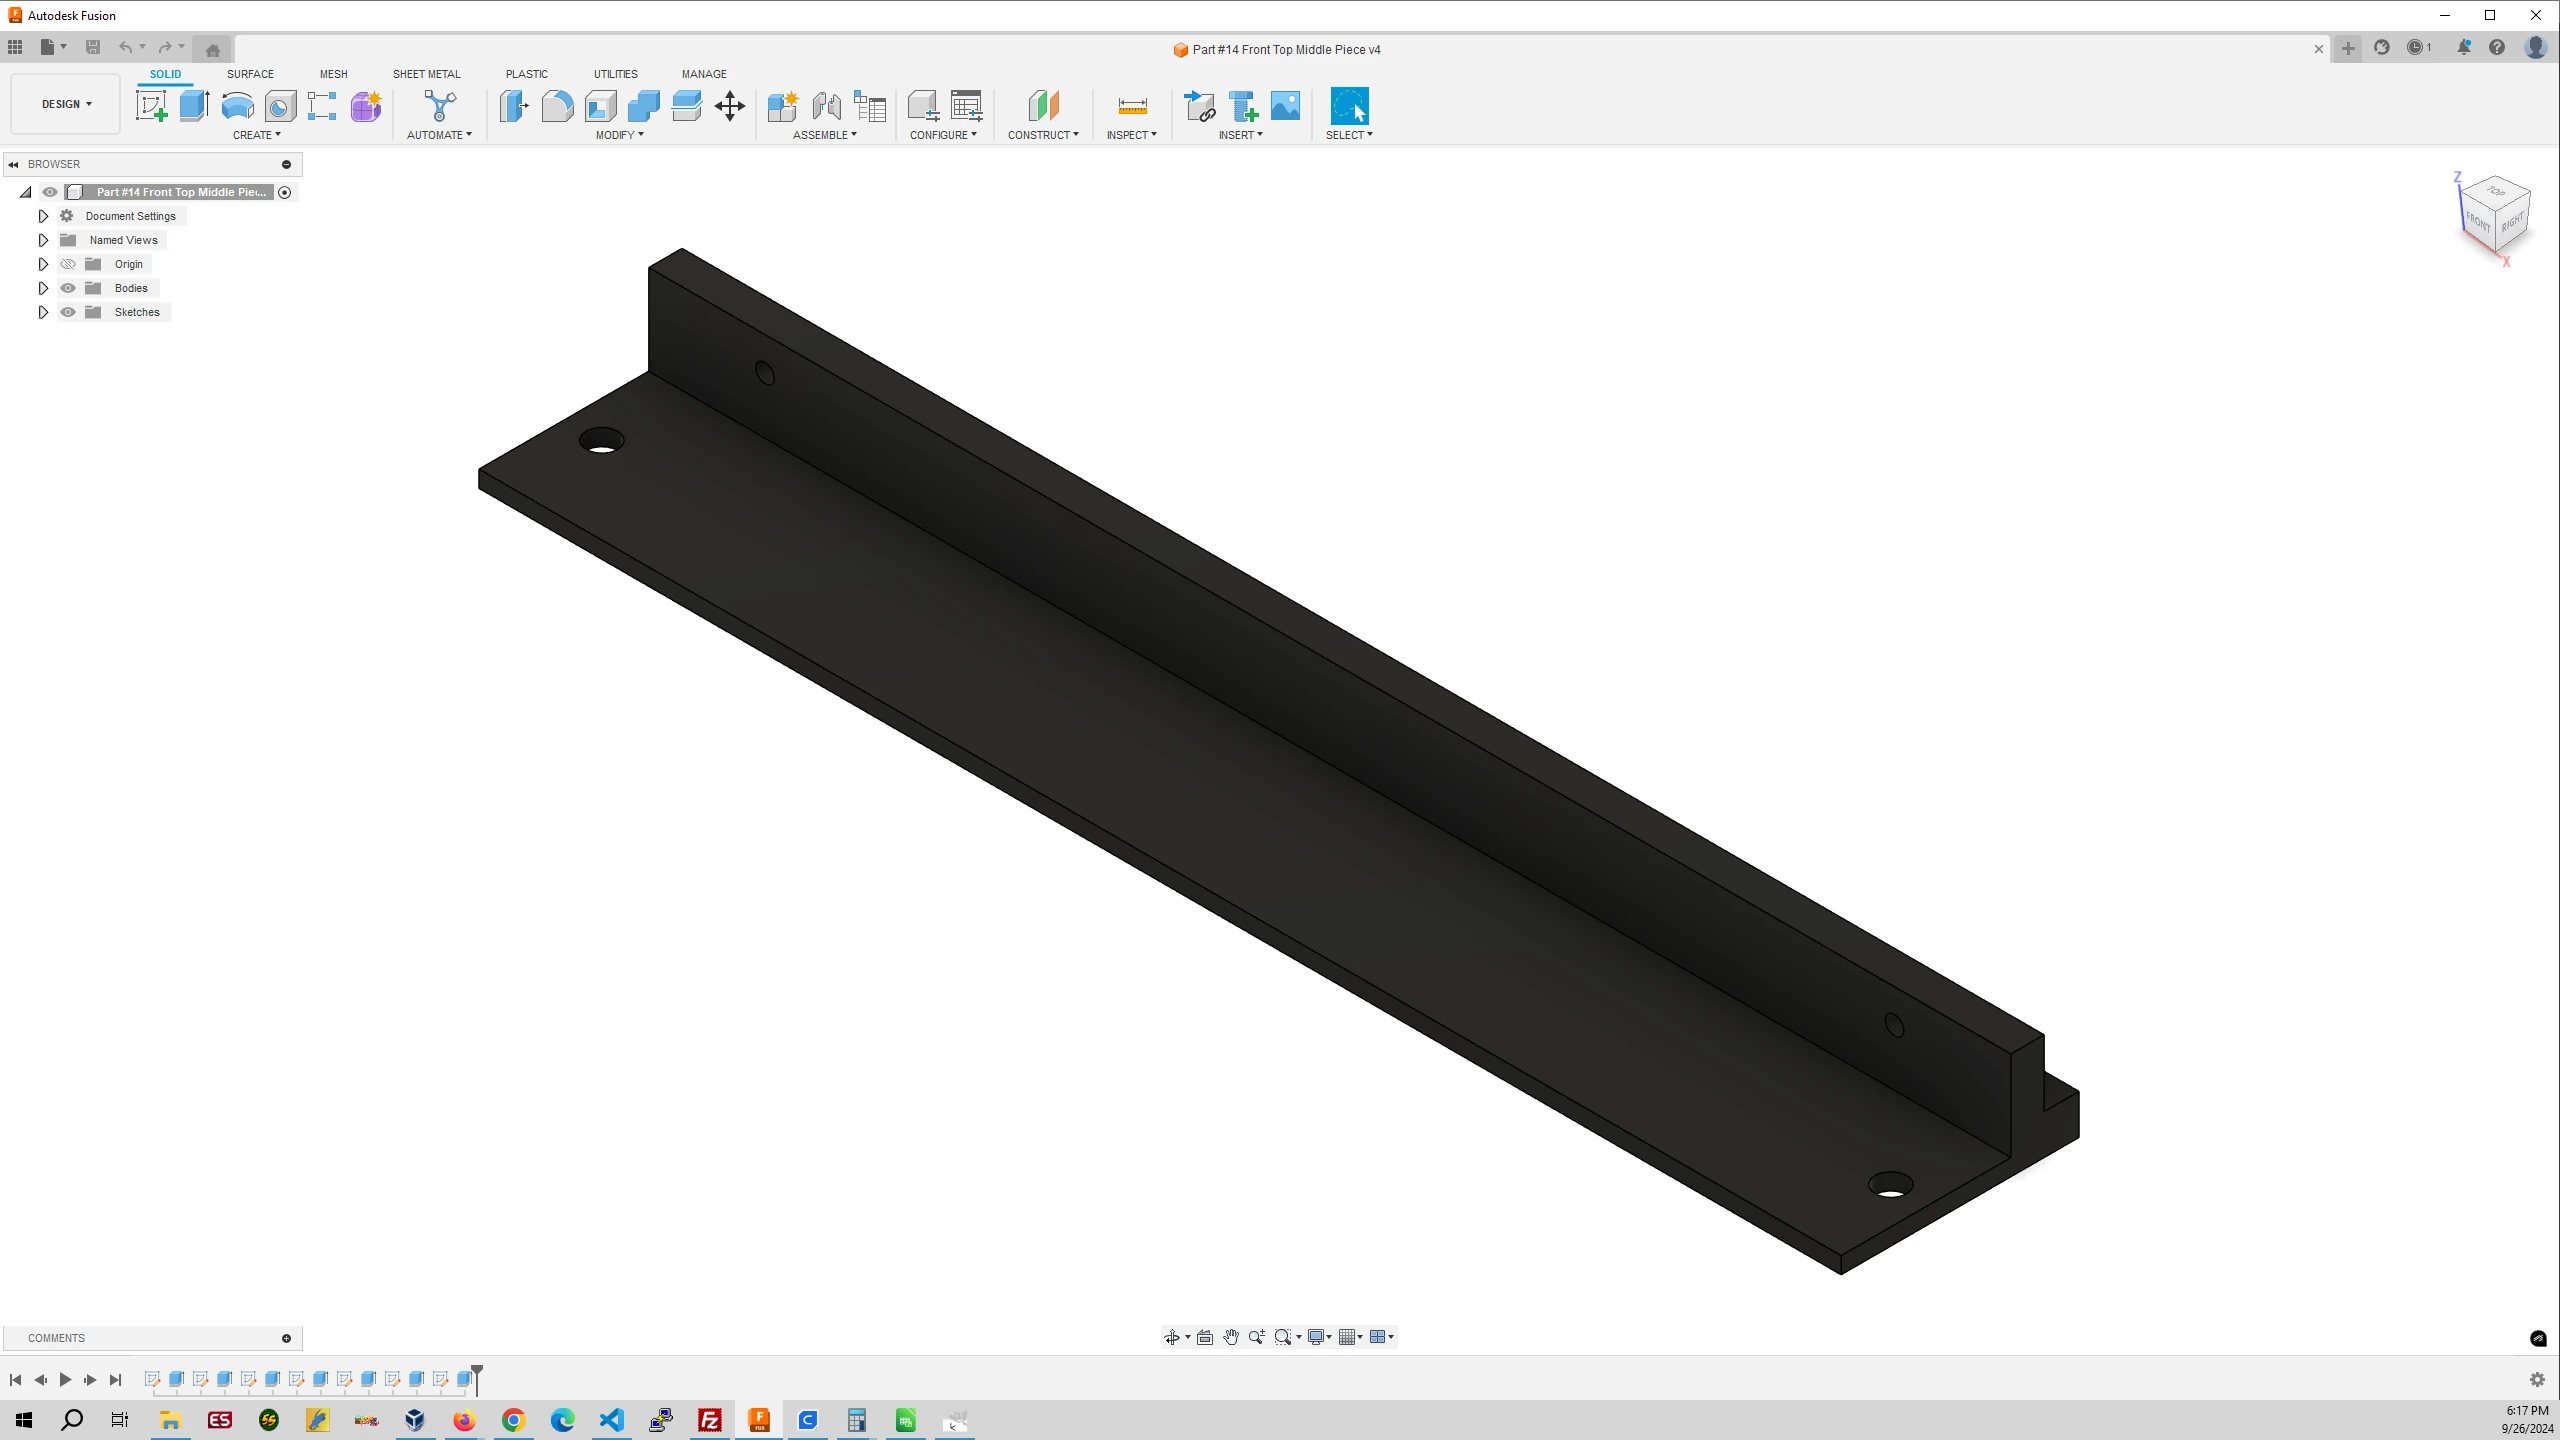
Part #14 Front Top Middle Piece

Part #15 Front Left & Right Middle Piece

Part #16 Front Bottom Middle Piece
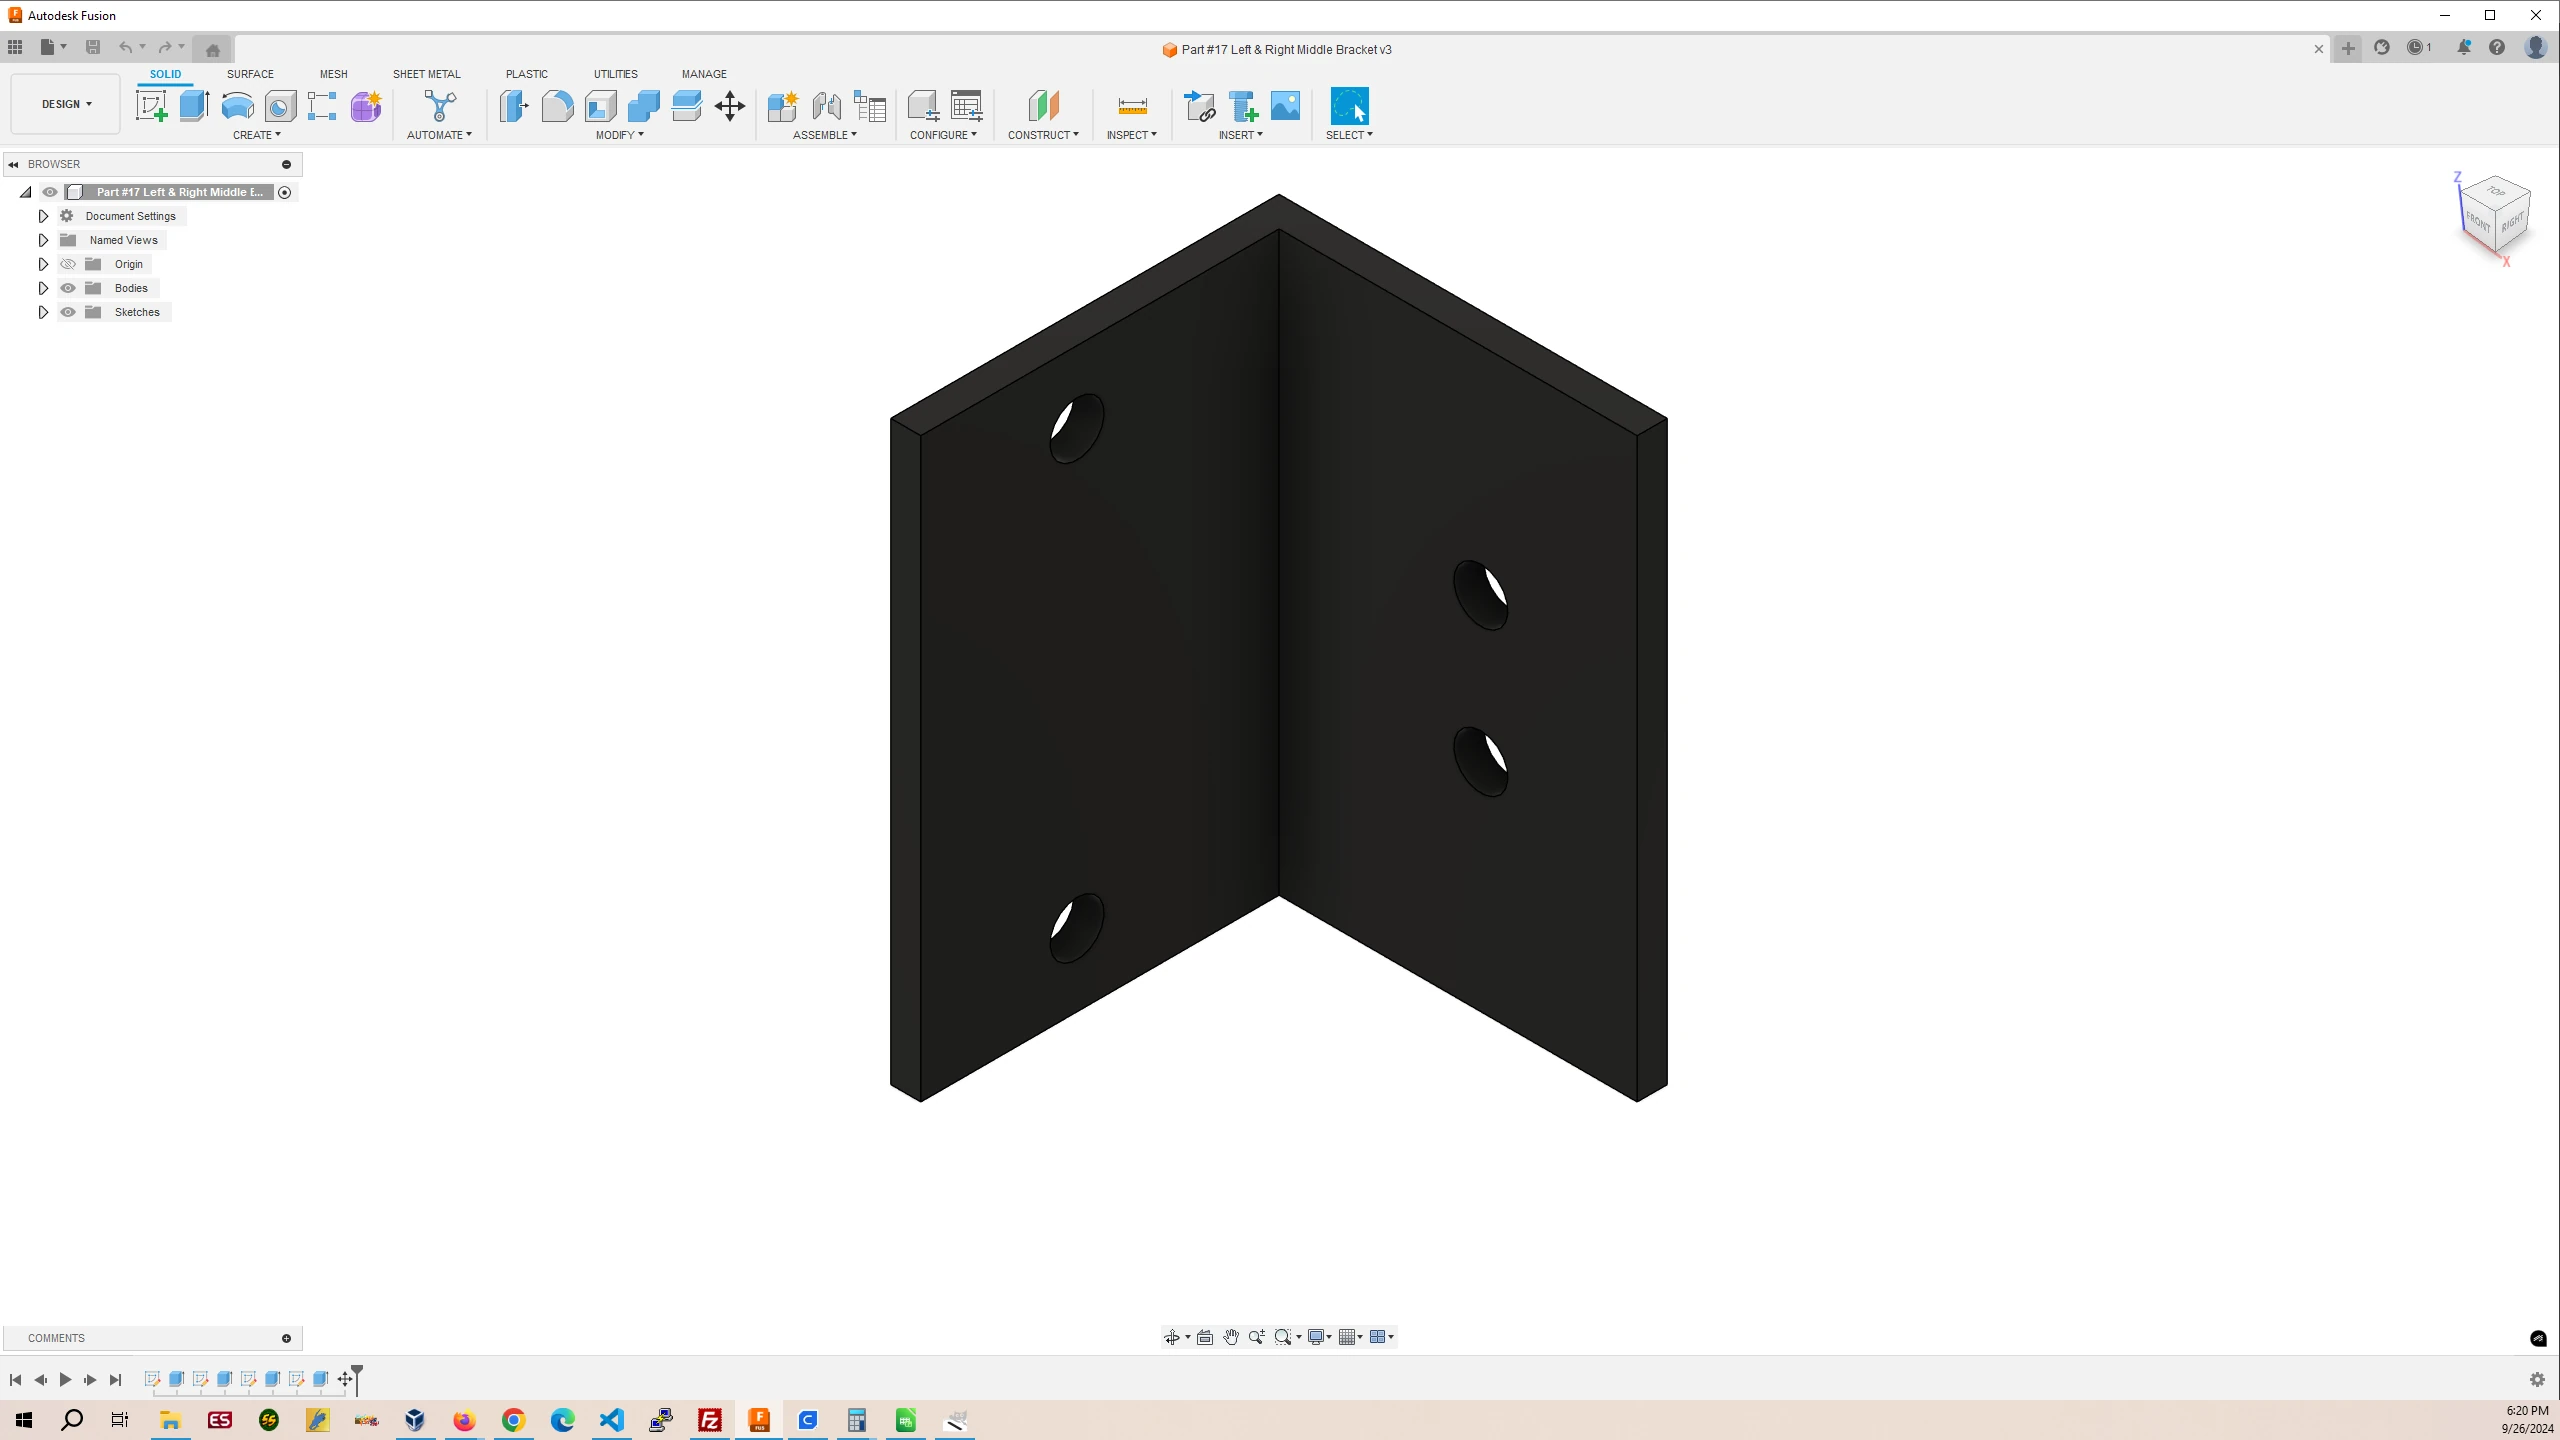
Part #17 Left & Right Middle Bracket
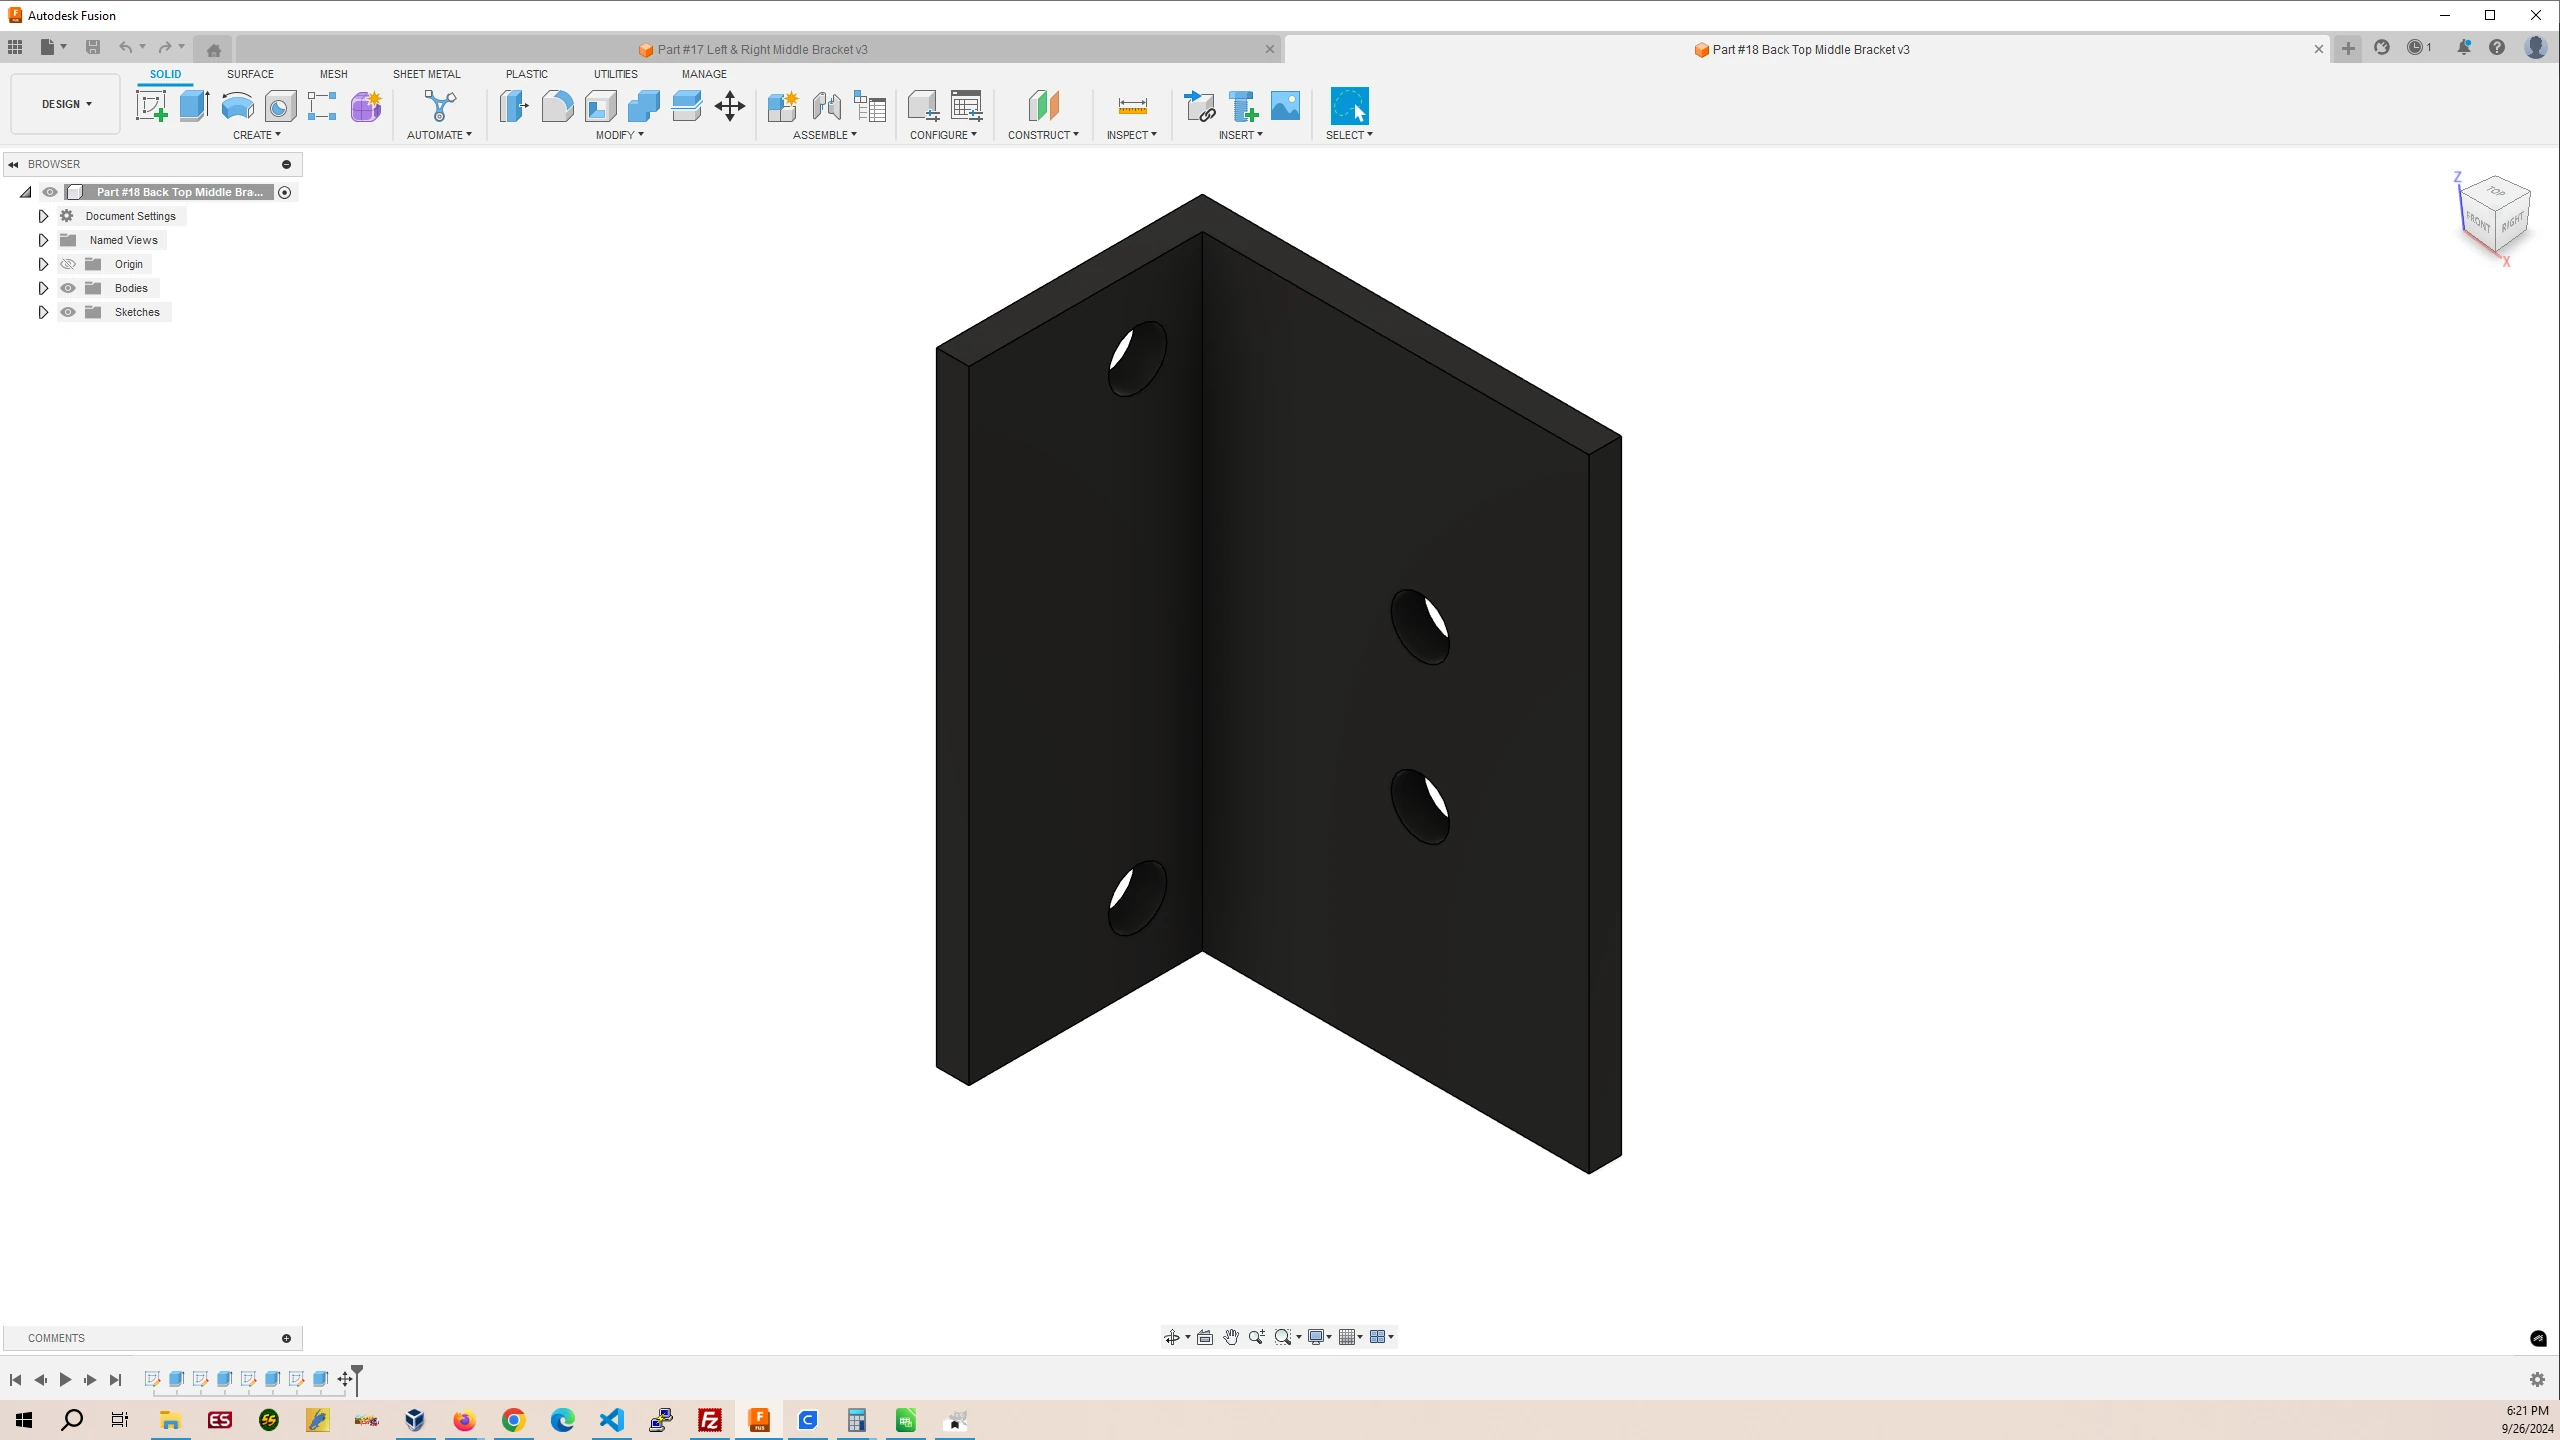
Part #18 Back Top Middle Bracket
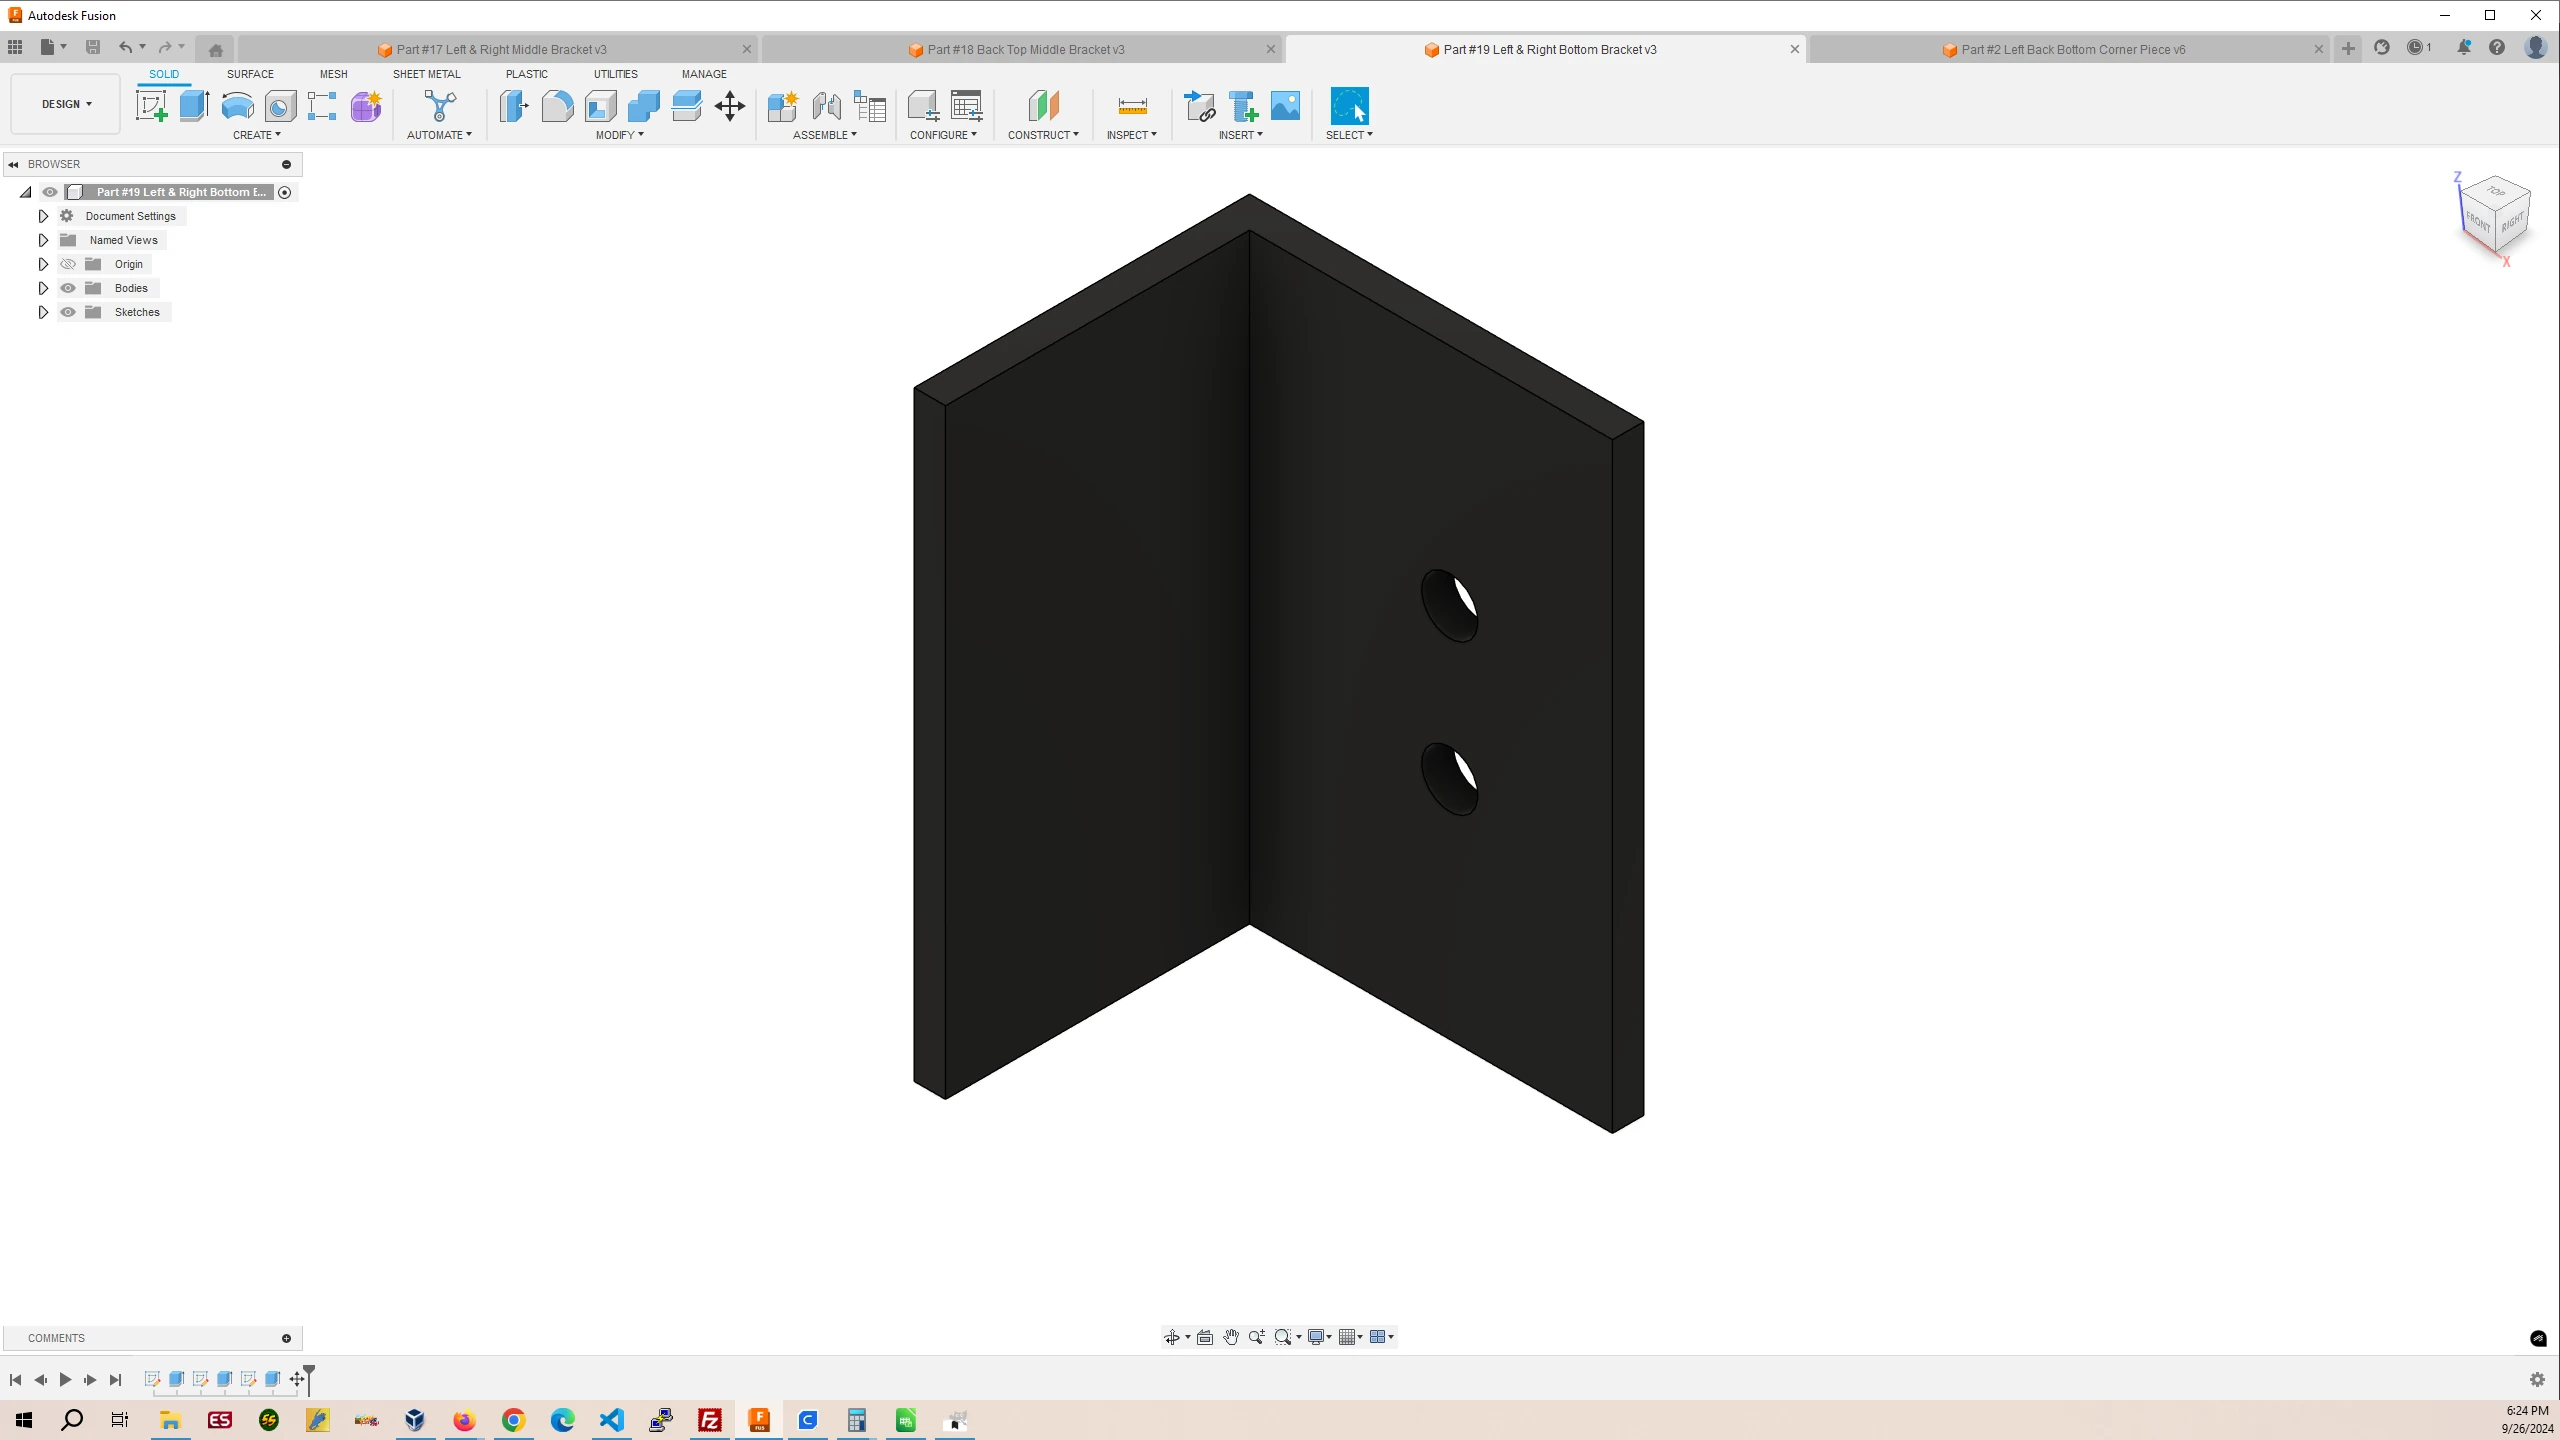
Part #19 Left & Right Bottom Bracket
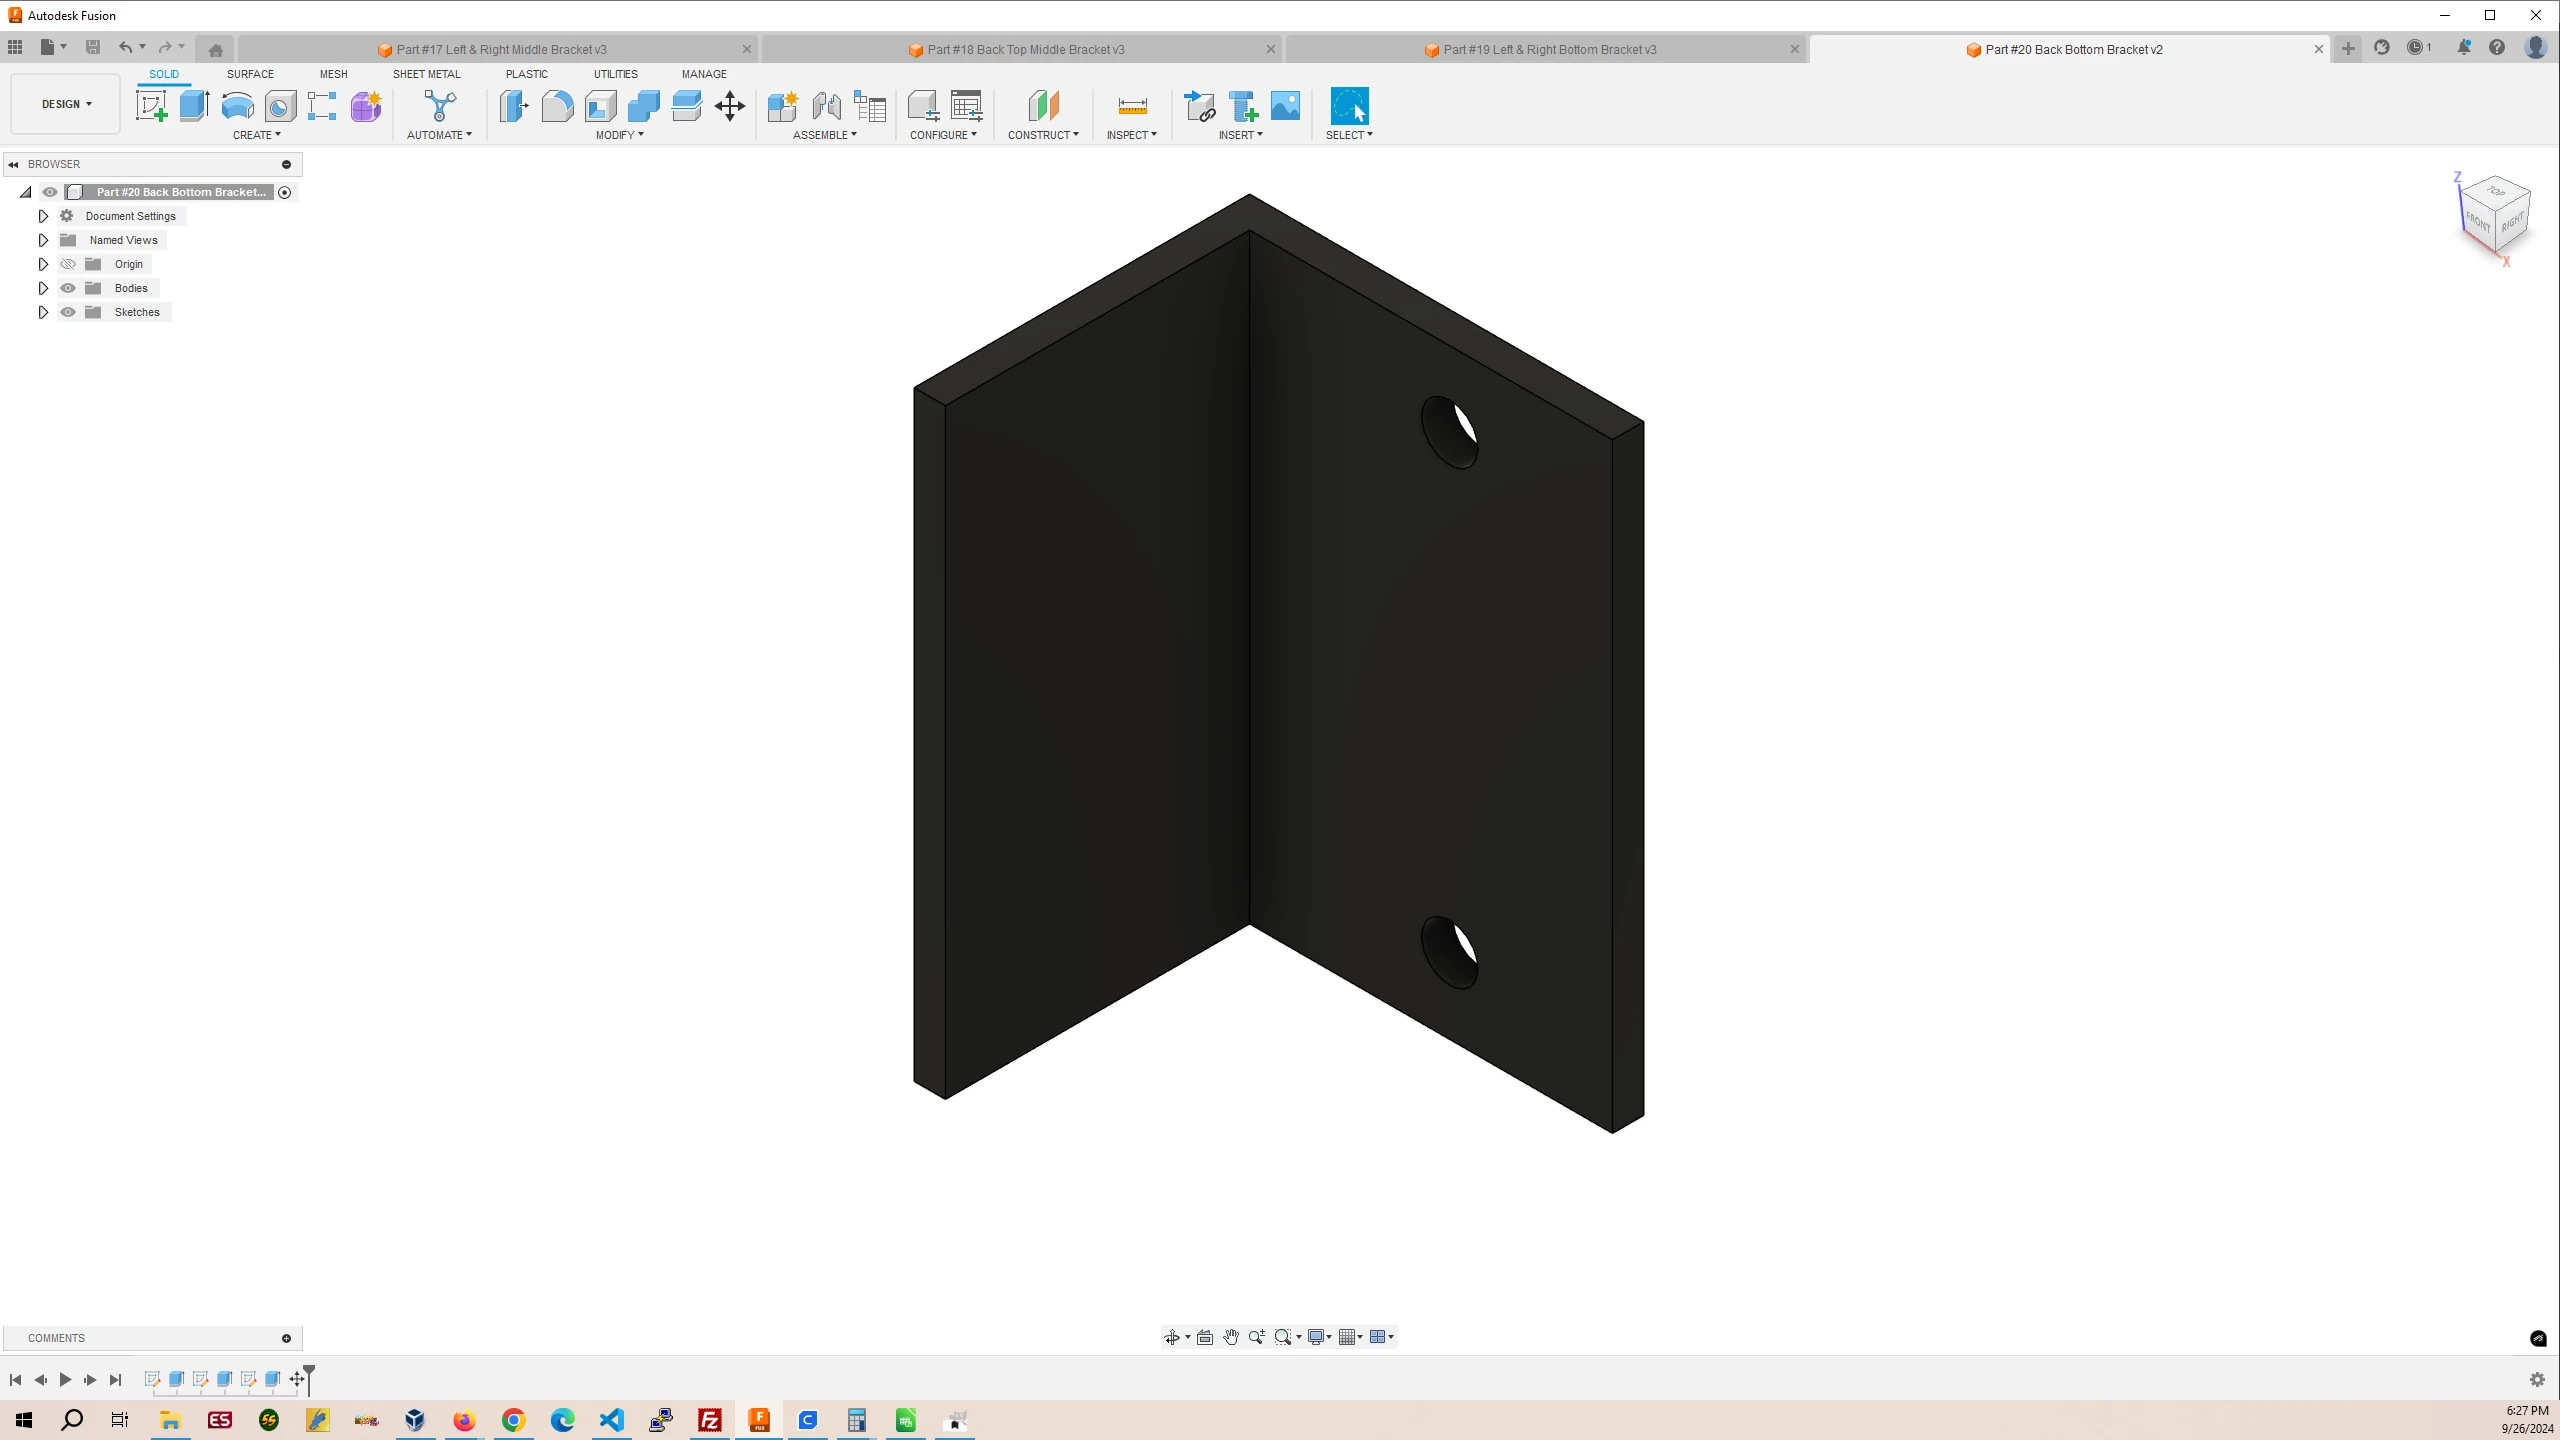
Part #20 Back Bottom Bracket
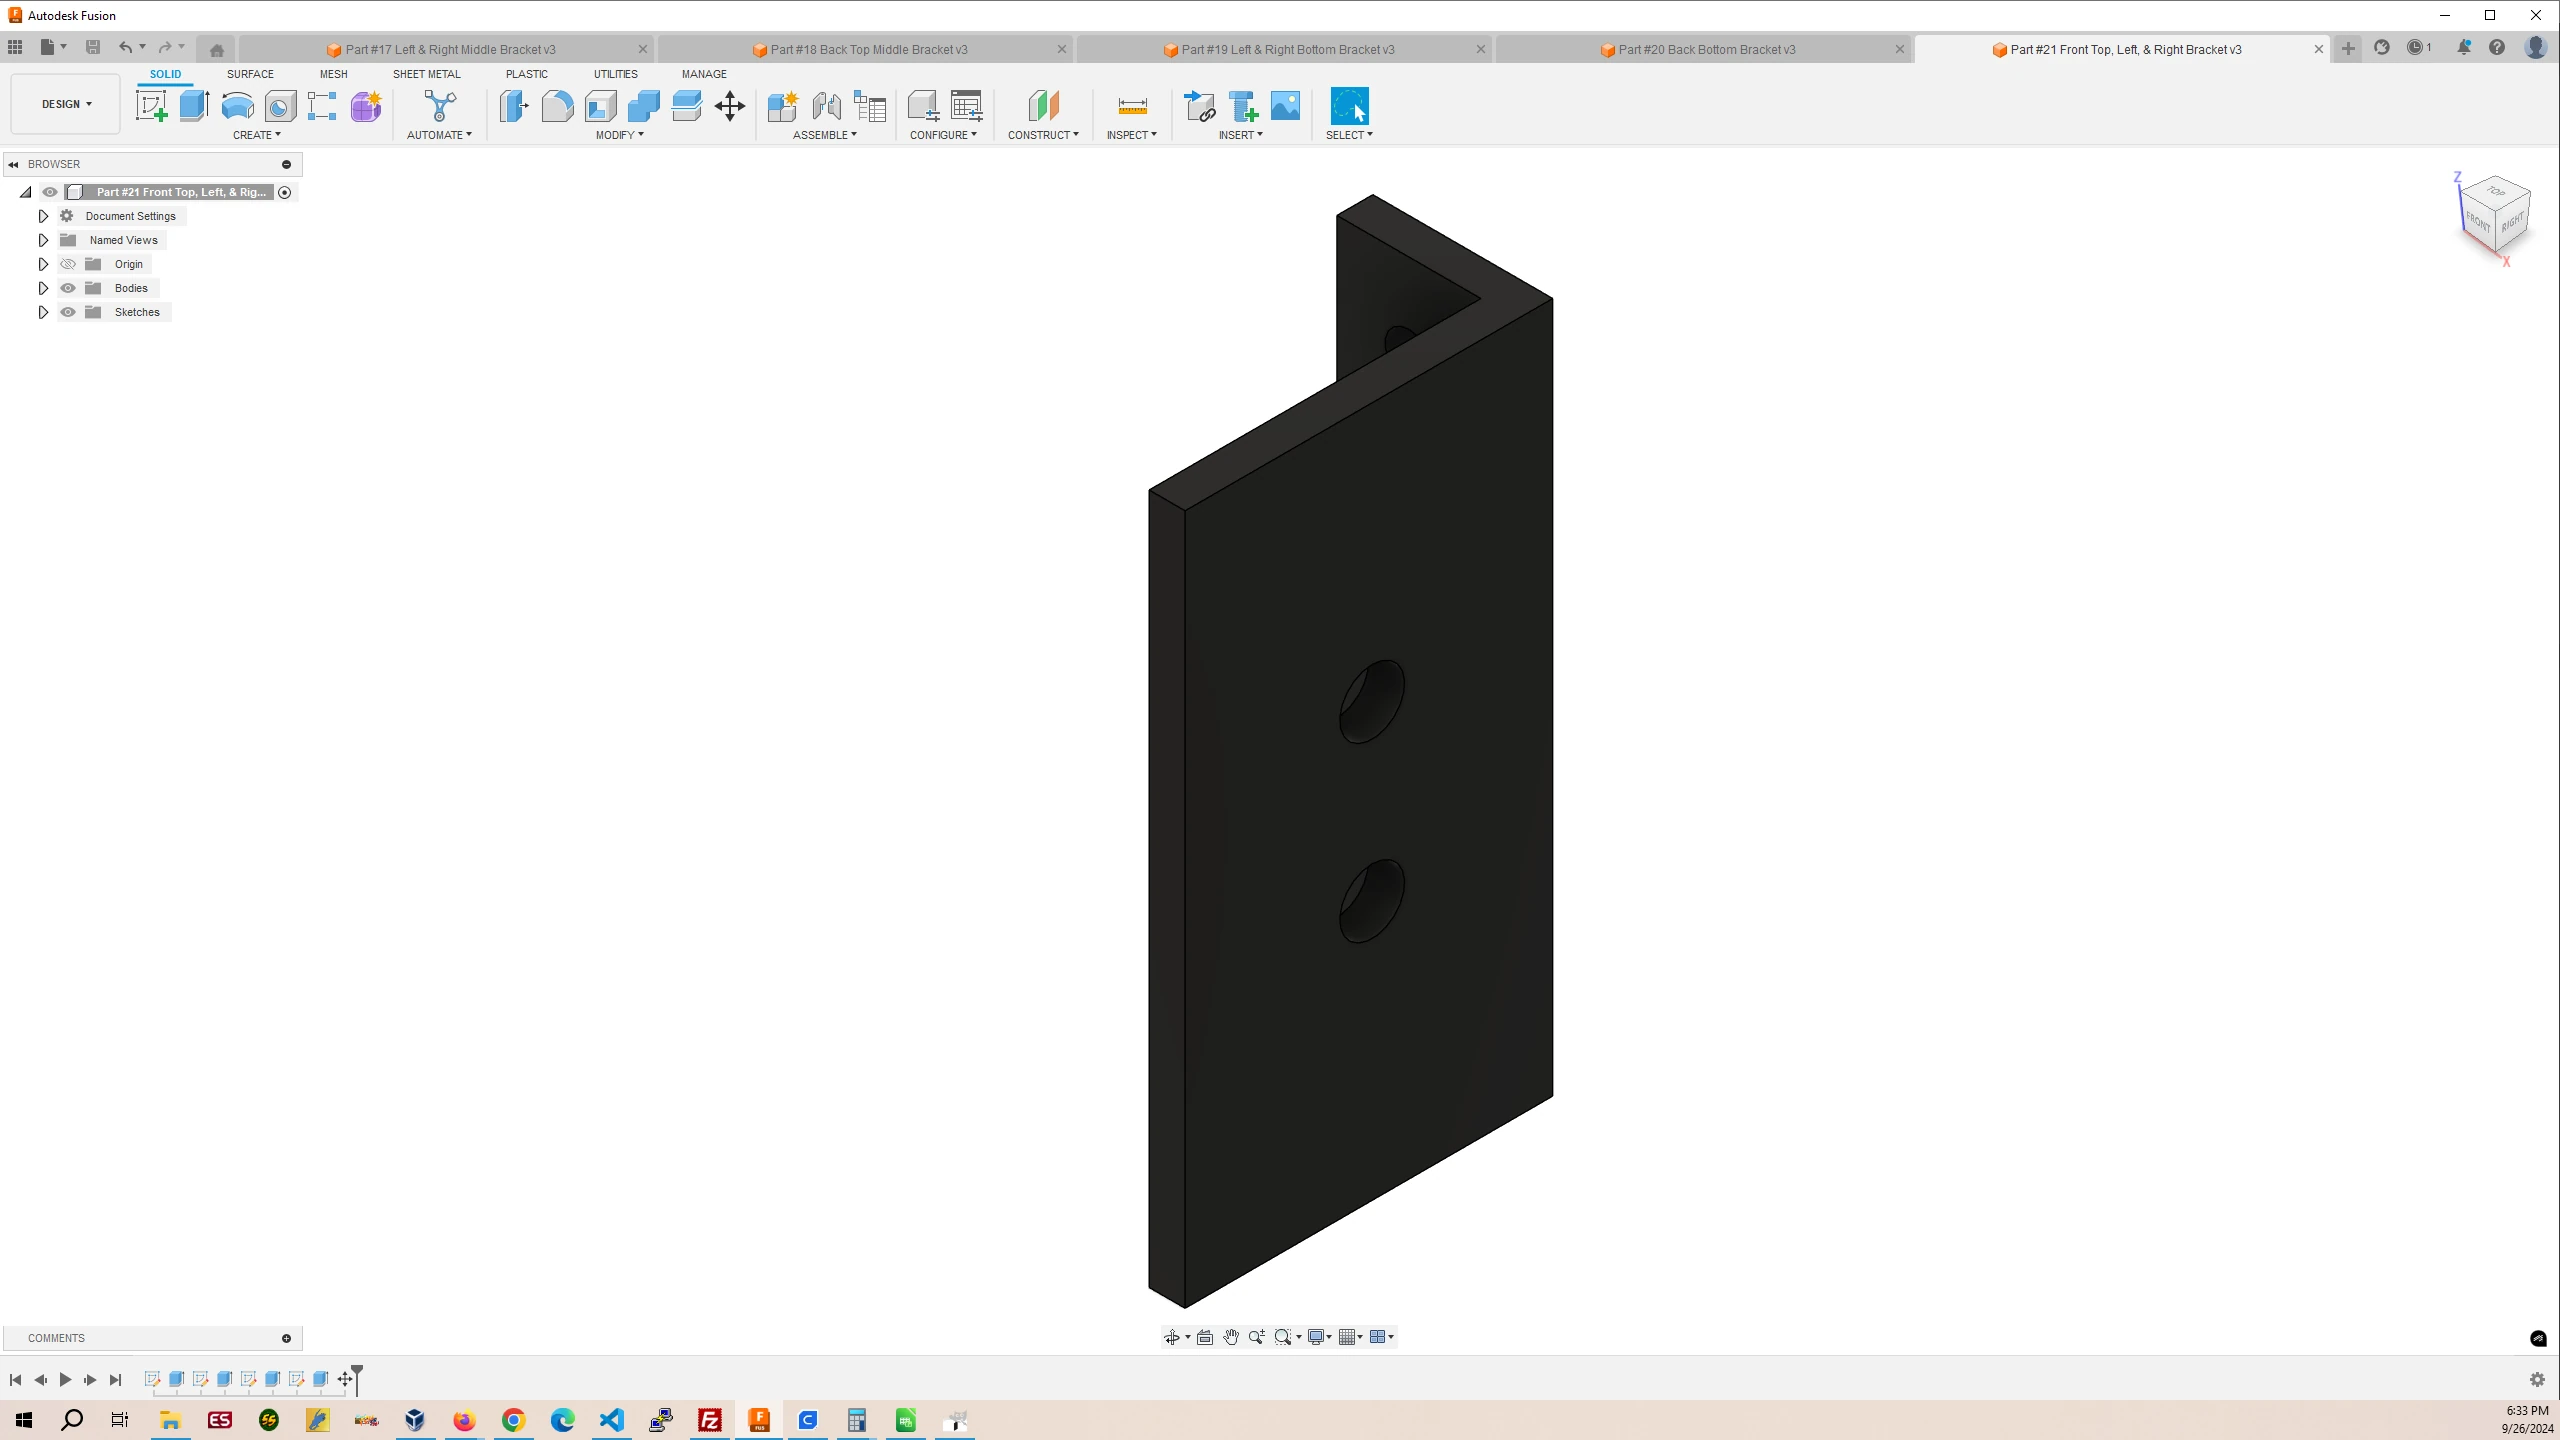
Part #21 Front Top, Left & Right Bracket
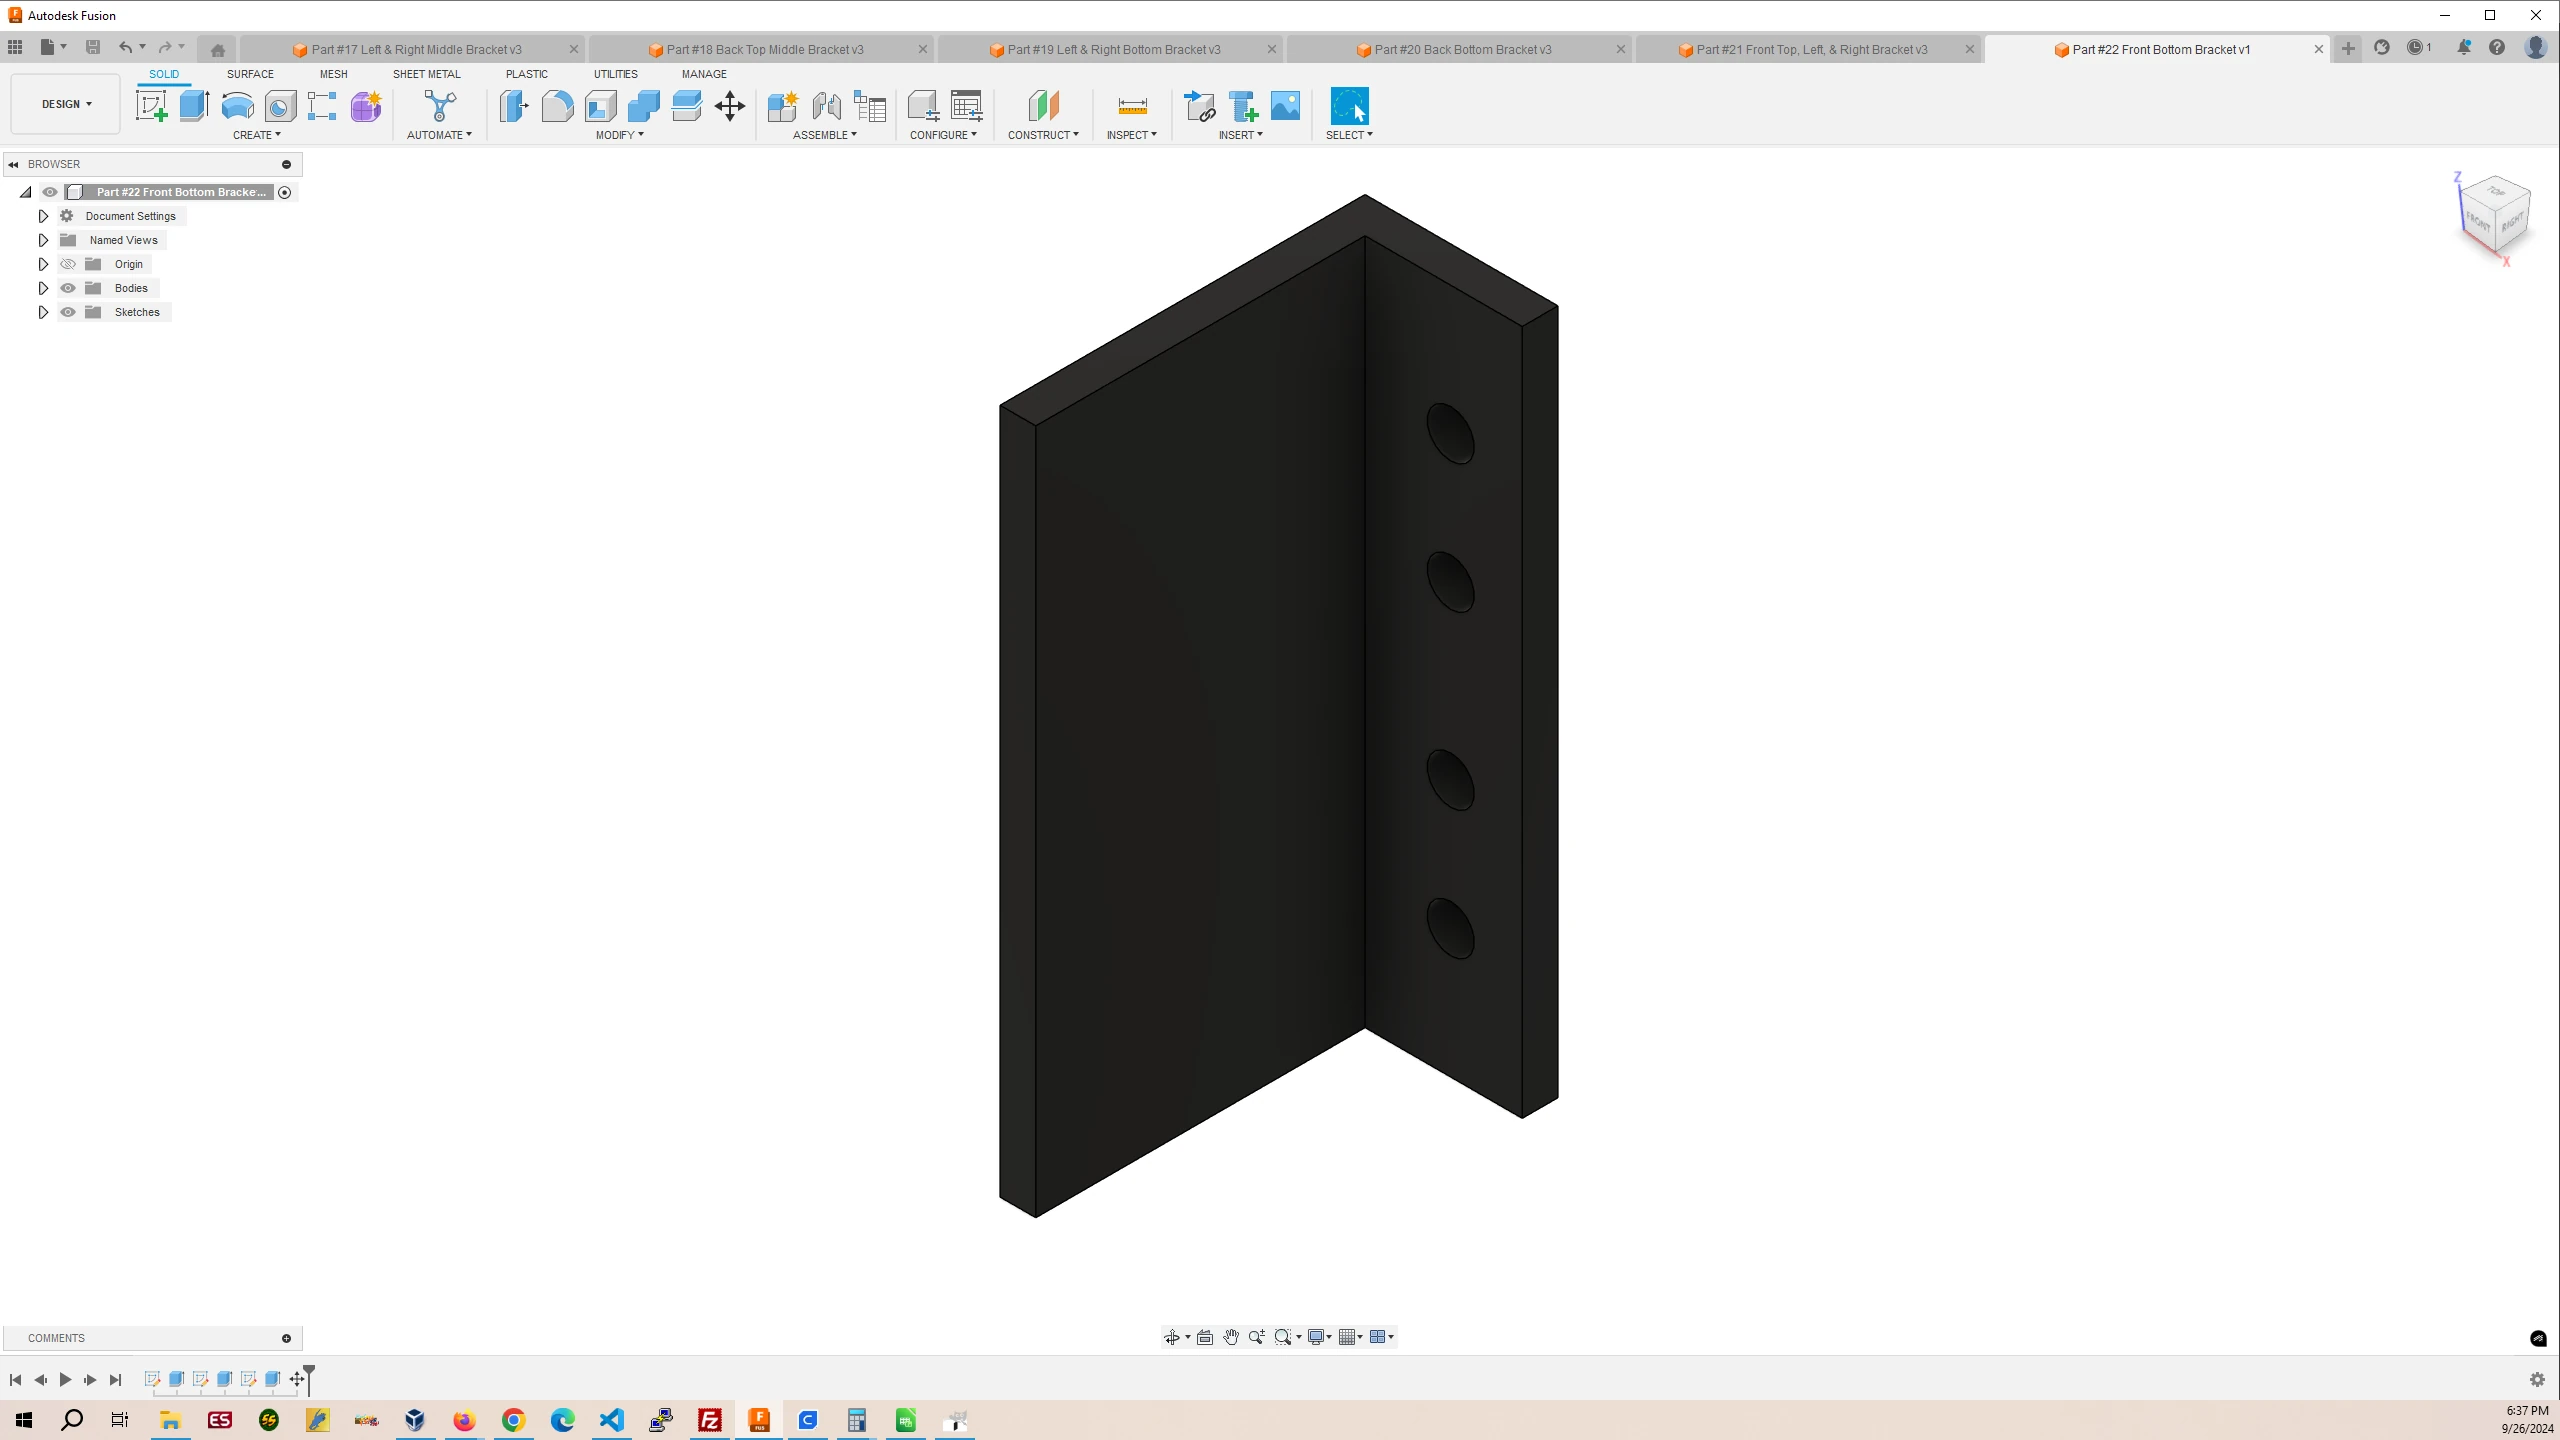
Part #22 Front Bottom Bracket
| Part # | Finished Part Name | Quantity |
|---|---|---|
| 1 | Left Back Top Corner Piece | 1 |
| 2 | Left Back Bottom Corner Piece | 1 |
| 3 | Right Back Top Corner Piece | 1 |
| 4 | Right Back Bottom Corner Piece | 1 |
| 5 | Left & Right Back Middle Piece | 2 |
| 6 | Left & Right Top Middle Piece | 2 |
| 7 | Left & Right Bottom Middle Piece | 2 |
| 8 | Back Top Middle Piece | 1 |
| 9 | Back Bottom Middle Piece | 1 |
| 10 | Left Front Top Corner Piece | 1 |
| 11 | Left Front Bottom Corner Piece | 1 |
| 12 | Right Front Top Corner Piece | 1 |
| 13 | Right Front Bottom Corner Piece | 1 |
| 14 | Front Top Middle Piece | 1 |
| 15 | Front Left & Right Middle Piece | 2 |
| 16 | Front Bottom Middle Piece | 1 |
| 17 | Left, Right & Top Middle Bracket | 10 |
| 18 | Back Top Middle Bracket | 2 |
| 19 | Left & Right Bottom Bracket | 4 |
| 20 | Back Bottom Bracket | 2 |
| 21 | Front Top, Left & Right Bracket | 6 |
| 22 | Front Bottom Bracket | 2 |
4. Let’s Look at the Printed Door Parts

Part #A Top & Bottom Door Corner Piece

Part #B Left Top & Right Bottom Door Corner Piece
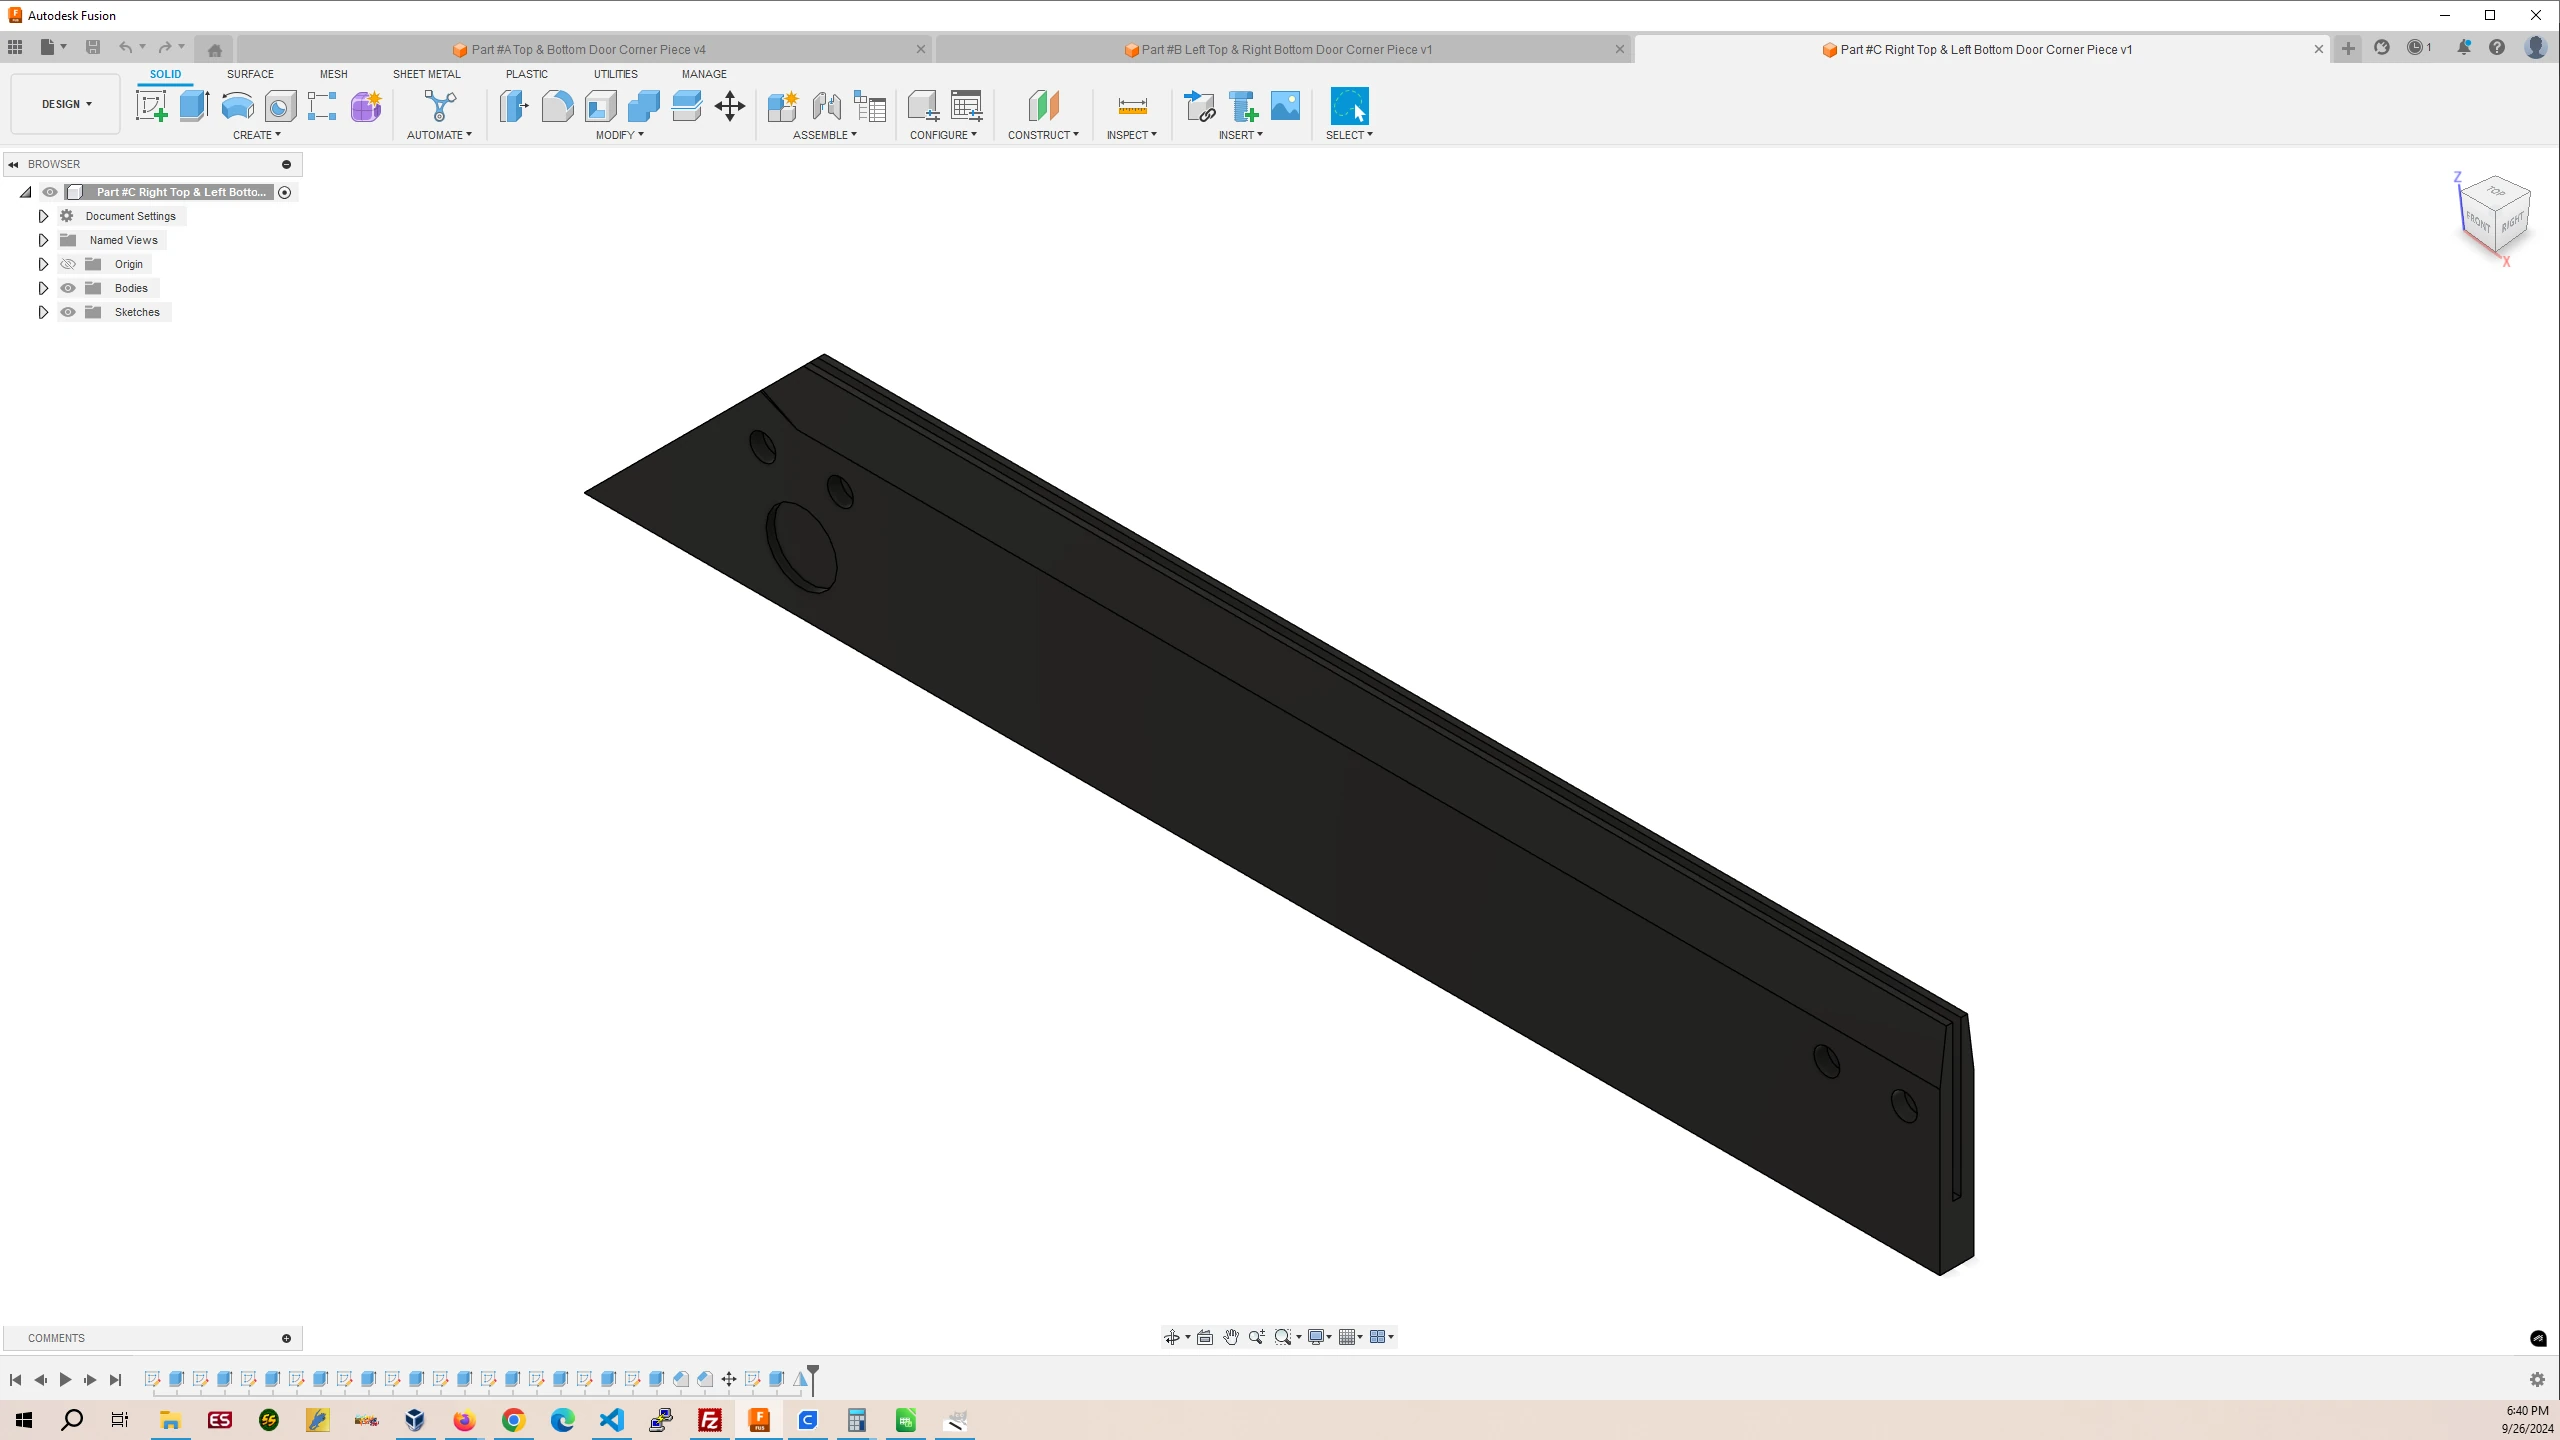
Part #C Right Top & Left Bottom Door Corner Piece
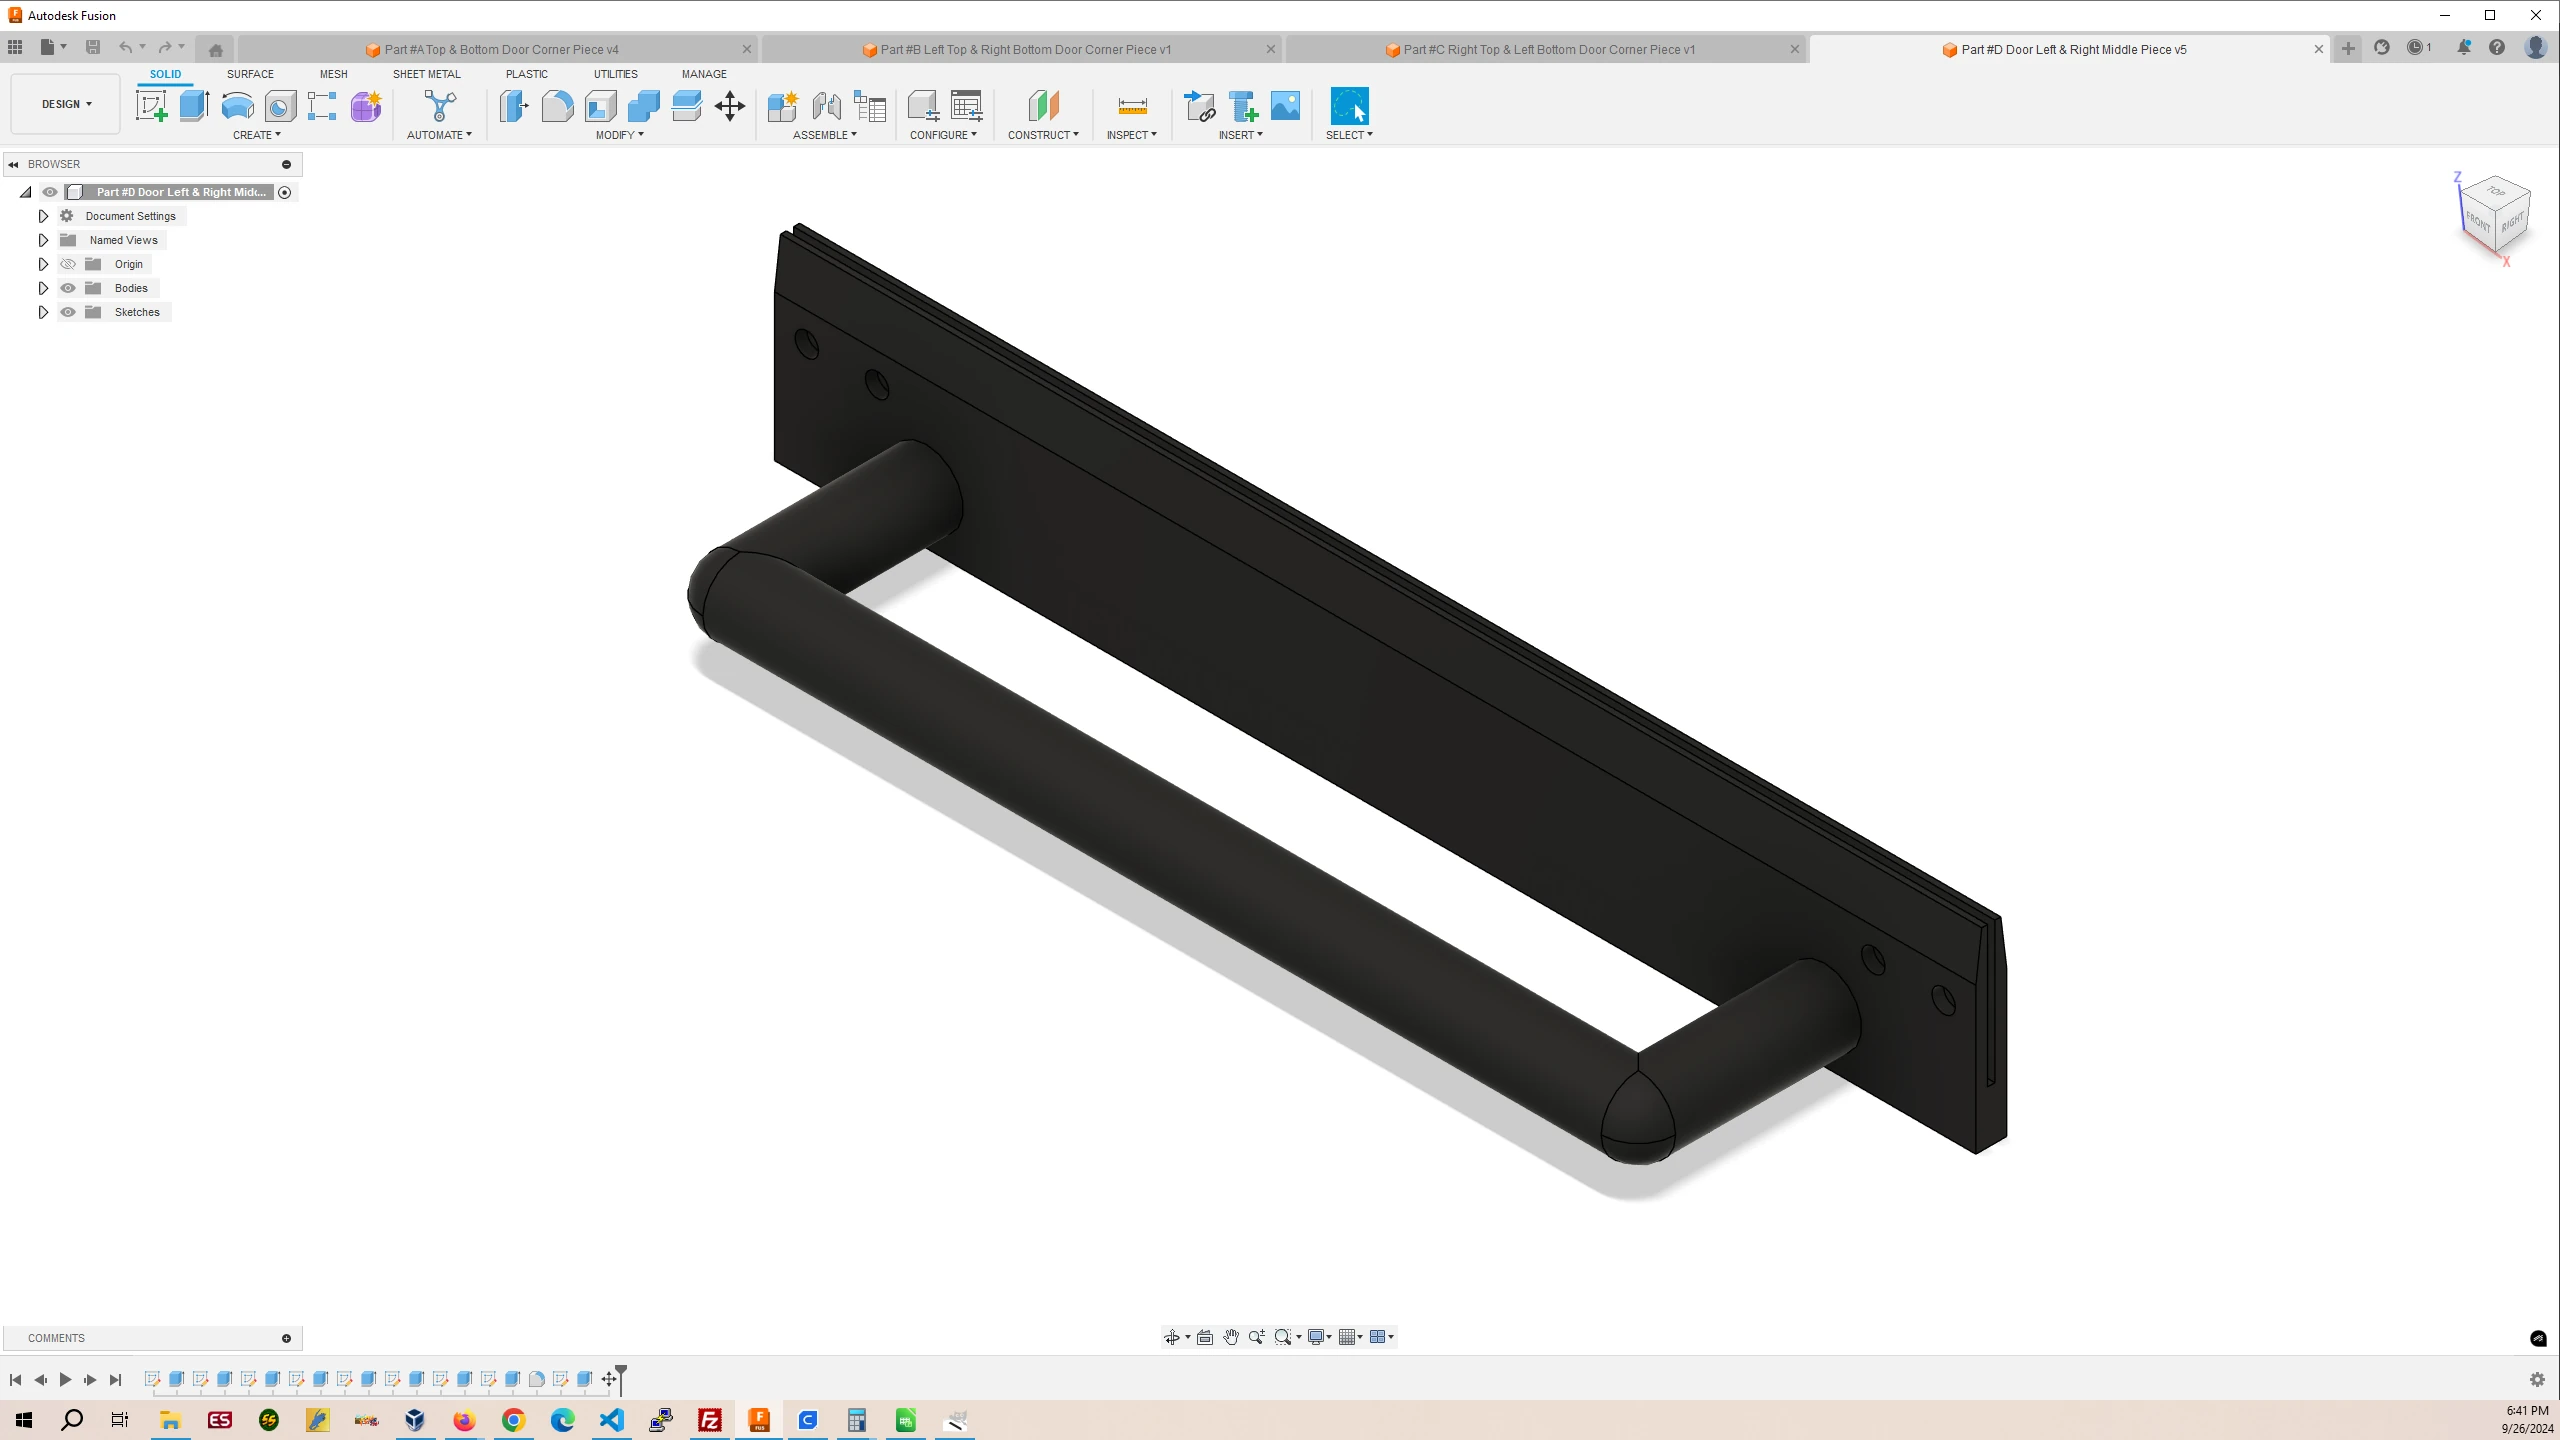
Part #D Left & Right Door Middle Piece
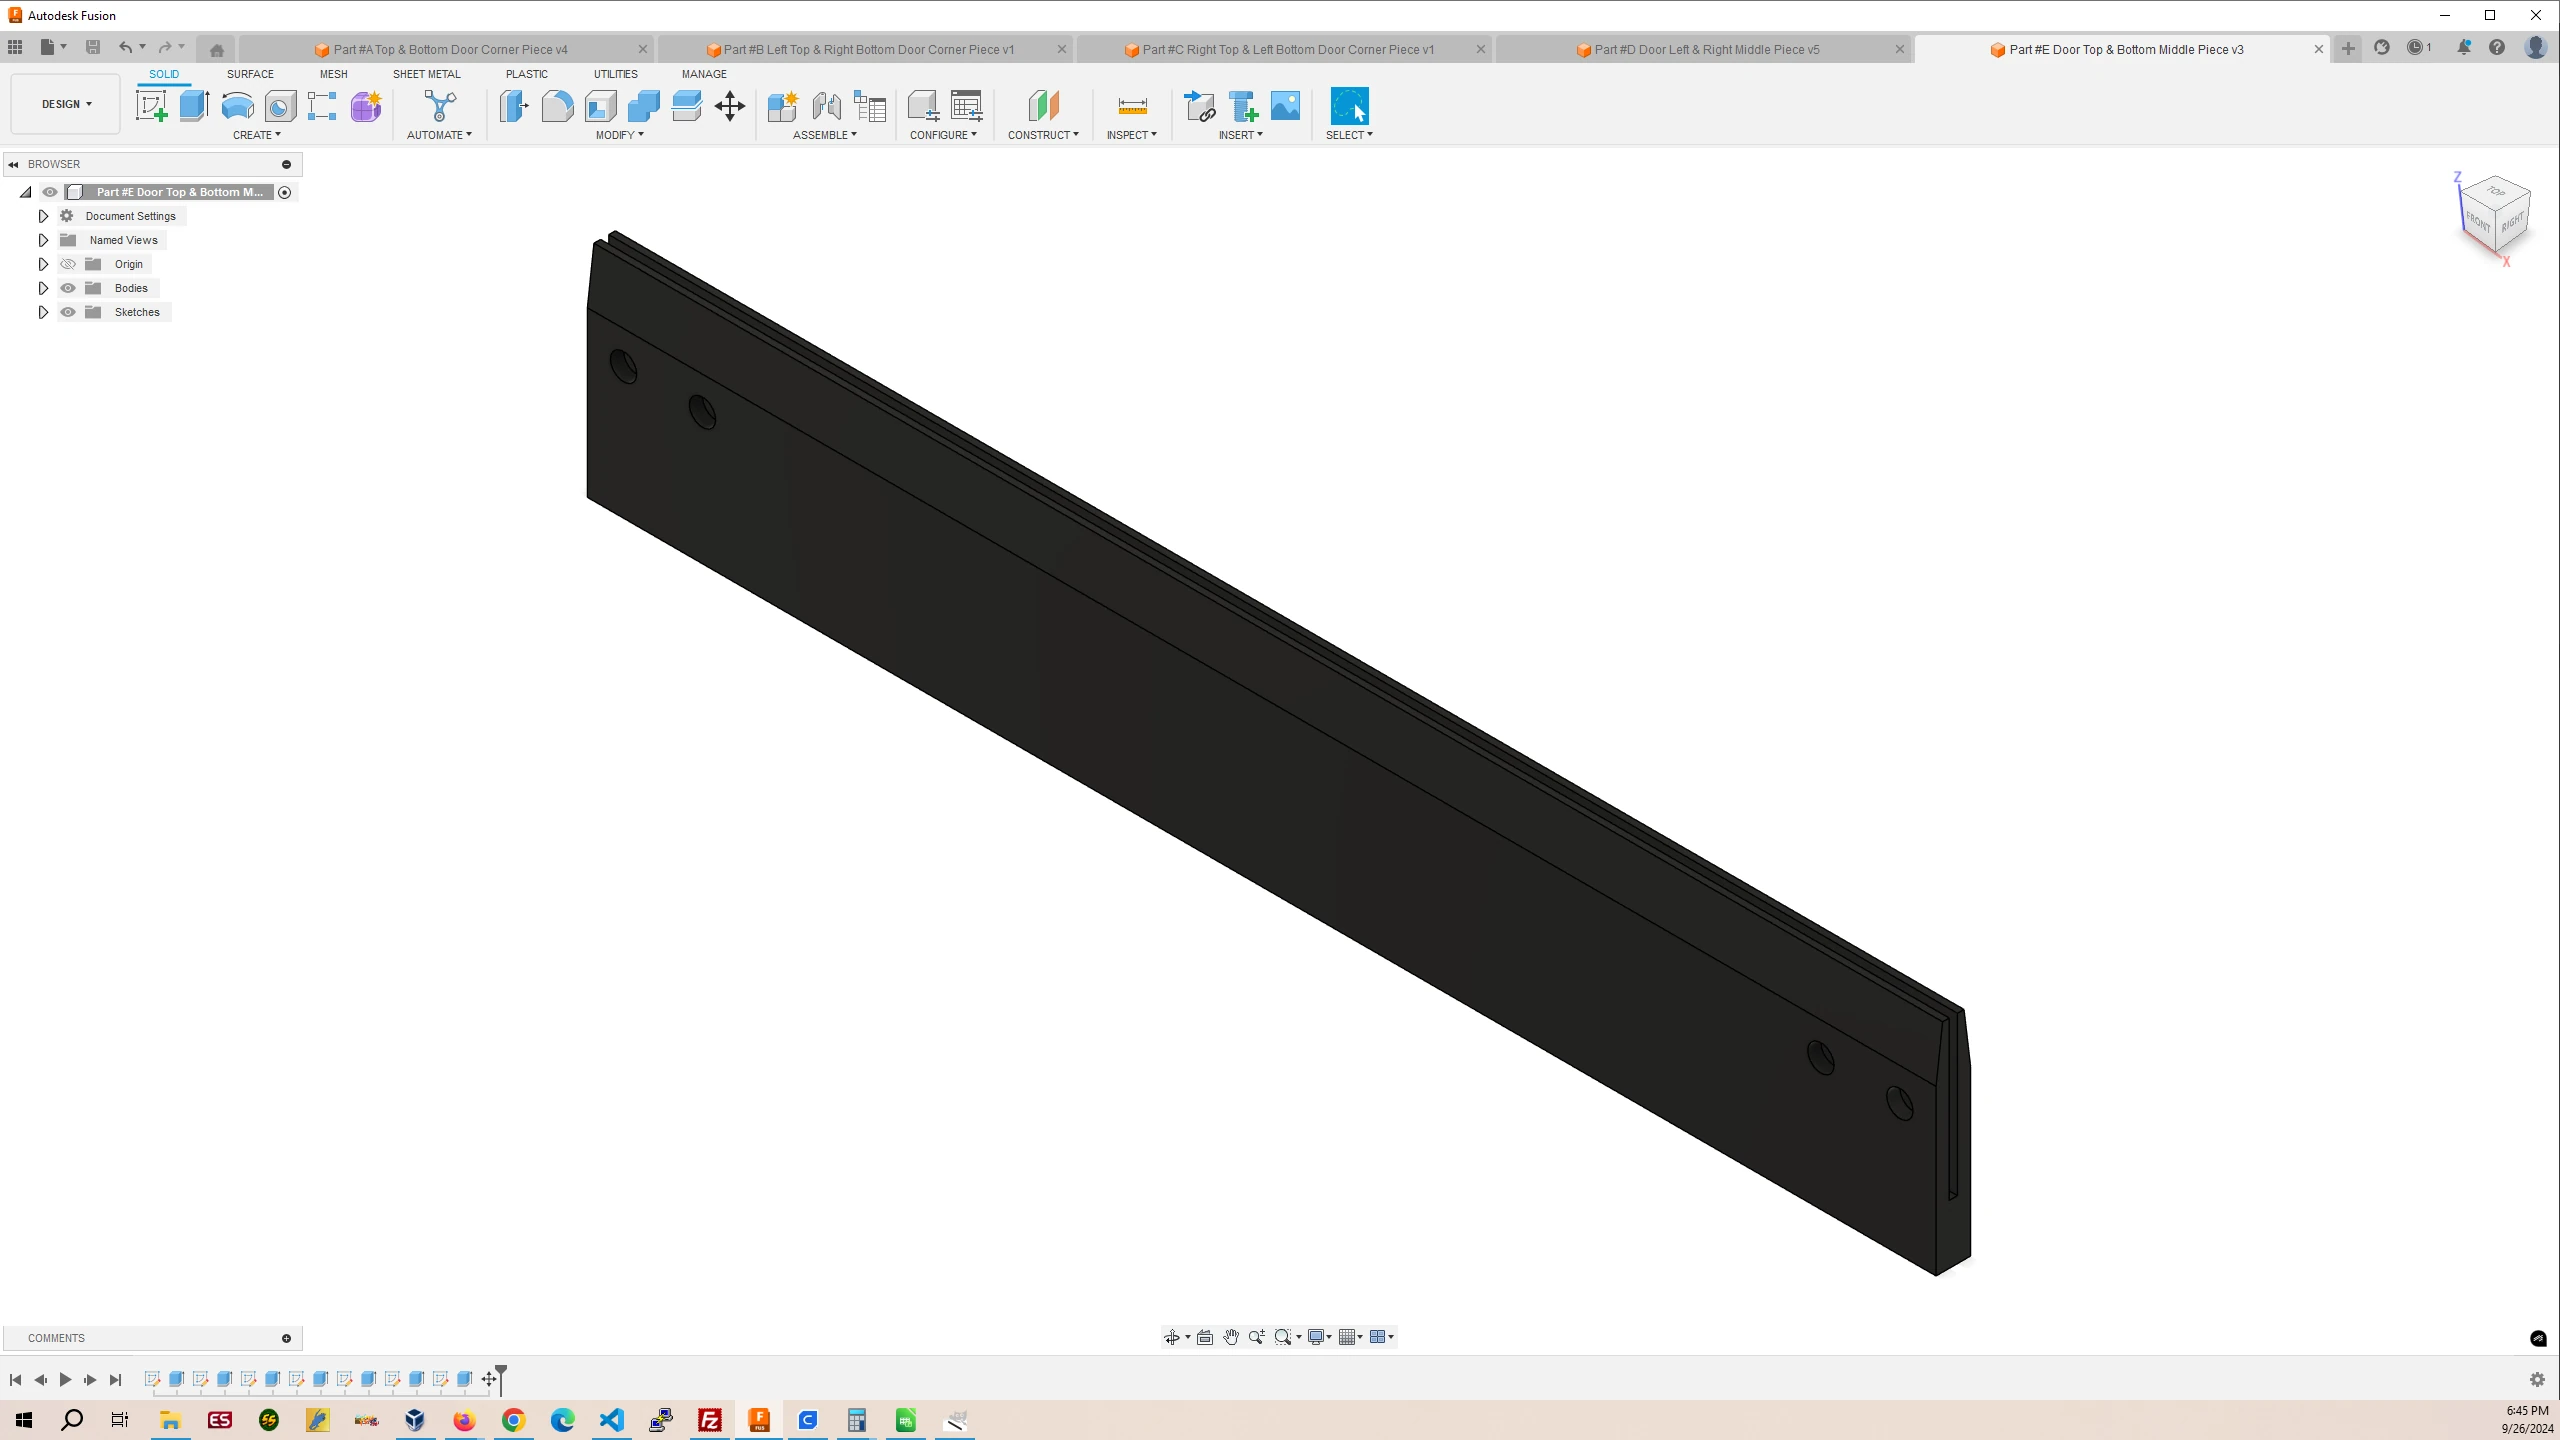
Part #E Top & Bottom Door Middle Piece
| Part # | Finished Part Name | Quantity |
|---|---|---|
| A | Top & Bottom Door Corner Piece | 4 |
| B | Left Top & Right Bottom Door Corner Piece | 2 |
| C | Right Top & Left Bottom Door Corner Piece | 2 |
| D | Left & Right Door Middle Piece | 2 |
| E | Top & Bottom Door Middle Piece | 2 |