Conduct Magnet Free-Fall Experiment
It is time to conduct the Magnet and Control Free-Fall experiments. There are five different objects you will need to test. I conducted twenty five trials per object, dropping them all from a height of a little over two meters onto a futon mattress to break their fall and pillows making a square drop zone so the free-fall objects don’t bounce off and hit the floor. An accelerometer is used to measure the g-forces of the objects during free-fall.
- Let’s Look at the Material Requirements
- The Objects to be Tested
- Assemble the Boxes to Hold the Magnets When Unused
- Assemble the Free-Fall Cores
- The Code to be Uploaded to the Arduino Nano
- Get the Bluetooth App from the Google Play Store
- Test the Arduino to Ensure it is Working
- Assembling the Free-Fall Object
- Conduct Free-Fall Tests
1. Let’s Look at the Material Requirements
| Item | Price | Quantity | Total | Location |
|---|---|---|---|---|
| Magnet RY04X0 | $77.45 | 6 | $464.70 | https://www.kjmagnetics.com/proddetail.asp?prod=RY04X0 |
| 2″OD x 1/4″ID Fender Washers (Qty 100) | $25.70 | 1 | $25.70 | https://www.amazon.com/dp/B000BD5GG4 |
| 1/4″-20 x 4in. Aluminum Hex Bolt | $2.72 | 1 | $10.88 | https://boltdepot.com/Product-Details?product=27439 |
| 1/4”-20 Aluminum Hex Nut | $0.18 | 4 | $0.72 | https://boltdepot.com/Product-Details?product=27343 |
| 1/4” Aluminum Washer | $0.18 | 8 | $1.44 | https://boltdepot.com/Product-Details?product=27373 |
| Magnetic Pole Detector | $5.99 | 1 | $5.99 | https://www.amazon.com/CMS-Magnetics-Magnetic-Detector-Identifier/dp/B00OQRG0HA |
| EPS Foam 1’x1’x1.5″ (3-pack) | $18.99 | 1 | $18.99 | https://www.amazon.com/dp/B07RRDXVVM |
| Cardboard Box 6″x6″x6″ (6-pack) | $7.99 | 1 | $7.99 | https://www.amazon.com/dp/B0CTMSCFYN |
| Grand Total | $536.41 | |||
2. The Objects to be Tested
Five different objects will be tested in this experiment. They are:
- Control object using non-magnetic steel fender washers with the thickness and diameter of the magnets.
- NSNS object composed of two magnets attractively coupled being dropped in the direction of north pole to south pole.
- NSSN object composed of two magnets repulsively coupled being dropped in the direction of north pole to north pole.
- SNNS object composed of two magnets repulsively coupled being dropped in the direction of south pole to south pole.
- SNSN object composed of two magnets attractively coupled being dropped in the direction of south pole to north pole.
3. Assemble the Boxes to Hold the Magnets When Unused
Download EPS Foam Milling Files
The magnets are too strong and dangerous to just be left lying around on a table or in a drawer or something. I recommend buying some EPS foam, milling it to fit the assembled magnet object, and a cardboard box to place it all in, finally taping the box shut.
EPS Foam Step #1

EPS Foam Step #2

EPS Foam Step #3
4. Assemble the Free-Fall Cores
Ever free-fall object consists of a
- 1 x 1/4″-20 x 4″ Aluminum bolt
- 2 x 1/4″ Aluminum washers
- 1 x 1/4″-20 Aluminum hex nut
The Control object consists of steel fender washers stacked to a height of two inches.
The NSNS object consists of two magnets attractively coupled with the bolt entering through the south pole side and exiting the north pole side where the hex nut is attached.
The NSSN object consists of two magnets repulsively coupled with the bolt entering through the north pole side and exiting the north pole side where the hex nut is attached.
The SNNS object consists of two magnets repulsively coupled with the bolt entering through the south pole side and exiting the south pole side where the hex nut is attached.
The SNSN object consists of two magnets attractively coupled with the bolt entering through the north pole side and exiting the south pole side where the hex nut is attached.
4a. Assembling the Control Core
Assembling the Control Object is the easiest part. Simply stack approximately thirty seven of the above fender washers using the above mentioned Aluminum bolt, washers, and hex nut while ensuring the height of the washers doesn’t exceed two inches so it will fit inside the Free-Fall object shell.
4b. Assembling the Attractively Coupled Magnets
I strongly urge anyone replicating this experiment to email K&J Magnetics before ordering and tell them you want them to attach the attractively coupled magnets for you.
If you try to do this yourself you run the very real risk of injury or breaking the magnets. You only need two magnets for the attractively coupled test as they don’t rely on the bolt and nut to keep them together. You simply remove the nut and bolt and flip them around to test the drop from north pole to south pole or vice versa.
With the two magnets already assembled it is merely a matter of attaching the Aluminum bolt, washers, and hex nut so they should have identical mass with the other magnet objects since they are made of identical materials.
4c. Assembling Repulsively Coupled Magnets
This is a little tricky and dangerous as the magnets will try and flip on you to couple attractively. The method I found that works is to put the Aluminum bolt through one Aluminum washer and then through one magnet. Use the magnet pole detector so you know which pole is on the bottom and which is on top. Then place a piece of MDF with a slot milled into it and slide it into the Aluminum bolt on top of the magnet.
Stand with both feet on the MDF on each side of the slot. Then you place the second magnet, make sure you know what pole is facing down with the magnet pole detector, so when you push it onto the Aluminum bolt there is repulsive force between the two magnets. Then simply push the magnet down far enough on the bolt, put on the washer and start tightening the nut. Once the nut is threaded enough on the bolt you may slide out the MDF piece.
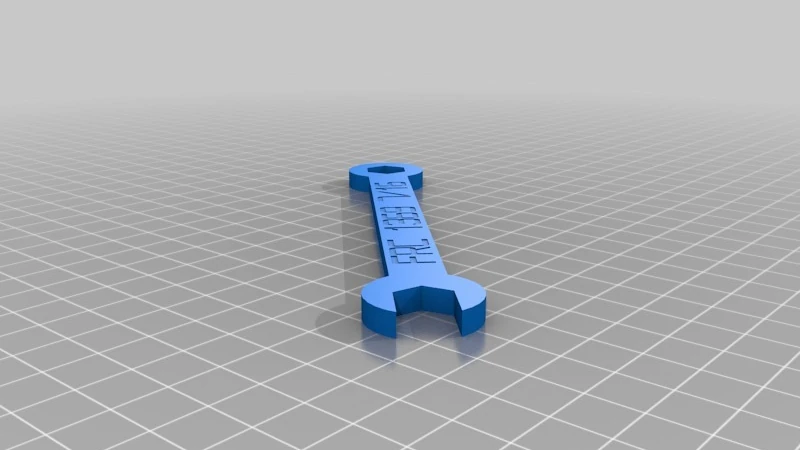
Finally, use two 3D printed plastic wrenches to hold the Aluminum hex bolt steady while you turn the Aluminum hex nut with the other wrench.
5. The Code to be Uploaded to the Arduino Nano
Download Arduino Code – ObjectFreeFallRecorder
I have written code for the Arduino that begins recording accelerometer and gyroscopic data 100ms after the button to start it is pressed in the cellphone Bluetooth program. It will record for about 1.25 seconds which is more than enough time for a drop height of slightly over two meters. Attach your Arduino to your PC with a USB cable and upload the ObjectFreeFallCode into it.
6. Get the Bluetooth App from the Google Play Store
Install the Serial Bluetooth Terminal App
You will need to make some configuration changes to get Serial Bluetooth Terminal to work with the Arduino Nano code I have written.
Open the app and look at the bottom of the screen. You will see gray buttons with M1, M2, etc. We want to change the name of the button and the command that is sent when it is pressed.
For the four buttons being used the following configuration applies:
Edit Mode: Text
Action: Send
Repeat: Unchecked
Hold down button M1, it should open a configuration screen for the button.
Name: Start
Value: Start Trial
Hold down button M2
Name: Go
Value: Go
Hold down button M3
Name: Redo
Value: Redo Trial
Hold down button M4
Name: New
Value: New Trial Series
Then click on the three bars next to the word Terminal and select Settings
Terminal tab
Buffer size: Unlimited.
For the Receive tab
Newline: CR+LF
Send tab
Newline: None
Under Misc. is where you save the text data you receive from the Arduino. I would recommend using a different folder for each free-fall object test. Click on Save + log folder, choose Custom and click Edit Custom.
I recommend creating five folders in the Downloads folder of your cellphone, one named Control, NSNS, NSSN, SNNS, and SNSN. Each time you finish an objects twenty five trials change the folder you are saving to so your accelerometer text files stay organized. Don’t forget to click the Allow Access button at the bottom of the screen when you have selected a folder. It gives the Bluetooth app the permission to write the text files to that folder.
7. Test the Arduino to Ensure it is Working
Before assembling the Free-Fall Object lets test to make sure the Arduino program is working. The Arduino should still be connected to your PC through the USB cable and be powered on.
In the Serial Bluetooth Terminal app click on the three bars and select Devices. Click on the Scan button in the upper right corner. You should see a Bluetooth device named SerialPassThrough. Click on it to connect to it. In the terminal window it should say “Connecting to”, then Connected. If you don’t see Connected appear then try clicking the icon to the left of the trash can to attempt reconnect.
Once connected click the Start button. You should see a line of text that says:
Trial 1 is ready. Clear terminal and press Go.
Clear the terminal by clicking on the Garbage Can icon, that will get rid of the unwanted text in the terminal so it doesn’t get saved with the accelerometer data in a text file. Do what it says, click the Go button.
After a couple seconds you should see a bunch of data getting transferred to your phone from the Arduino. Once it stops writing data to the terminal screen click the three dots and select Data > Save. This will save the terminal data to a text file in the directory you specified above.
Now that we know its working we can disconnect the USB cable.
8. Assembling the Free-Fall Object
Take out the plastic shells you printed and place Foam Piece 1 into the bottom of the bottom plastic shell. Then Foam Piece 2 and Foam Piece 3. Starting with the Control tests, place the assembled Control Core in the bottom shell, then place Foam Piece 4 on top fitting it half way inside the shell. Connect the Lipo battery to the Powerboost powering up the PowerBoost and the Arduino Nano. Then place it in Foam Piece 5. Place Foam Piece 6 the top shell followed by Foam Piece 5.
Now proceed to use the M4x25mm nylon screws and M4 nylon hex nuts to attach the bottom and top shells together.
9. Conduct Free-Fall Tests
Connect your phone once more to the Arduino Nano using the Serial Bluetooth Terminal app.
Each trial follows the same process.
- Click Start
- Click Trash Can
- Click Go
- Wait for Data Download to Finish
- Click Three Dots
- Click Data
- Click Save
I added the Start button so you will know what trial number you are about to conduct and letting you delete that information from the screen so only accelerometer data gets saved to the text file.
If you intend to conduct more than twenty five trials per free-fall object then you will need to edit the Arduino file, the variable “numberTrials” and increase it.
If you intend to drop the objects from greater heights.then variable “numberSamples” will need to be increased. It is currently set to “125” which is approximately 1.25 seconds.
You may of course conduct as many trials per object and from whatever heights you desire but I would recommend heights of at least two meters to help determine if the NSNS magnet object ever plateaus in its acceleration during free-fall which I am sure got your attention and desire to replicate the experiment in the first place.